
How to use the Google Sheets Premium Workflow Action?
Google Sheets Premium Workflow Action is a feature designed to make your life easier when dealing with data in Google Sheets. Imagine you have a magic tool that can perform tasks like adding, updating, and deleting rows in your Google Sheets without you having to do it all manually. That's what the Google Sheets Premium Workflow Action is all about. It's like having a helpful robot assistant for your spreadsheets.
Who Can Benefit?
This tool can be a game-changer for different people and organizations:
- Businesses: For managing inventory, budgets, and reports more efficiently.
- Project Managers: To keep track of tasks and resources.
- Sales and Marketing Pros: To handle data for sales and campaigns.
- HR Professionals: For managing employee data and processes.
- Teachers and Students: To organize classwork and track progress.
- Nonprofits: For donor management, event planning, and budgeting.
- Researchers: To collect, analyze, and report data accurately.
What Are the Benefits?
Here's why you should care about Google Sheets Premium Workflow Action:
- Saves time: It does repetitive tasks for you, so you can focus on more important things.
- Reduces errors: Automation means fewer mistakes in your data.
- Makes teamwork easy: It helps team members work together on projects.
- Customizable: You can create workflows tailored to your needs.
- Easy to find data: Its search function helps you locate specific information quickly.
- No complicated setup: You don't need to be a tech genius to use it.
- Scales with you: Works for small or large organizations.
- Better decisions: Accurate data means smarter choices.
How to Get Started:
The following Workflow actions are supported in Google Sheets:
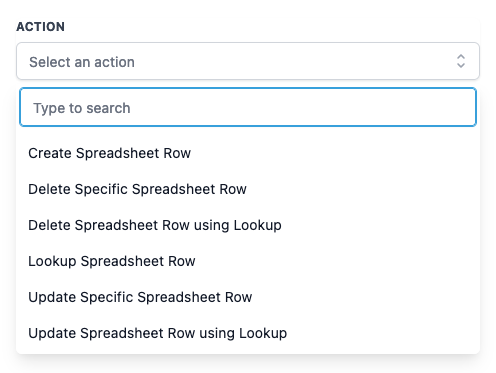
Create Spreadsheet Row
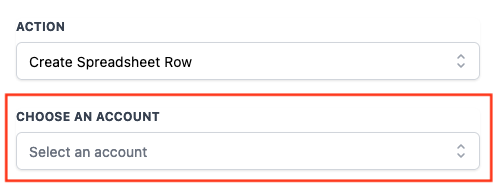
Here are the basic steps:
- Connect your Google account to the tool.
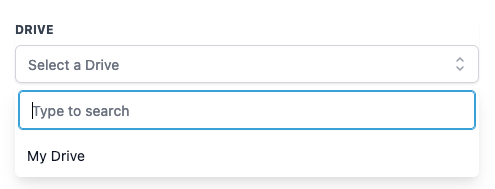
- Choose the Google Drive where your sheet is located.
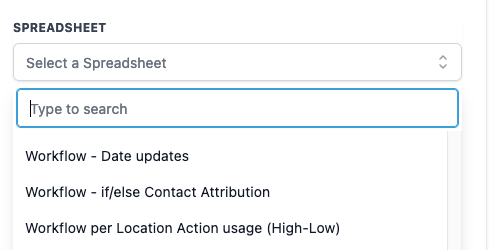
- Pick the specific sheet you want to work on.
- Select the worksheet within that sheet.
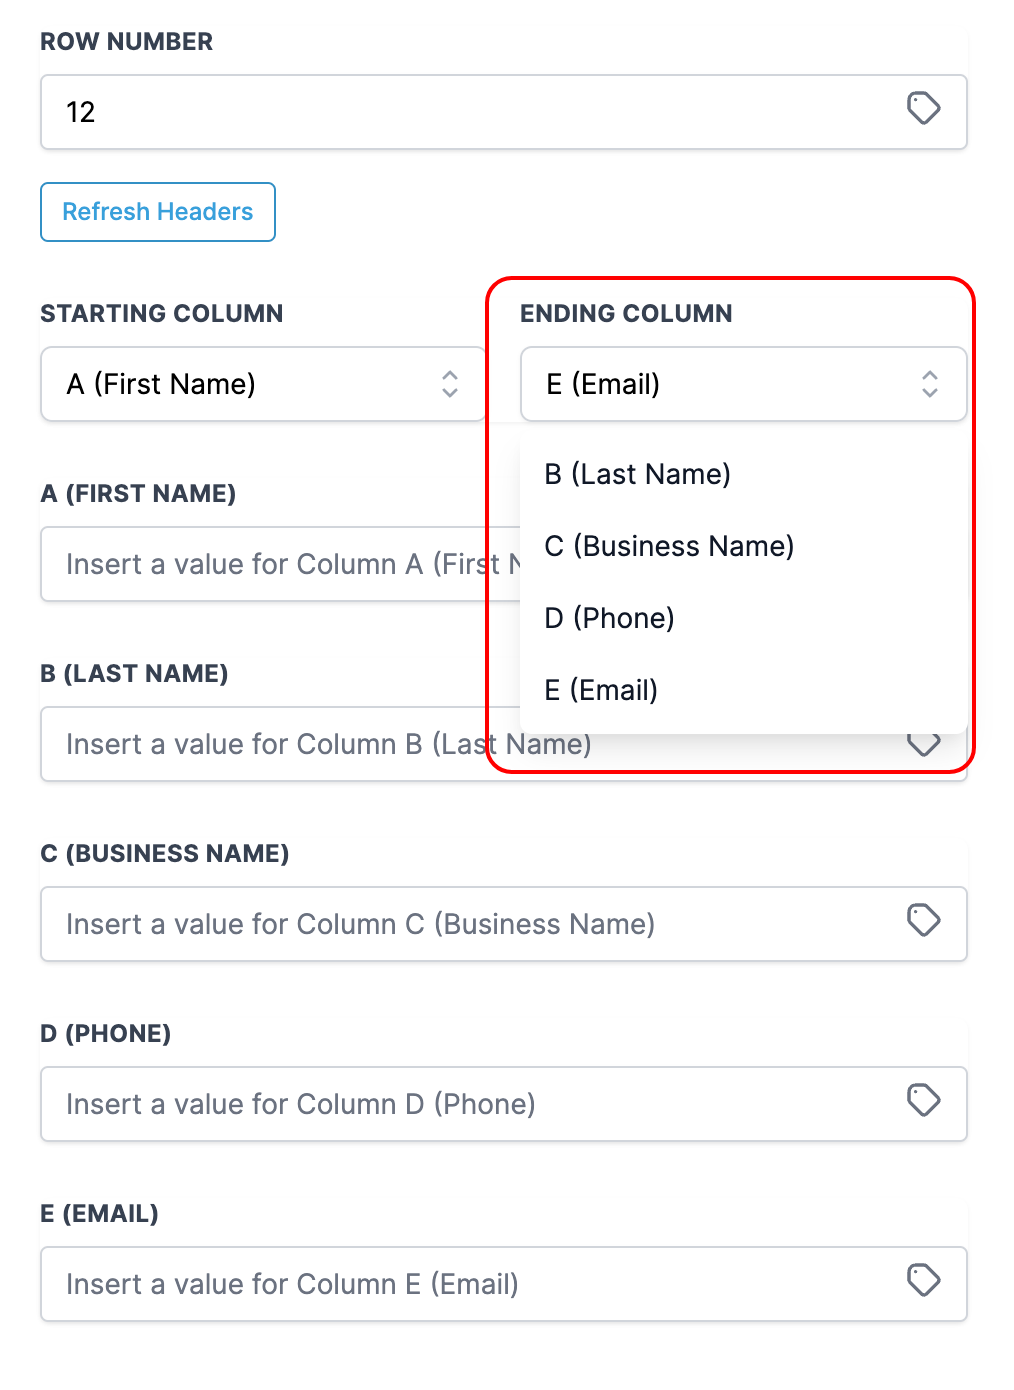
- Choose the columns where you want to add or update data.
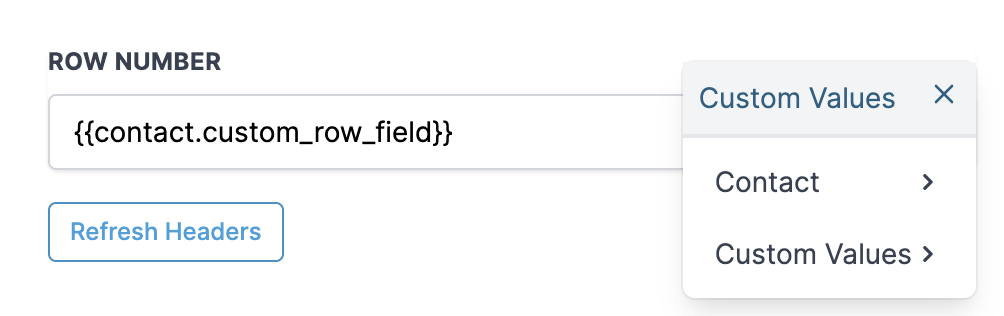
- You can also use special names for your data if you want it to be flexible and adaptable.
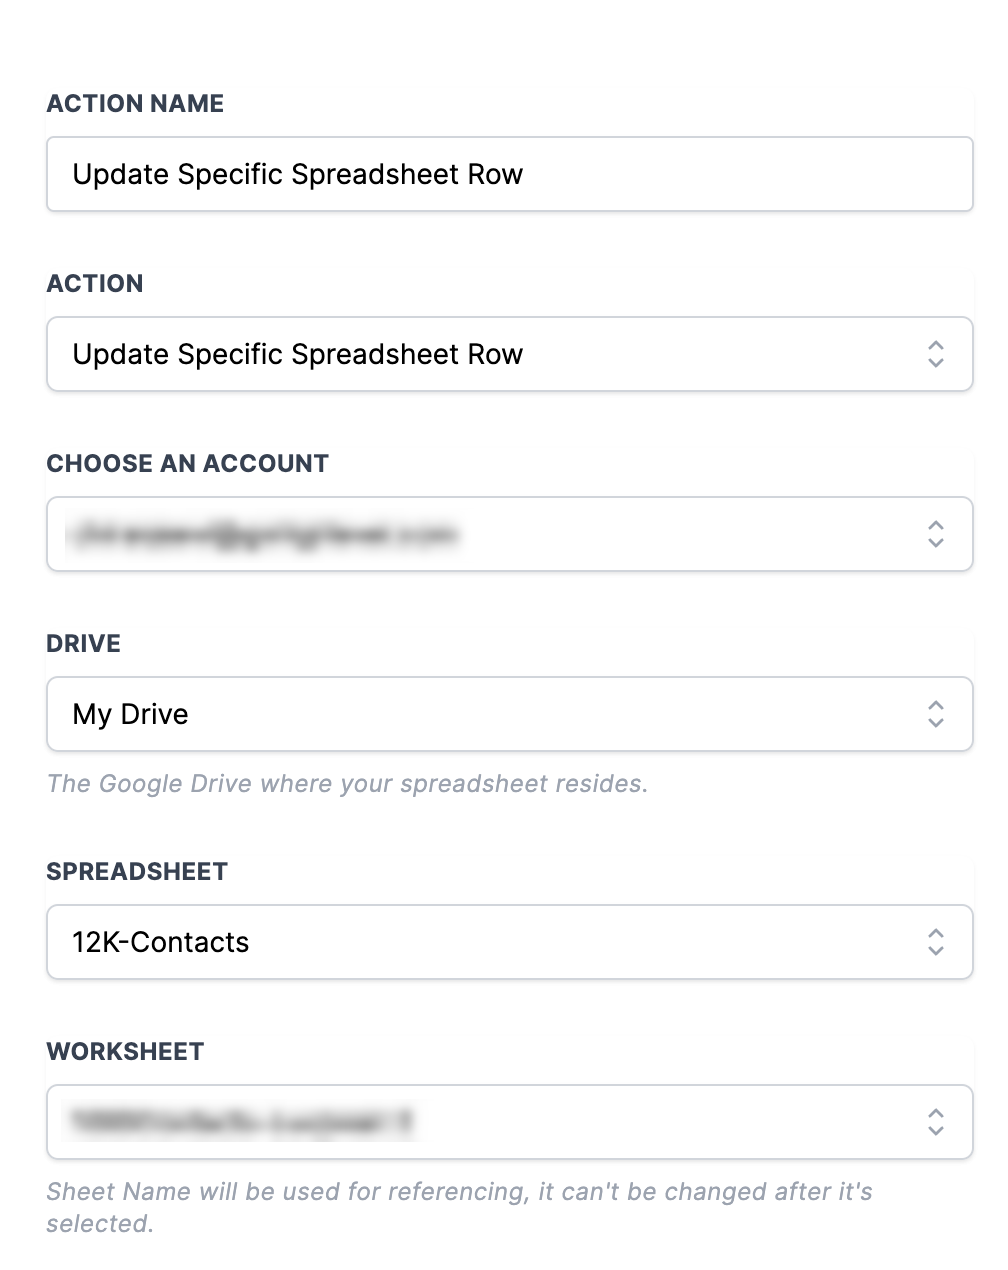
Update Specific Spreadsheet Row:
Let's say you want to change some information in a row. You can use this tool to do that too. Just tell it which row you want to edit, and it will make the changes for you. This is handy for keeping your data up-to-date without manually editing each row.

Key Points to Remember:
- You can be very precise with this action, changing only the information you need.
- If you want to update multiple rows, you'll need to use this action for each row individually.
- You can leave columns blank if you don't want to make changes in a particular part of the row.
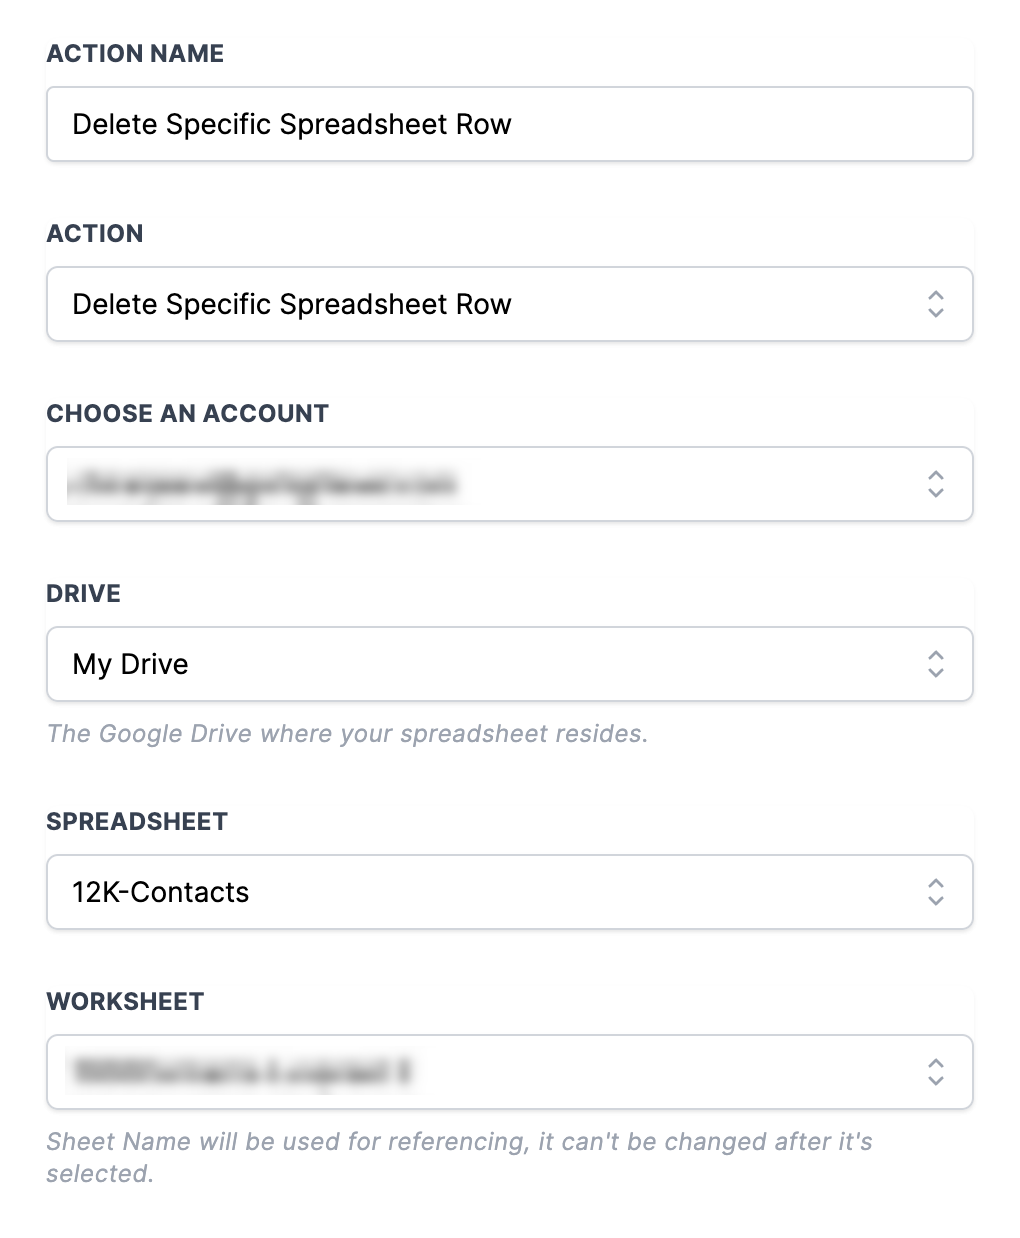
Delete Specific Spreadsheet Row:
Sometimes, you need to get rid of some data. This tool can help with that as well. It can clear out all the information in a particular row, which is like erasing it. But remember, it doesn't delete the row itself, just the stuff inside it.
💡 Important Note: When you use the "Delete Specific Spreadsheet Row" action, it only clears the contents of the row; it doesn't permanently remove the row itself. It's like removing text from a page but leaving the page in the book.
Key Point to Remember:
- You can be very specific about which row to delete, ensuring you only remove the data you want.
- If you need to delete multiple rows, you'll need to use this action for each row individually.
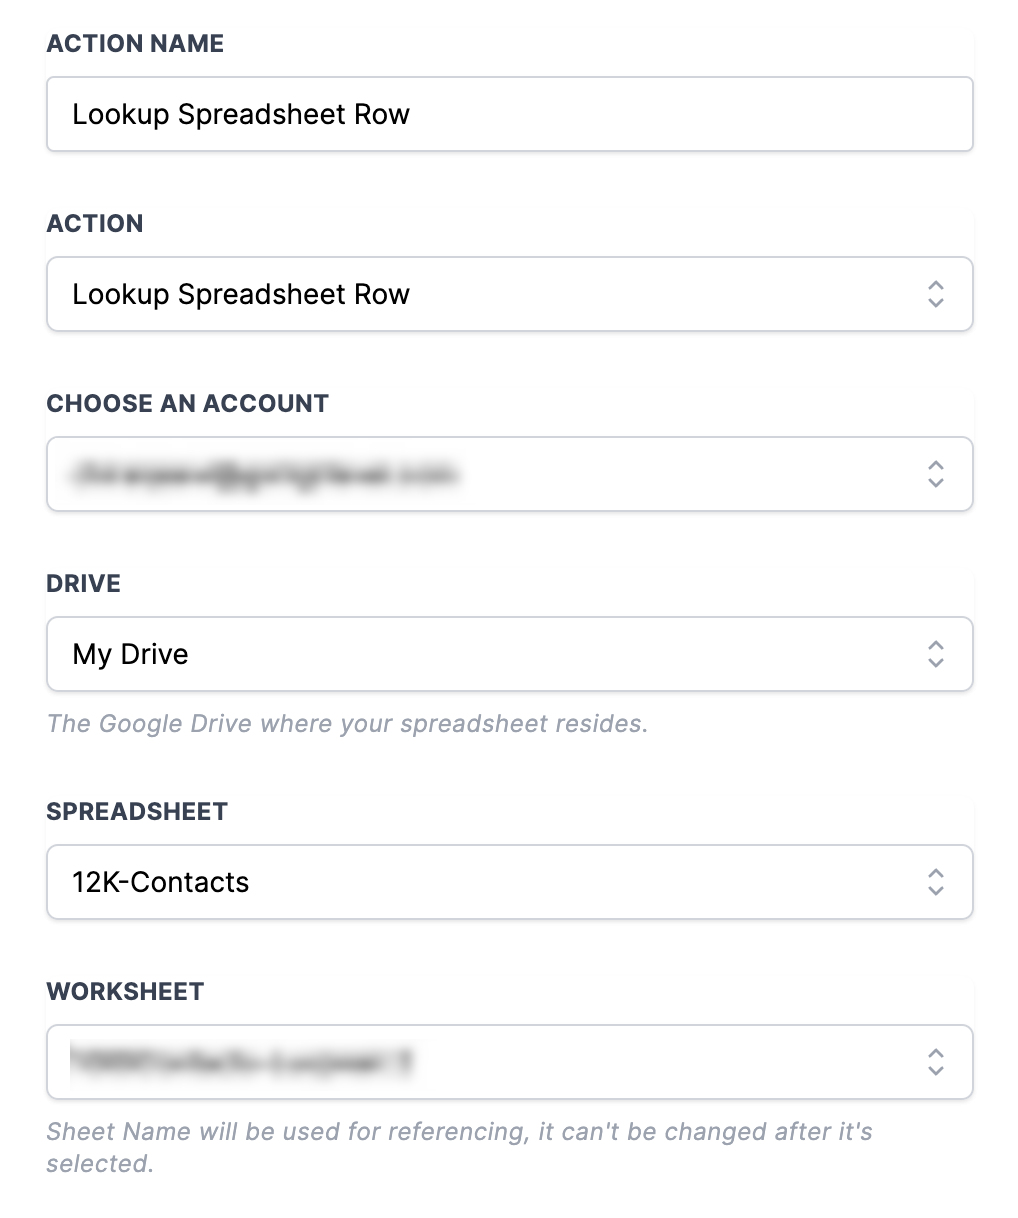
Lookup Spreadsheet Row:
Here's how to put this data detective to work:
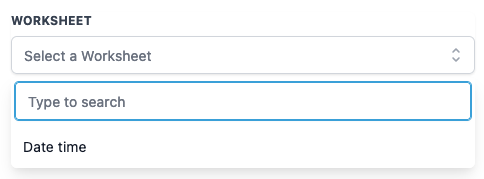
- Choose a Worksheet: Select the part of your spreadsheet where you want to search for data. Think of it as telling the detective where to look.
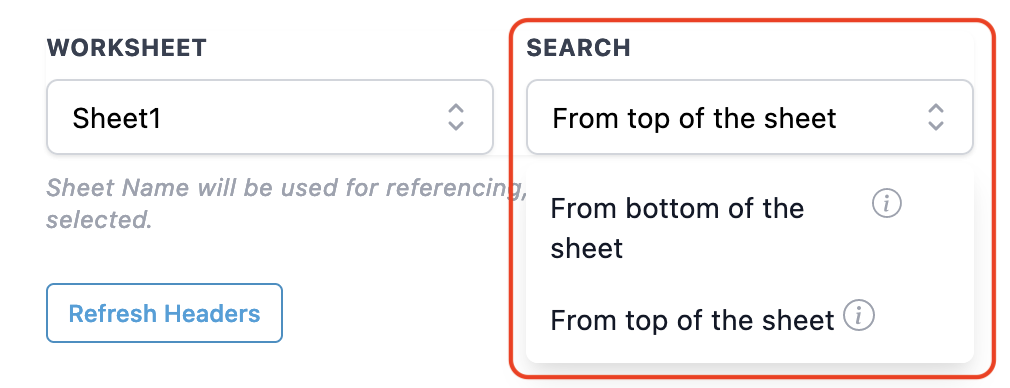
- Select Search Order: Decide if you want to start searching from the top or the bottom of your spreadsheet. It's like telling the detective where to begin the investigation.
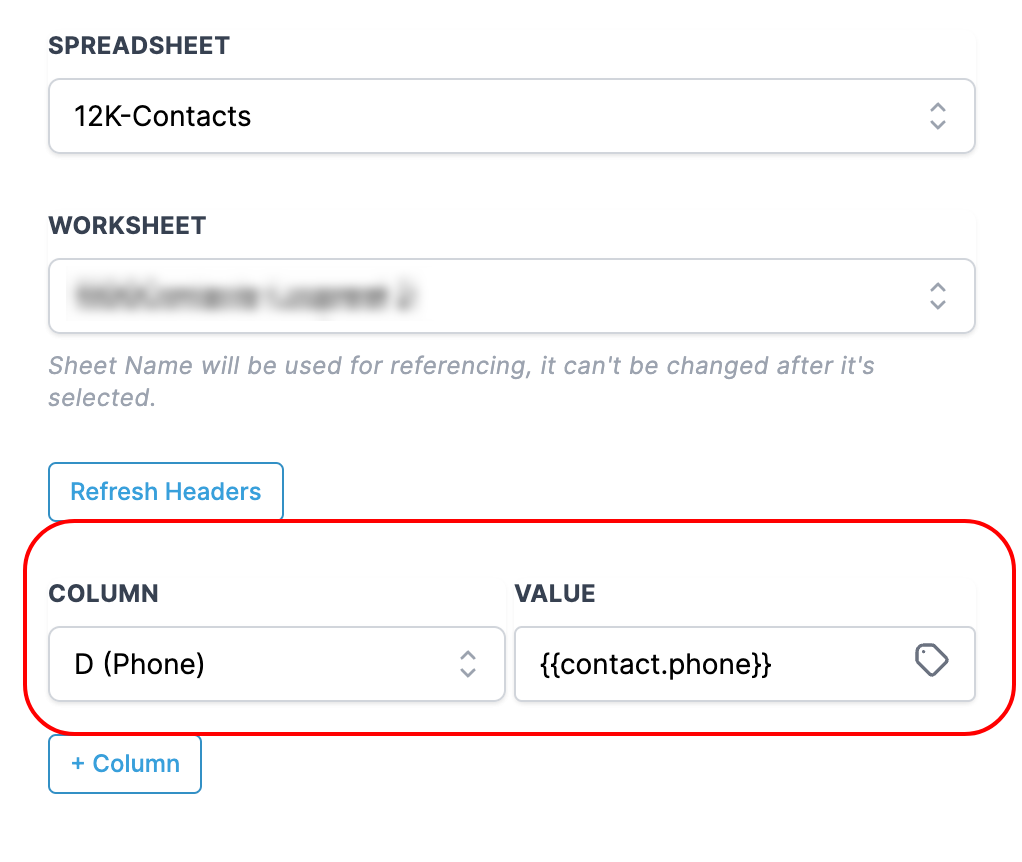
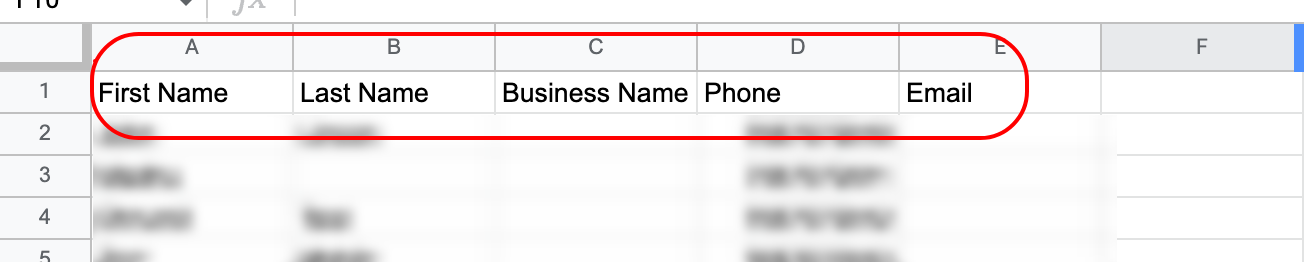
- Pick a Column and Lookup Value: This is where you tell the detective what to look for. Imagine you're searching for a person's name in a phone book (your spreadsheet). The column is like the section of the phone book, and the lookup value is the name you're searching for.
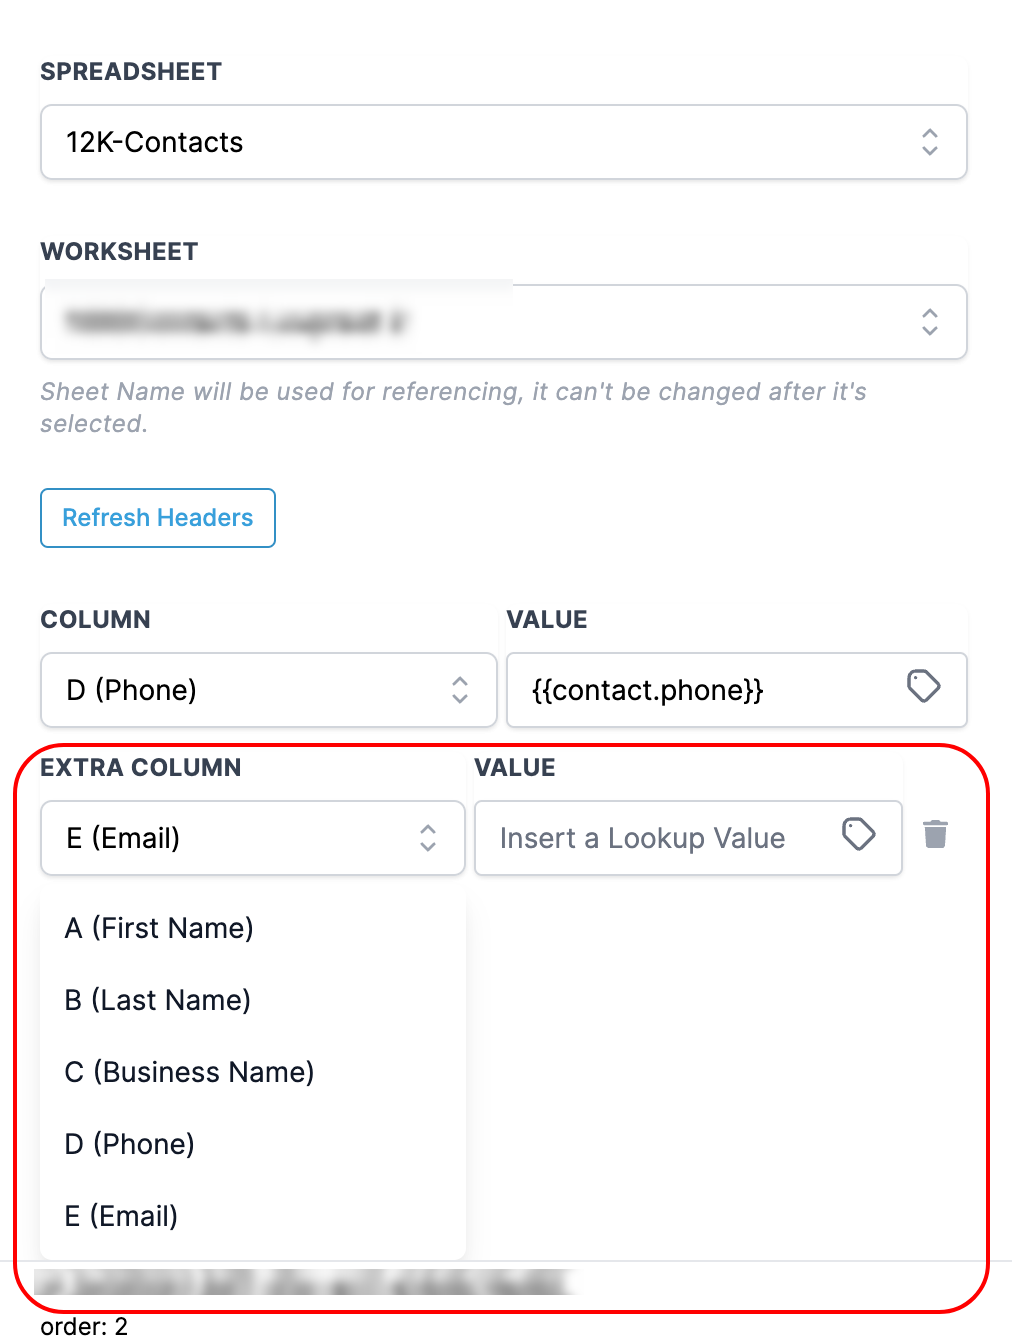
- Extra Clues (Optional): Sometimes, one clue isn't enough. You can add an extra clue (another column and value) to help the detective narrow down the search.
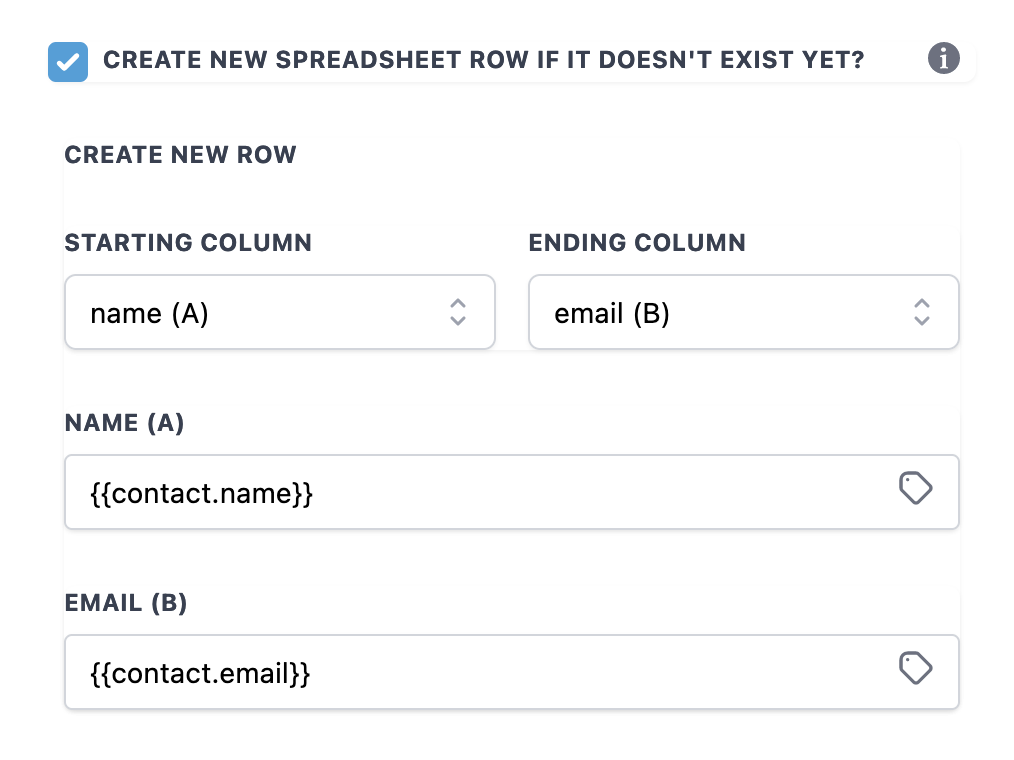
- Create a Row if It Doesn't Exist: If the detective can't find what you're looking for, you can ask it to create a new row for you. It's like telling the detective to make a new entry in the phone book.
- Custom Variables: The detective is really smart. It not only finds what you want but also remembers it for you. You can use this information later in your work, just like you'd remember a phone number you found.
Some Detective Tips:
- Each time you use the detective, it gets a special index (a bit like a case number). This helps you keep track of different searches.

- Once you start a detective case, you can't change or delete it. So be careful when you set it up.
- You can use the information the detective finds in other parts of your work. For example, if you find someone's phone number, you can use it in an "If/Else" situation or any other action in your workflow.
Update Spreadsheet Row using Lookup:
Updating a row in a spreadsheet can be a bit like making corrections in a book. You want to find the right page (row) and then fix the errors (update data). With the "Update Spreadsheet Row using Lookup" action, it's like having an editor for your spreadsheet. Here's how it works:
- Finding the Right Row: Before you can update anything, you need to find the row you want to work on. This is where the "Lookup" action comes in. Think of it as a magnifying glass that helps you pinpoint the exact location (row) in your spreadsheet based on a specific value (clue).
- The Update Mission: Once you've located the row you want to update using the "Lookup" action, it's time to make changes. This is where the "Update using Lookup" action steps in. It's like your editing pen for the spreadsheet. Please Note: To use the "Update using Lookup" action, you must first use the "Lookup" action. It's like solving a mystery—you need to find the clues (row) before you can take action. So, the order matters: Lookup first, then Update using Lookup.
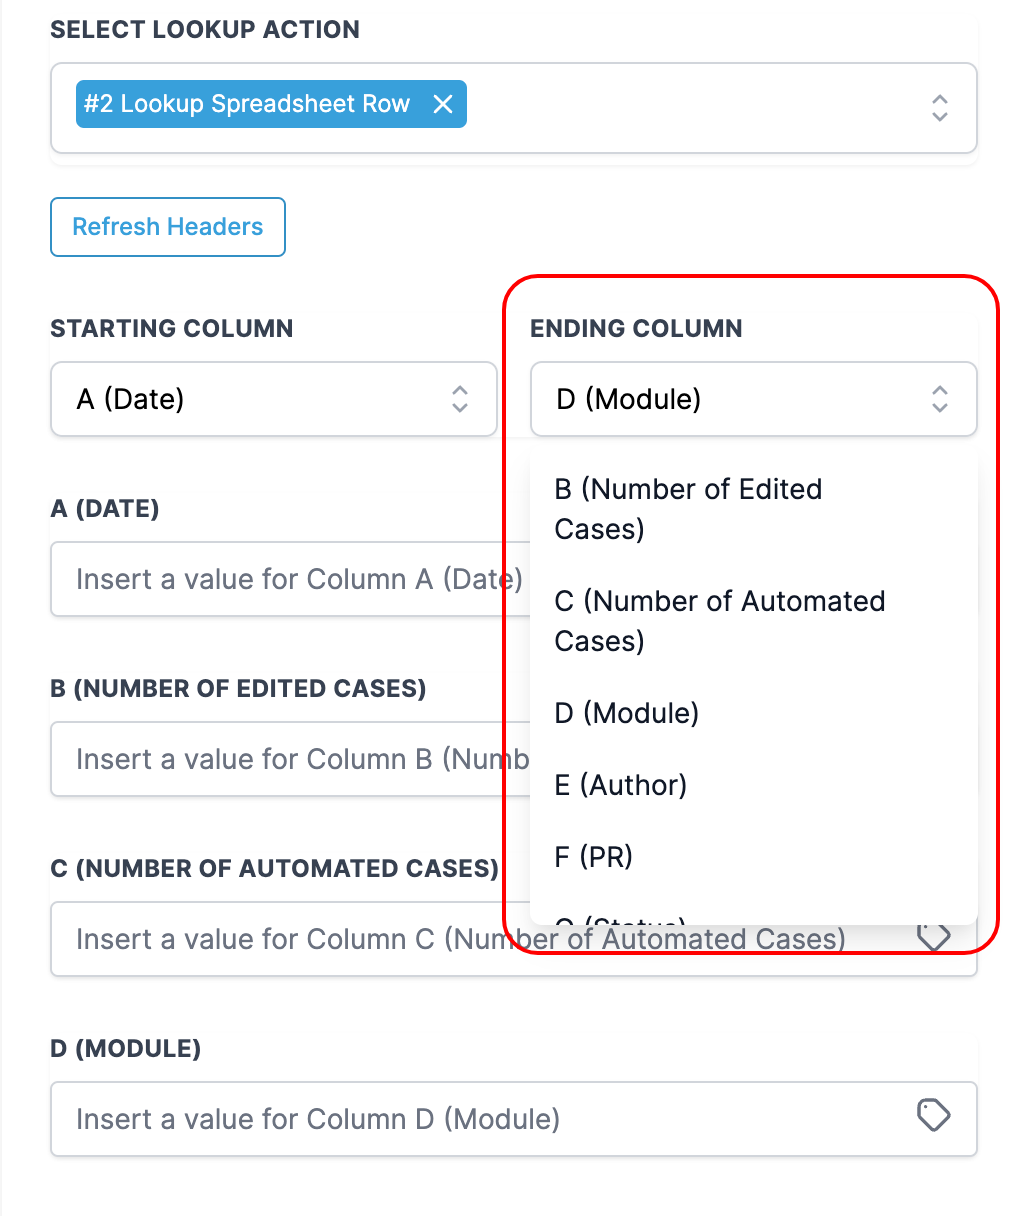
- Choosing the Right Lookup Action: When you use the "Update using Lookup" action, you'll need to pick the specific "Lookup" action that you used earlier. It's like telling your editor which magnifying glass to use for the corrections.

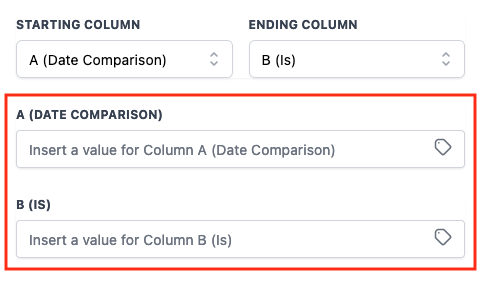
- Selecting Columns to Update: Now, let's say you found the row, but you only want to update certain parts of it (like fixing a few words in a book). You can choose the starting and ending columns for the updates. If you want to update the entire row, you can leave these blank.
Things to Keep in Mind:
- You can only select one "Lookup" action at a time when using the "Update using Lookup" action.
- If the "Lookup" action doesn't find any rows (like not finding any clues in the mystery), the workflow will move on to the next step without making any updates.
Delete Spreadsheet Row using Lookup:
Once you've located the row you want to get rid of using the "Lookup" action, it's time to clear it out. This is where the "Delete using Lookup" action steps in. It's like the delete button for that specific row.
💡 Please Note: To use the "Delete using Lookup" action, you must first use the "Lookup" action. It's like opening a drawer (Lookup) to see what's inside before you can decide what to remove (Delete using Lookup). So, the order is crucial: Lookup first, then Delete using Lookup.
Selecting the Right Lookup Action: When you use the "Delete using Lookup" action, you'll need to pick the specific "Lookup" action that you used earlier. It's like telling the system which detective found the clue you're acting on.
Points to Remember:
- When you use the "Delete using Lookup" action, it wipes out all the values in the row. It's like clearing a whiteboard.
- However, it doesn't permanently remove the row itself. The row is still there, but it's empty.
Choosing the Correct Lookup Action: You can only select one "Lookup" action at a time when using the "Delete using Lookup" action. It's like telling the system which detective you want to assign to this case.
No Row, No Deletion: If the "Lookup" action doesn't find any rows (like when the detective can't find any clues), the workflow will continue without deleting anything.