Calendar Settings
In the Calendar Settings section you will be able to view and manage all of the calendars linked to your CRM, create calendar groups, and create individual calendars. Edit your calendars and groups in this section, as well as copy scheduling links to quickly send your calendar to a client for easy booking. You’ll also find embed codes to paste on your website for customers to quickly book an appointment.
Calendar Setting
Create Group
Creating a group calendar using the ‘Create Group’ button can be a useful tool for staying organized with a team. Begin by clicking on the ‘Create Group’ button on the top right of the page. Here you can create a group calendar to include multiple team members calendars into one. This feature allows you to group multiple calendars together for booking purposes. When you click on the button, a popup will appear for you to fill in the group name, group description, and calendar URL.
Create Calendar
You can create a new calendar by clicking on the blue ‘Create Calendar’ button on the top right of the page. You can select a calendar type from Round Robin, Unassigned, Class, or Collective (coming soon). Here you will be able to fill in all the necessary information for your calendar according to your preferences.

Calendar Overview
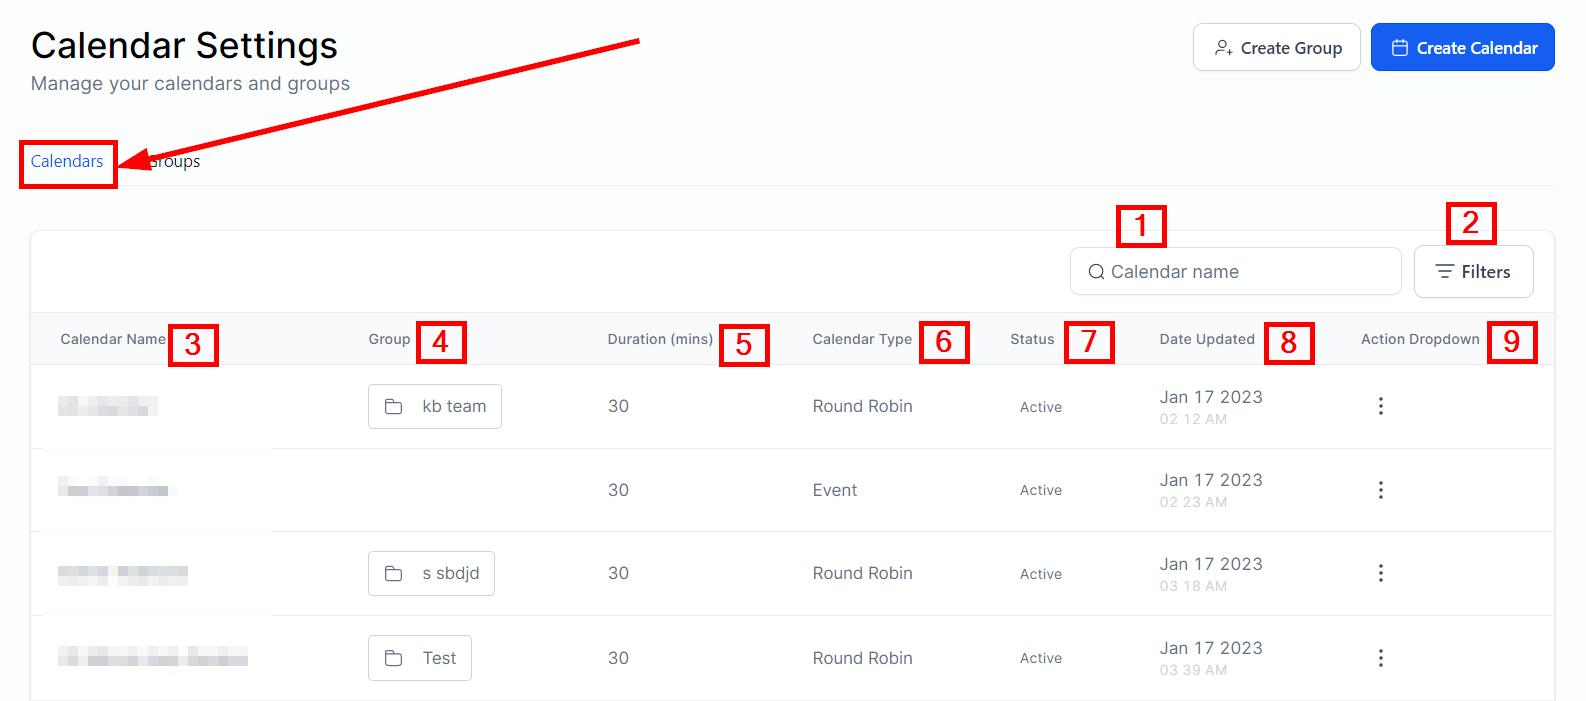
When you are in the calendar settings page, you will see a list of calendars currently active in your CRM. From left to right you will see the differentiators of your calendars including calendar name, group they belong to, duration, calendar type, status, and date updated.
- Search Bar
Here you can quickly find out any of the calendars from the list just by entering the calendar name in the search bar.
-
Filters Filters allow you to customize the display of calendars based on their status or groups.
- Calendar Name
Here you can see the name you have given to each calendar you have created in the system.
- Group
Here you can see which group each calendar in the list belongs to.
- Duration (mins)
Here you can see the meeting duration you have set for each calendar on the list.
- Calendar Type
This column displays the type of calendar created; Round Robin, Event, or Collective Booking calendar.
- Status
This column lets you know whether the calendar is active or not.
- Date Updated
This gives you information about the date when the calendar was updated.
- Action Dropdown The three-dot menu gives you the ability to perform several actions. Let's cover them one by one.
Action Dropdown
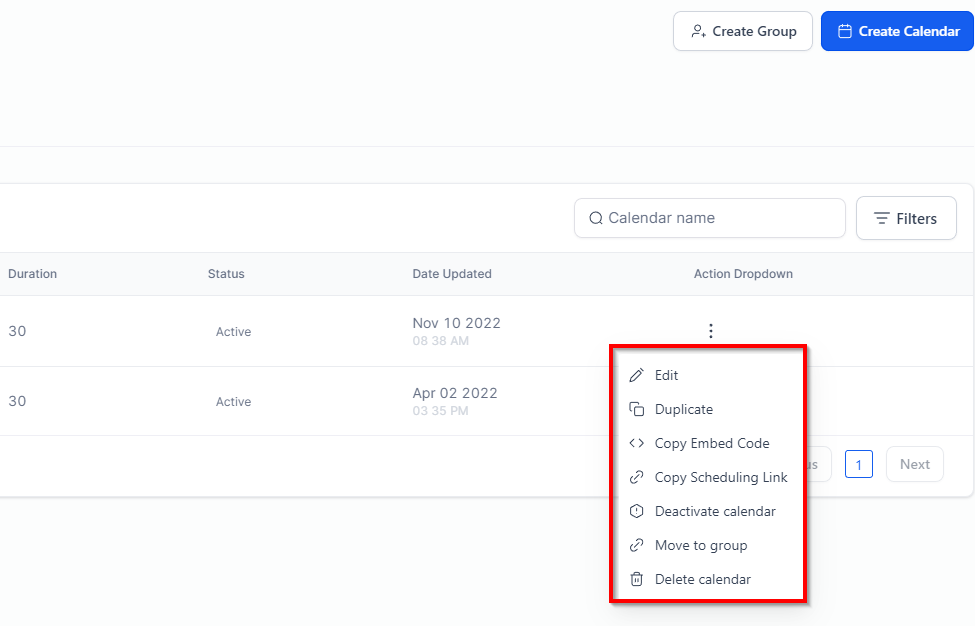
By clicking the three dots to the far right of your calendar under Action Dropdown, you will see a variety of action items related to your calendar including:
- Edit
Allows you to edit the calendar settings such as your availability and everything with respect to the calendar.
- Duplicate
You can duplicate the calendar with this option. All of the existing settings from the original calendar will be applied to the newly created calendar.
- Copy Embed Code
Click on this option if you need to paste the calendar code on your webpage. Once you paste the code on your website, your customer would be able to book an appointment right from your website.
- Copy Scheduling Link
Use this to share the scheduling link with anyone who wishes to book an appointment with you.
- Deactivate Calendar
Use this tab to deactivate one of the calendars on the list.
- Move to a Group
With this option, you can move an individual calendar from the current group to another group as per the task requirements.
- Delete Calendar
This allows you to Delete one of the calendars from the list.
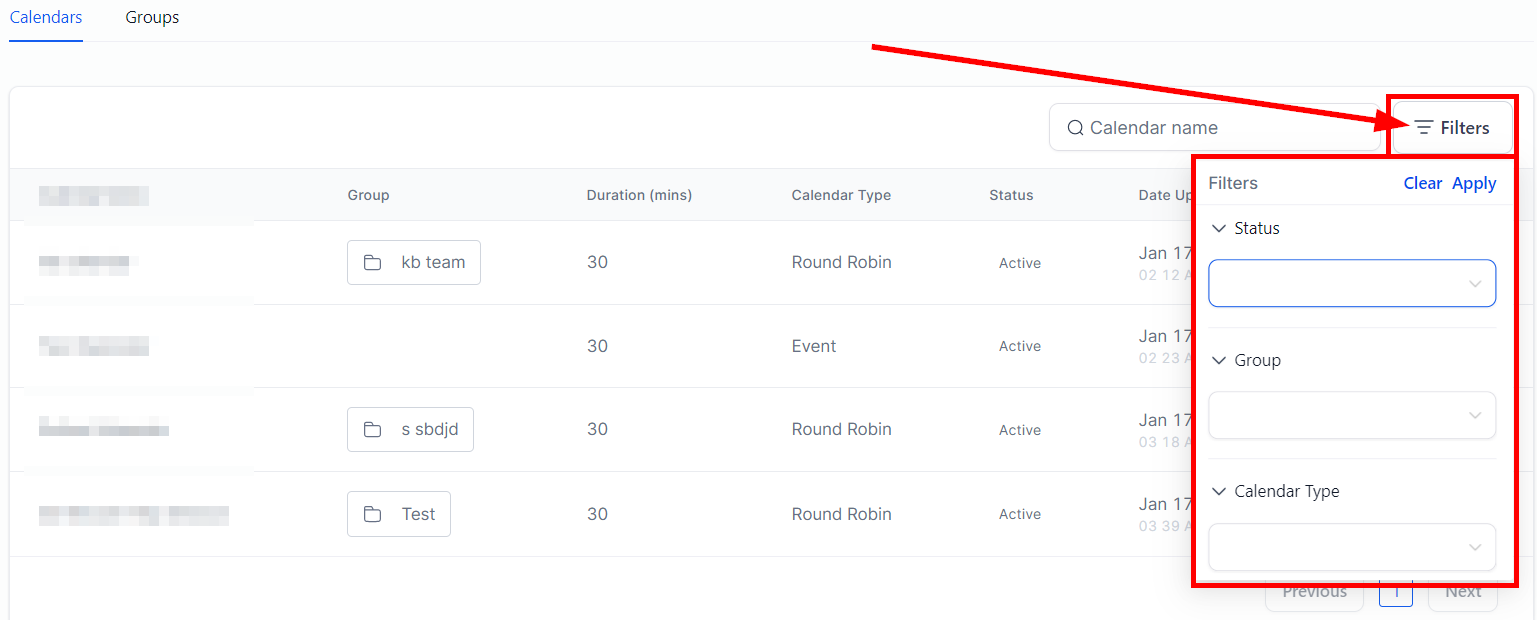
Filters
Filters allow you to customize the display of calendars based on their status or groups. To apply a filter, be sure to click apply each time you set one.
- Status
With this filter, you can view the calendars based on their status such as active calendars or calendars that are in draft mode.
- Group
With this filter, you can view calendars based on the groups they are associated with. Just click on the Group menu button to select any of the groups and the system will show the calendars specific to the group.
- Calendar Type
You can also filter your calendar based on the types; Round Robin, Event, or Collective Booking calendar. Just click on the Calendar Type menu button to select the type you want to view and the system will show the calendars specific to that type.
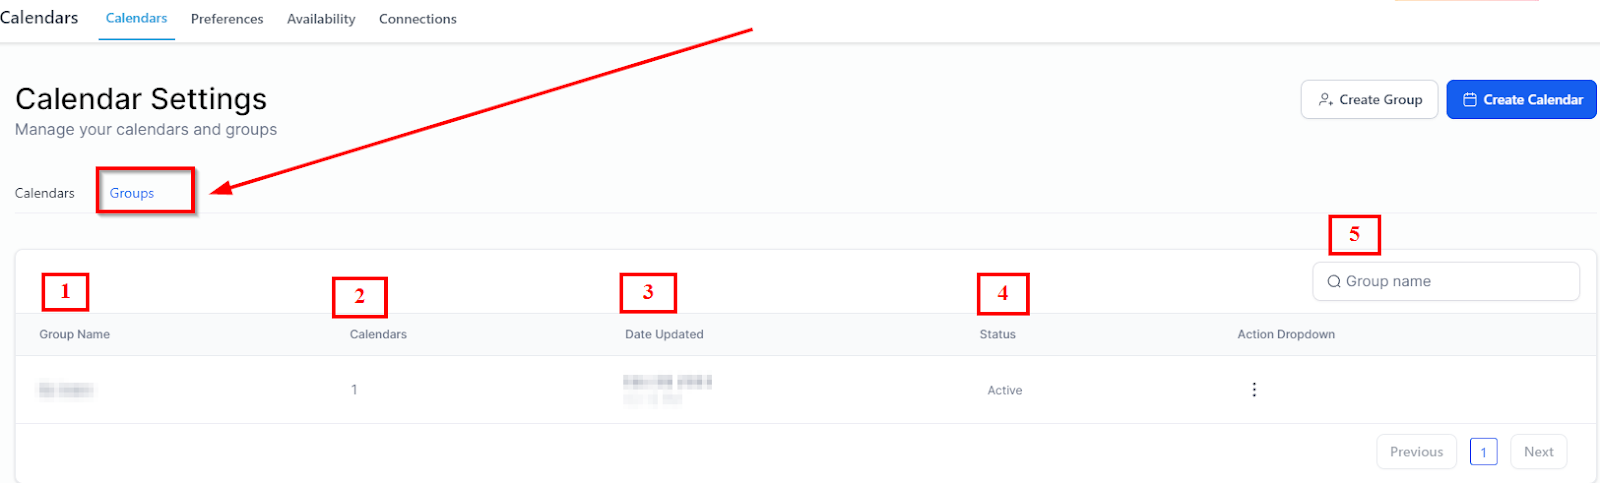
Group Overview
"Team" calendars are now referred to as "Groups". In this section, you will learn how to add a group calendar. Adding a Group calendar is now done within the calendars settings tab, Users are directly added to their respective Calendars within the Team & Event Step in the calendar model.
Groups have multiple users working on a common objective such as a sales team or support team. Here, you will be shown all of the groups you have created in the system:
- Group Name
Here you can see the name of each group you have created in the system.
- Calendars
Here you can view the calendar associated with each group on the list.
- Date Updated
This column shows the date when the group was updated.
- Status
This lets you know the status of each group on the list.
- Group Search Bar
Use this tab to find out any of the groups from the list of all groups.
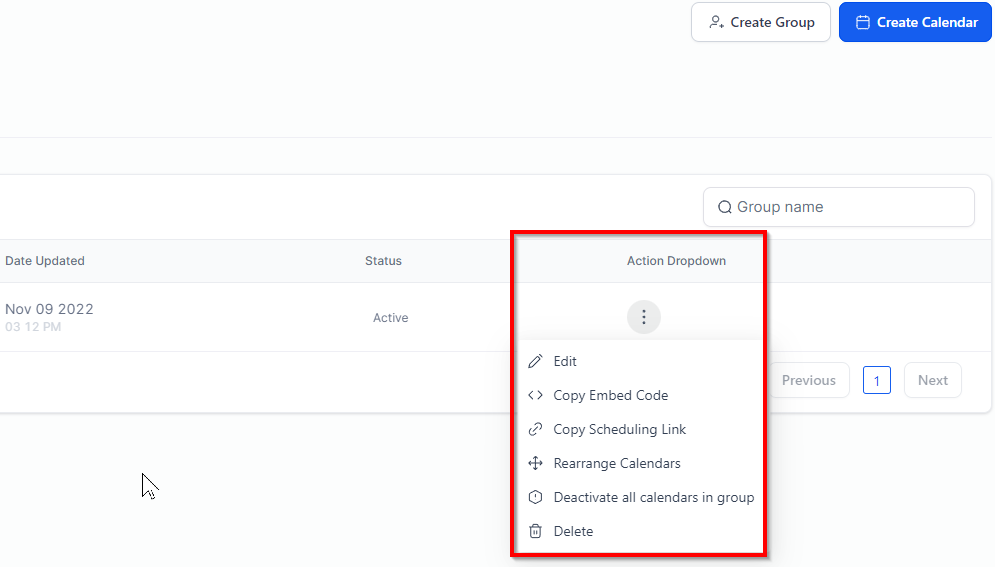
Action Dropdown
The three-dot menu gives you the ability to perform several actions. Let's cover them one by one.
- Edit
This lets you edit the group details.
- Copy Embed Code
Use this to copy the HTML code which you can paste on your webpage for the clients to book an appointment on the specific calendar.
- Copy Scheduling Link
It allows you to copy the link that can be used to share with anyone for them to book an appointment.
- Rearrange Calendars
This gives you the ability to rearrange the calendars based on your preference.
- Deactivate all calendars in Group
You can deactivate the group and group calendars.
- Delete
This allows you to delete the selected group on the list. Remember once deleted, all of the information associated with the group will be deleted permanently.