
Add Payments to Appointments
In this article, I'm going to show you how you can accept payments for your appointments.
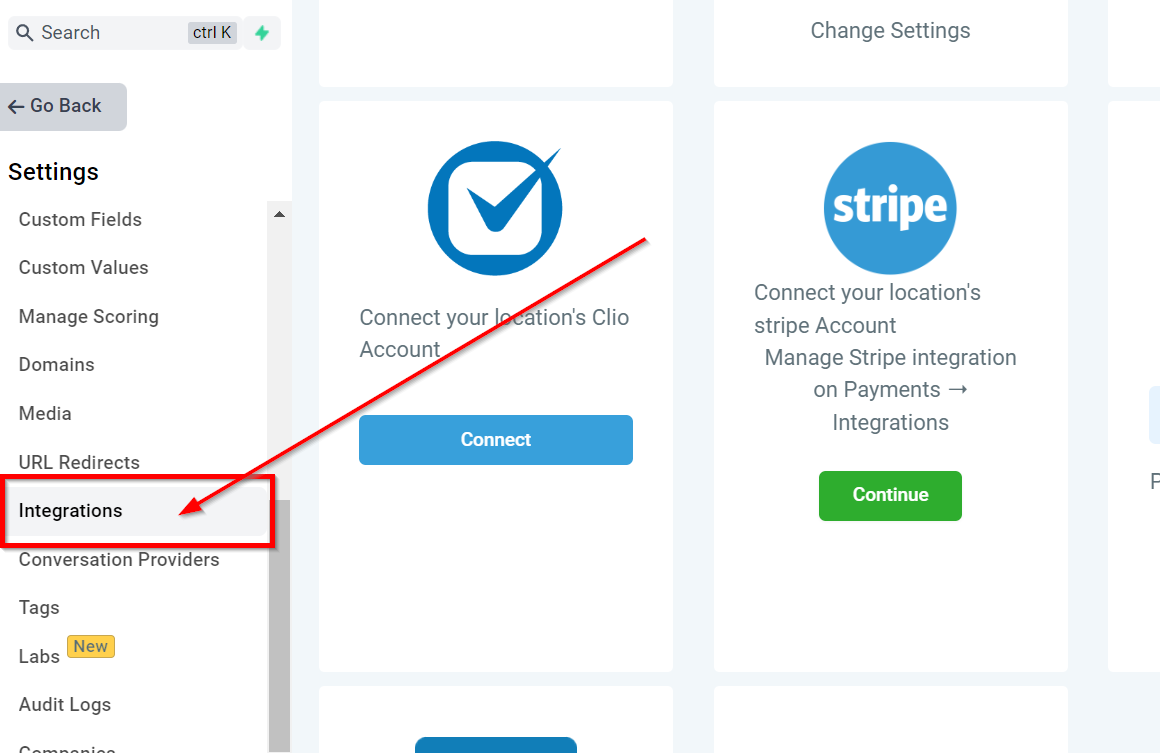
To start, click Settings on the left menu, and then click Integrations on the new left menu that appears.
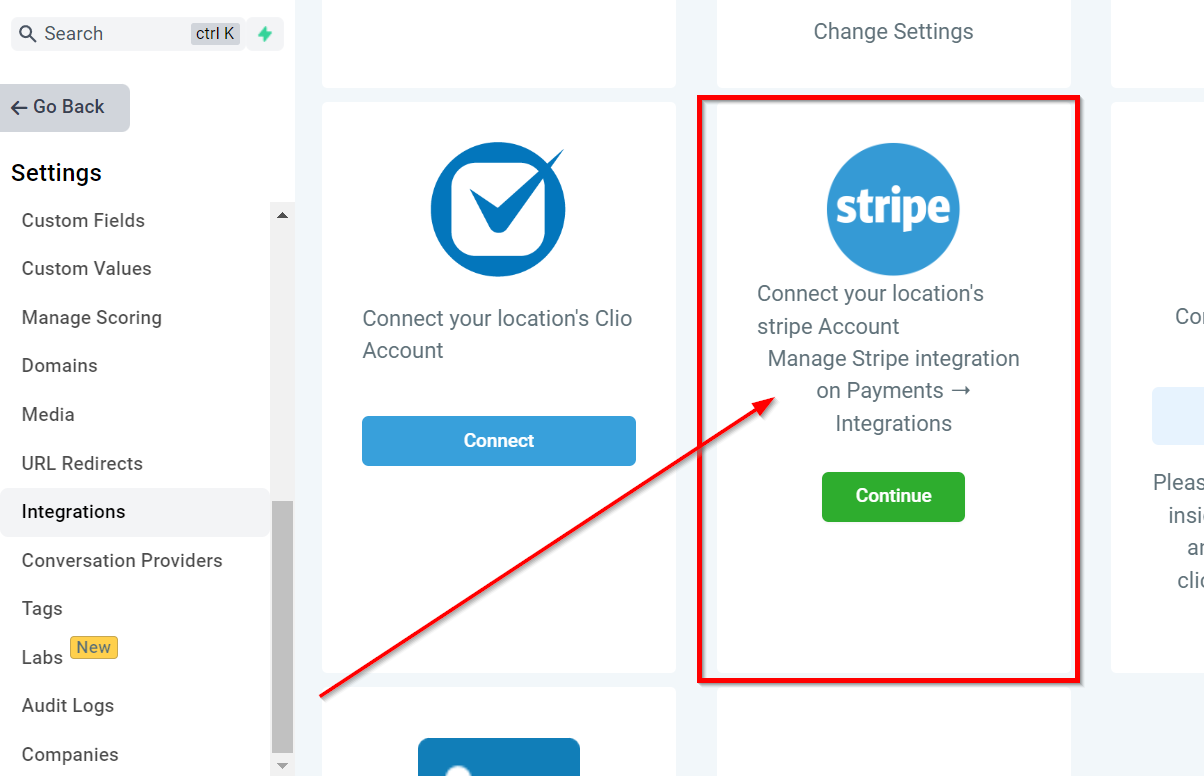
If you've already integrated your Stripe account, you'll see your keys entered under the Stripe icon.
If you haven't done so already, you'll need to integrate Stripe. This is covered in a previous article.
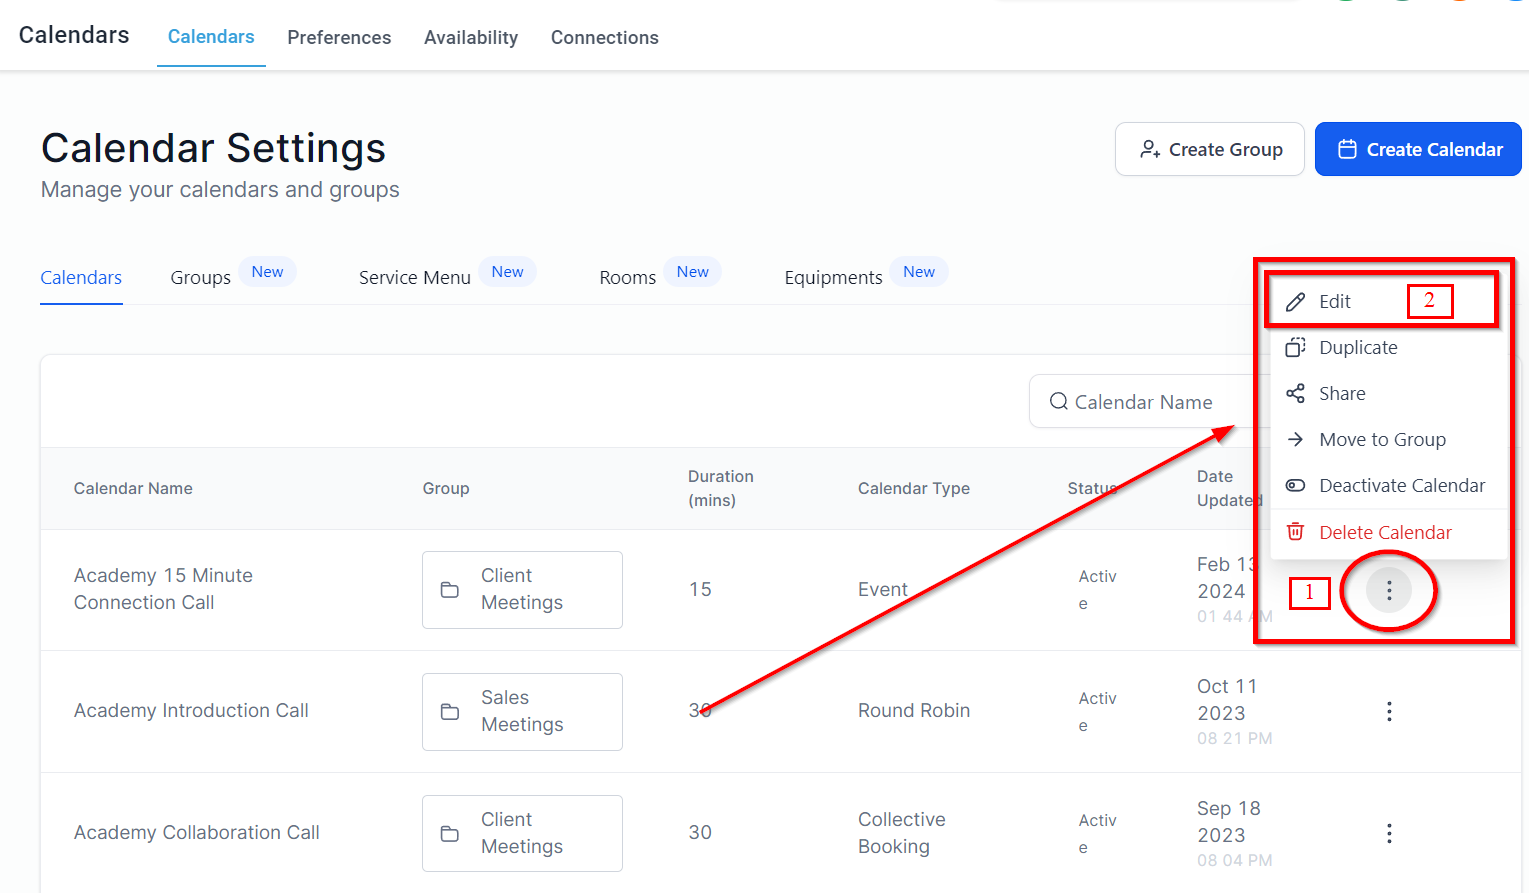
Now, click Calendars in your Settings menu.
Click on the three dots of your appointment calendar, and then click edit.
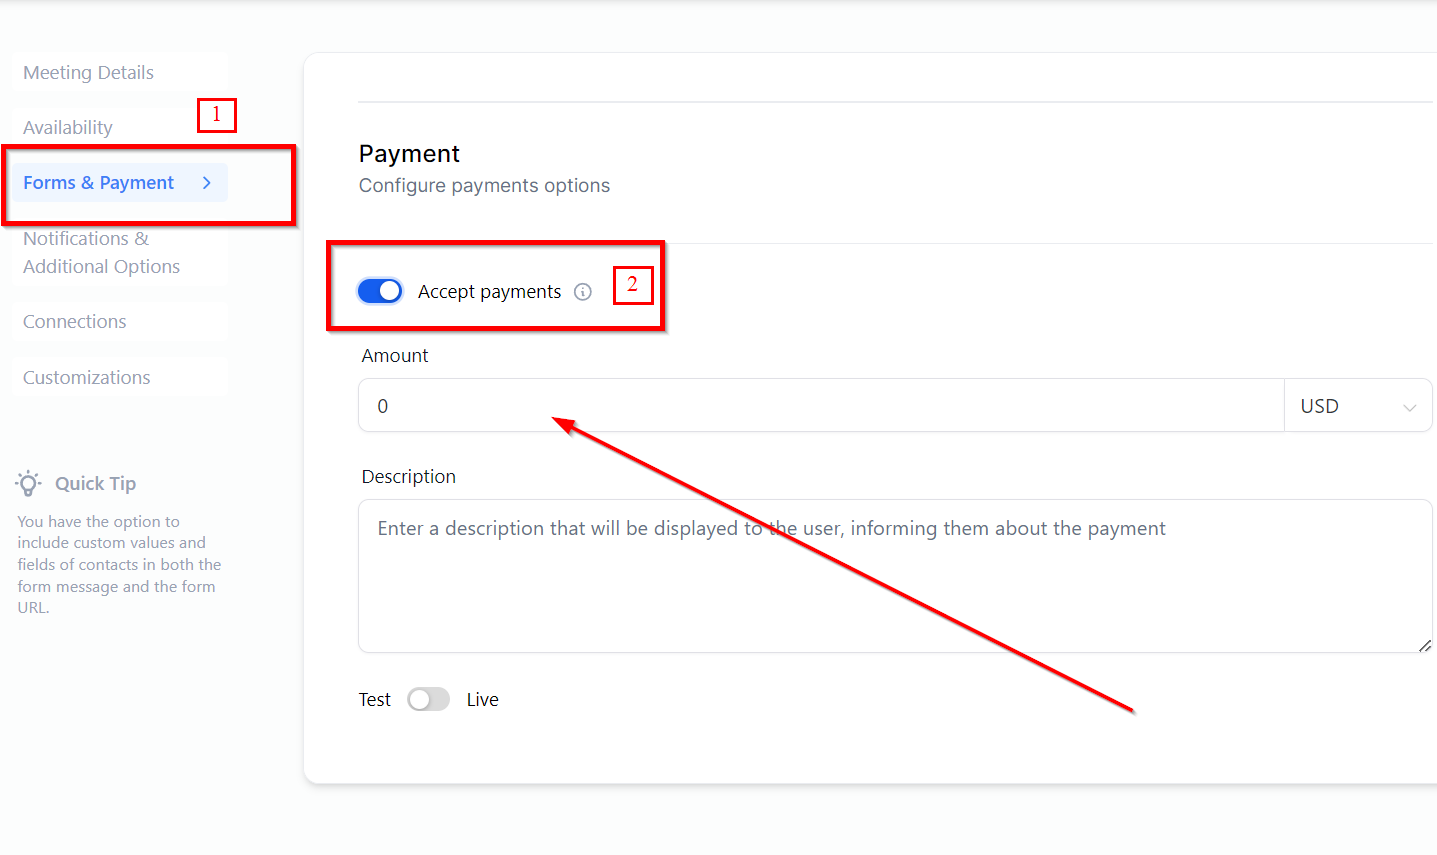
This opens your Edit Calendar pop-up. Click the “Forms & Payment” tab.
Then scroll down to “Accept payments” toggle.
Turn the toggle on, and enter the amount you'd like to charge for your appointments in the Amount field.
In the Currency field, open the currency dropdown to select your preferred currency.
You can also type a description of the payment in this text field.
Click Complete at the bottom to add the payment to your appointment booking system.
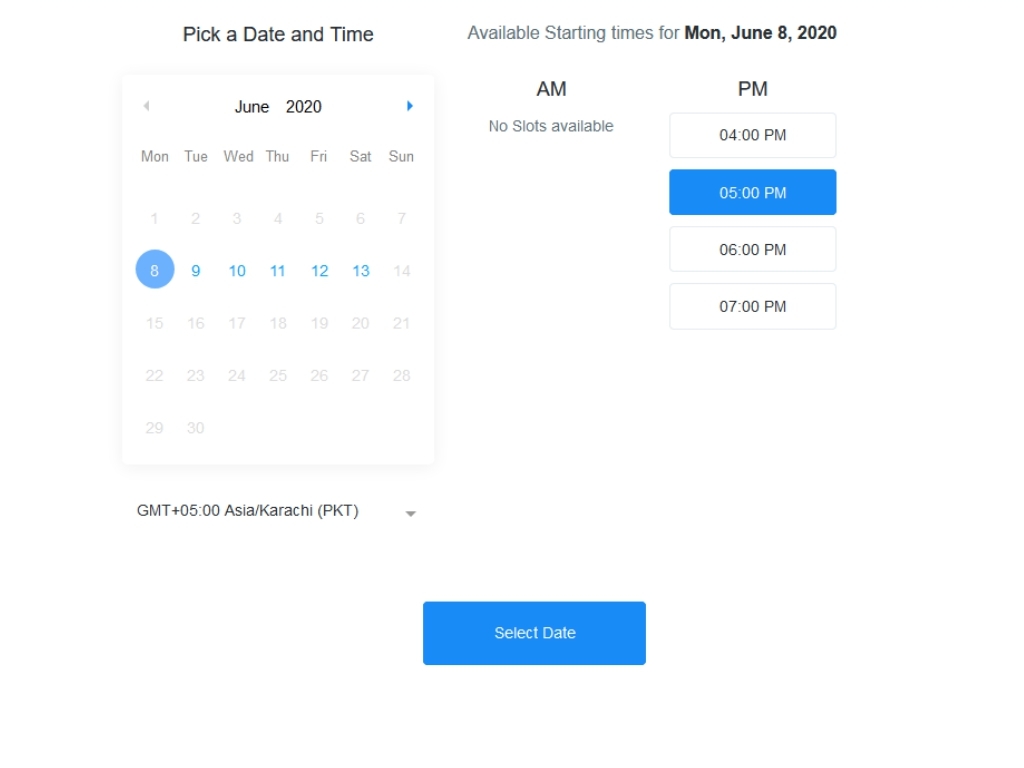
To see how it works, let's click the link button to open the calendar in another window.
Select a day and available time slot. Then, click Select Date.
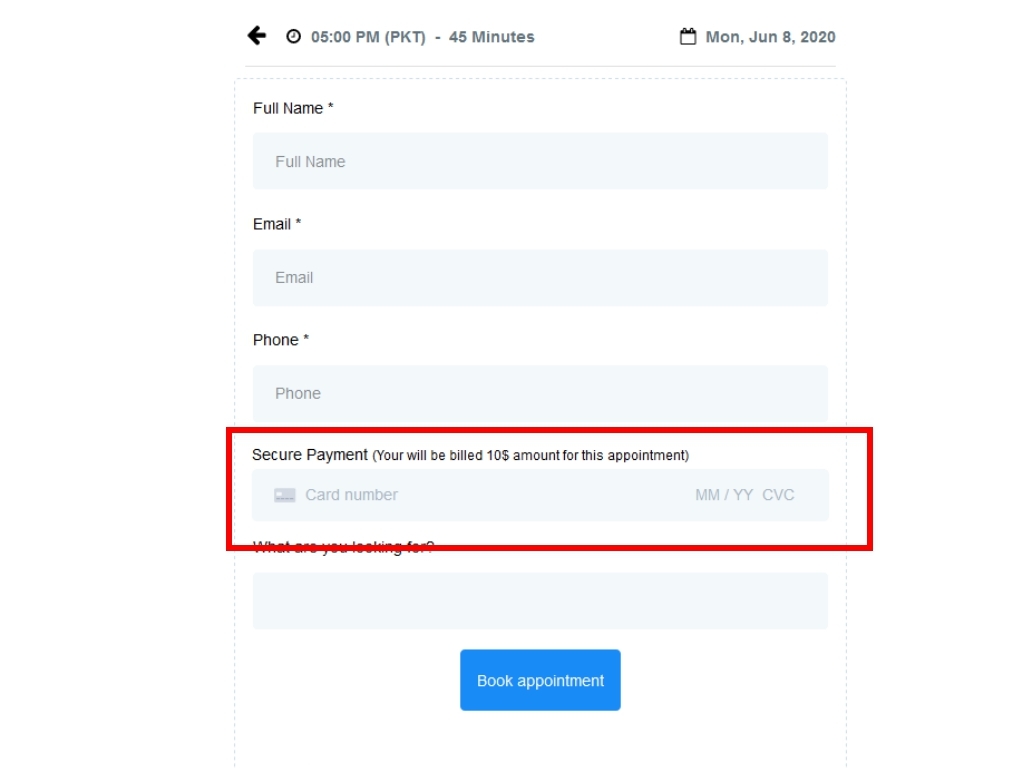
Now you can see the new payments integration that will appear when someone books an appointment on your calendar.
And that’s all there is to it - you can now accept payments when appointments are booked!