
How To Set Up A Round Robin Appointment Distribution
Creating a Round Robin Booking
If you want this new calendar to fall under an existing Group calendar, it's best you select the Round Robin Booking calendar type. The Round Robin booking (Round Robin scheduling) allows you to determine how you want leads to be distributed among your assigned team members.
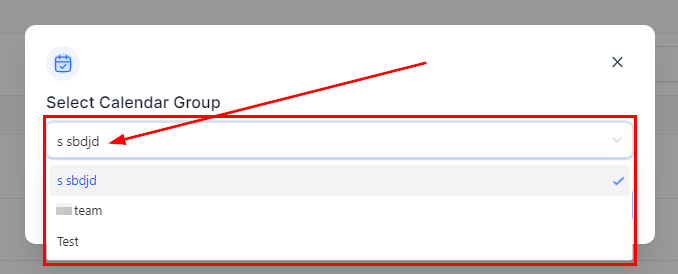
Select Calendar Group
Once you select this type, it will require you to choose the calendar group you would like to work with, then click on the "Select" button to move to the next step.
Creating Your Calendar
Once you select a Calendar group, you will be directed to the Calendar Setup which consists of three (3) steps;
- Team & Event Setup
- Availability
- Confirmation
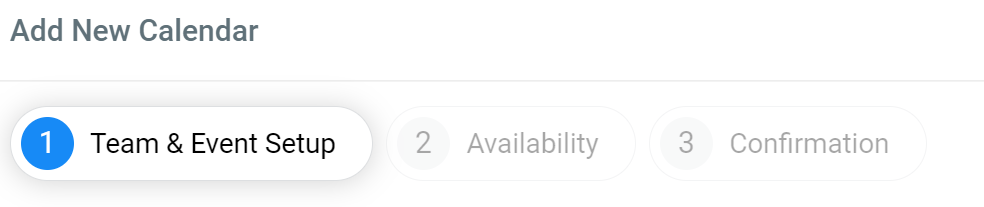
1. Team & Event Setup
Appointment Distribution
This allows you to determine how meetings from your calendar will be distributed amongst the team members.
- Optimize for Availability You can decide to set up your calendar in such a way that it distributes meetings to users based on priority. The higher the priority a user has, the more meetings they get.
For instance, If user A is tagged High priority the user will get all the meetings for all the available time slots but if two meetings are booked in the same time slot depending on the setting for the "Appointment per slot", the other meeting goes to another user with either medium or low priority
-
Equal Distribution This will allow you to distribute meetings equally, and it ensures that every assigned team member gets an equal number of meetings.
- Add User Once you click on the +Add User it shows a drop-down menu where you can select the user you want to add. You can add more than one user by clicking on the +Add User under the just-selected user. You will also add:
- (For Optimize for Availability distribution) Select the priority level for each user; High, Medium, or Low Priority.
- Choose and connect the meeting venue; Zoom Meeting or Google Meet.
-
Provide the meeting location URL.

Calendar
- Calendar Name
Give your calendar a name. The name will show leads and customers the reason they are scheduling an appointment.
- Description
You can go into more detail about the topic and subject of your calendar by adding a description here. This description will be visible to anyone looking to schedule an appointment.
-
Calendar URL Type in the calendar slug here.
- Appointment Title
When your leads/customers schedule an appointment, this title will get added to your calendar as well as the confirmation email.
-
Event Color This option is used to choose the color for this calendar's events, it helps organize your meetings and events. The color is also synced to google calendar. Click on the color to select and unselect

2. Availability
Next step, we need to establish the availability settings for this particular calendar.
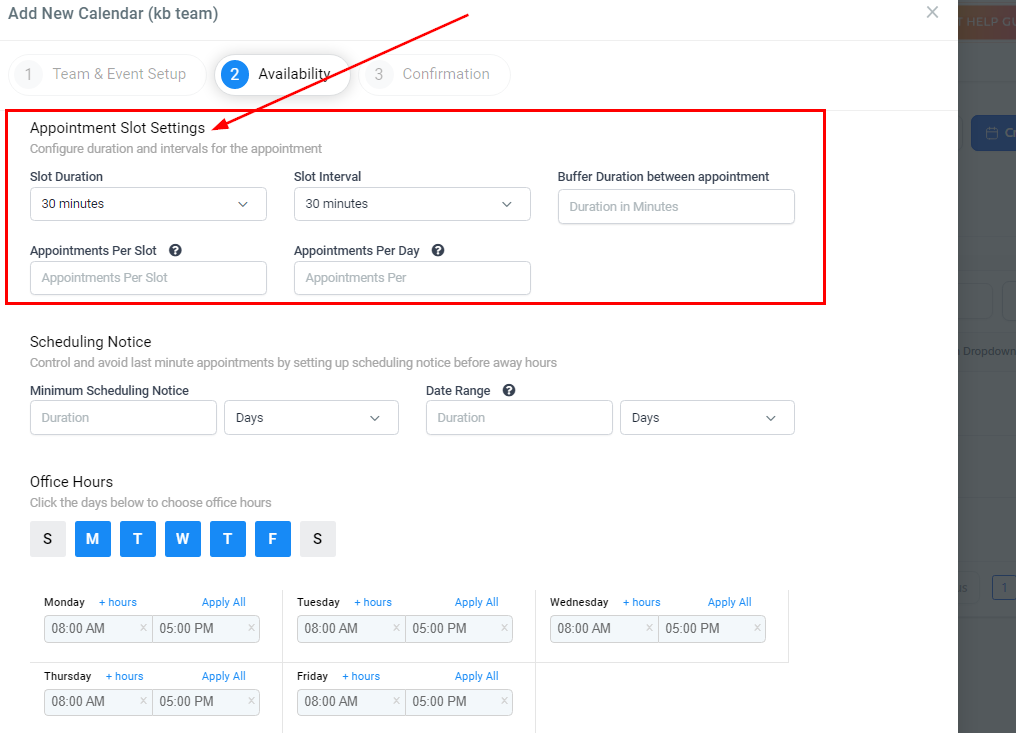
Appointment Slot Settings
Here you will see the availability slot and interval settings. These give you control over the time, length, and quantity of appointments scheduled.
-
Slot Duration This setting allows you to choose the length of your appointments. This will show when people are booking on your calendar so they know how long the appointment should take.
-
Slot Interval Slot intervals show what times are available. For example, if you have a 30-minute slot interval, then your time slots will show availability every 30 minutes (10:00 am, 10:30 am, 11:00 am, etc.)
-
Buffer Duration Between Appointments To give you or your team a break in between appointments, you can establish a buffer in-between appointments. This helps prevent back-to-back appointments.
- Appointments Per Slot It is the maximum number of appointments permitted per slot for the user (If the number of appointments exceeds the given slot for the user, then it either switches over to the next user in the round-robin queue or marks the slot unavailable for the prospect to book). For example, if user A in a Round-robin schedule has their 'appointment per slot' set at 2 and if 3 meetings are booked at the same time, user A gets assigned to the first two meetings then the third meeting goes to the next user.
You can choose to book multiple appointments per time slot as well. This works well in class or group situations where you would like more than one person in different meetings at the same time.
-
Appointments Per Day This is the Maximum number of appointments permitted per day on this calendar. To prevent your day from being loaded with calls or appointments, you can establish a maximum number of appointments per day that can book on this calendar as well.
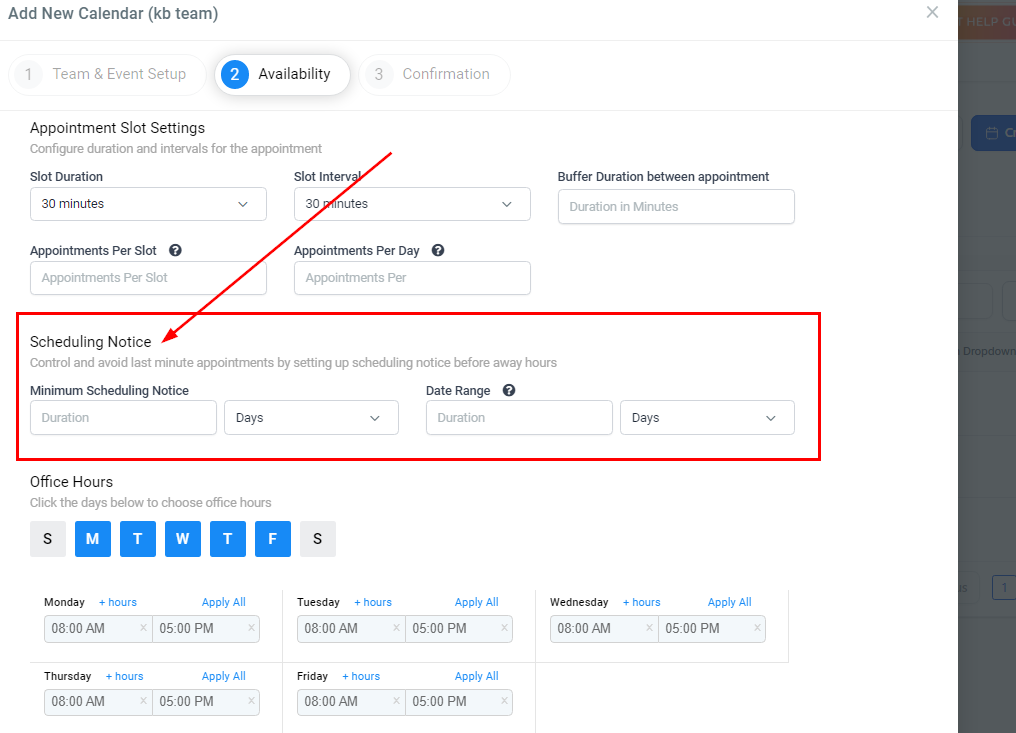
Scheduling Notice
-
Minimum Scheduling Notice Here is where you establish the time period for your minimum scheduling notice. You can choose between hours, days, weeks, or months. For example, if you choose 5 days, then nobody will be able to book an appointment within 5 days of your next appointment on your calendar.
- Date Range Events can be scheduled over the next few days. If you want to allocate a specific time range for your calendar to allow scheduling, you can do so here. For example, you can show appointments for the next 6 hours, 6 days, 6 weeks, or 6 months.
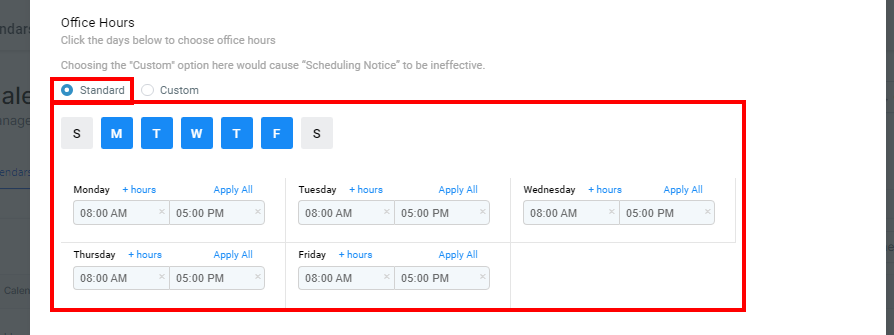
Office Hours
Here is one of the most important settings in this section, as it controls the availability time frames shown on your calendar on a weekly basis.
- Standard
- Days Of The Week Available By clicking any of these days of the week buttons, you can turn on or off which days you are available for people to schedule on your calendar.
-
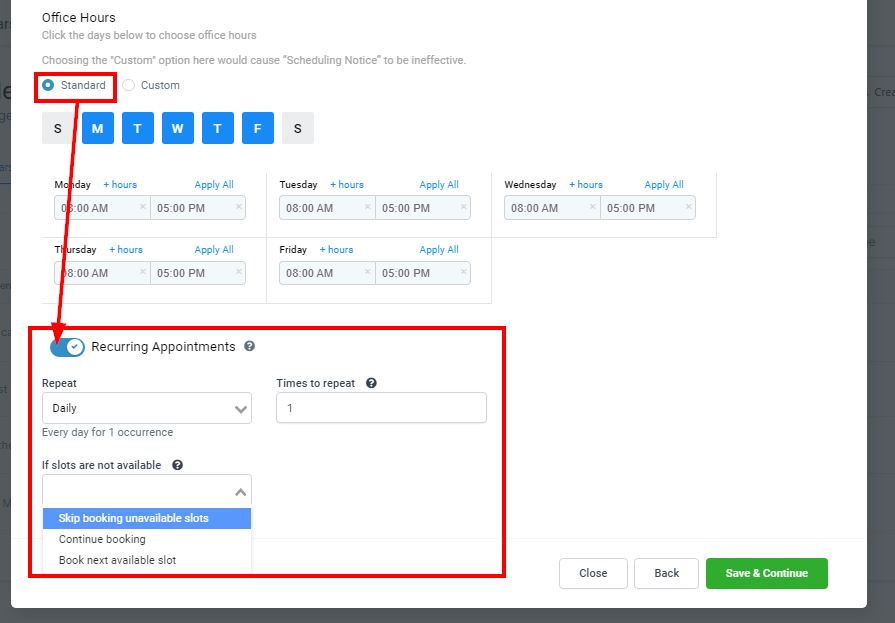
Recurring Appointments When you toggle this on, it allows Contacts to book multiple appointments when only one user is selected in the Appointment Distribution section then choose based on the below configuration;
-
Repeat Select how frequent you want this booking to be; daily, weekly, monthly, or custom. If you want just one occurrence for your repeat simply select daily.
-
Times to Repeat Input the No. of times (occurrences) the booking has to repeat. For example, 2 times a week.
- If slots are not Available Select the action you want to happen when slots are not available. For example, if you select "Skip booking unavailable slots" that means if there're 10 occurrences and only 6 slots are available, then the 6 available slots are booked and the 4 unavailable slots are skipped.
-
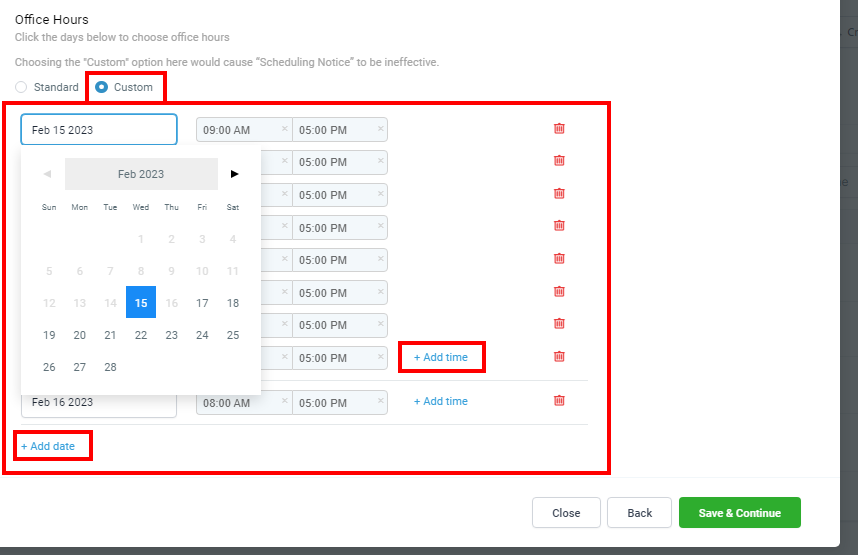
Custom When you click on the Custom button, it allows you to create specific dates and times for your appointments especially when you are booking appointments for a Webinar or Seminar series.
-
Add Date This allows you to add specific dates for appointments to your calendar.
- Add Time This allows you to choose a suitable time for the dates you selected. You can have as much time as you want for each selected date.
Note: Choosing the "Custom" option here would cause “Scheduling Notice” to be ineffective alongside the Recurring appointments.
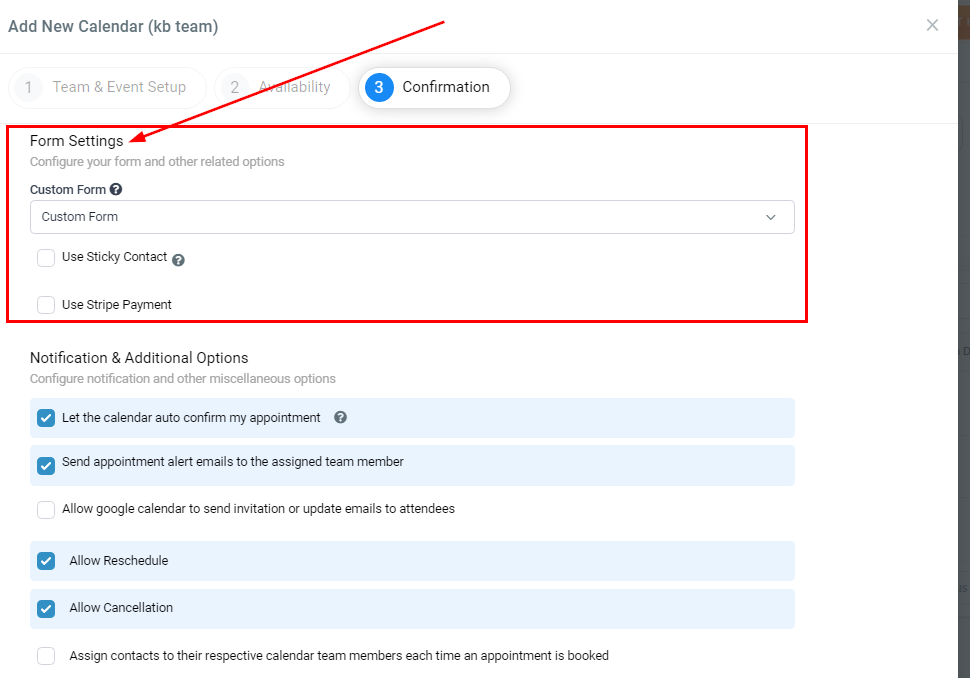
3. Confirmation
Form Settings
Every calendar has a basic form attached to it by default. This captures the name, email, and phone number, and gives space for a custom message.
-
Use Custom Forms If you've built a custom form in your CRM and would like to use it in this calendar, you can select it by using this drop-down tab.
-
Use Sticky Contact Turning on Sticky Contact will make sure that whoever is scheduling the appointment DOES NOT need to re-enter their contact information if they have already done so once before. This keeps the signup process smooth and straightforward.
- Collect Payments With Stripe If you are looking to collect payment at the time of scheduling appointments, you can do so here by clicking this checkbox and adding some pricing information.
Notification & Additional Options
This entire next section handles what happens after the appointment is booked in this calendar.
-
Auto-Confirm Appointments If you'd like your CRM to auto-confirm all appointments booked using this calendar, you can turn that on here. This will mark the appointment as "confirmed" and you can fire marketing automation using that confirmed status.
-
New Appointment Alert Emails To send email notifications when a new appointment is scheduled, add email addresses here. Add multiple email addresses in a comma-separated format (email 1, email 2, email 3, etc)
-
Allow Auto-Confirmation You can allow Google to send an invite email to all parties by checking this box. Google calendar invites are very professional and have a lot of detail. This email will also ask the user to re-confirm they are attending by selecting either yes, no, or maybe in the email.
-
Allow Rescheduling If you want to give the option to reschedule, check this box. It will send a rescheduling link along with the confirmation email. This can also be done manually in your CRM.
- Allow Cancellations If you want to give the option to cancel the appointment, check this box. It will send a cancellation link along with the confirmation email. This can also be done manually in your CRM.

Additional Appointment Notes
If you'd like to add additional notes to the appointment details, you can add them here. This is great for adding context to the appointment, requesting additional information to be brought to the appointment, or any other information that may need to be added after the appointment is booked.

Add Facebook Pixel
To track new appointment bookings with your Facebook Ads Manager, you can add your Facebook Pixel here.

Add Custom Code
If you have software developers on staff, or if you know how to write custom code, you can add it here. This is way beyond the scope of this guided tour.
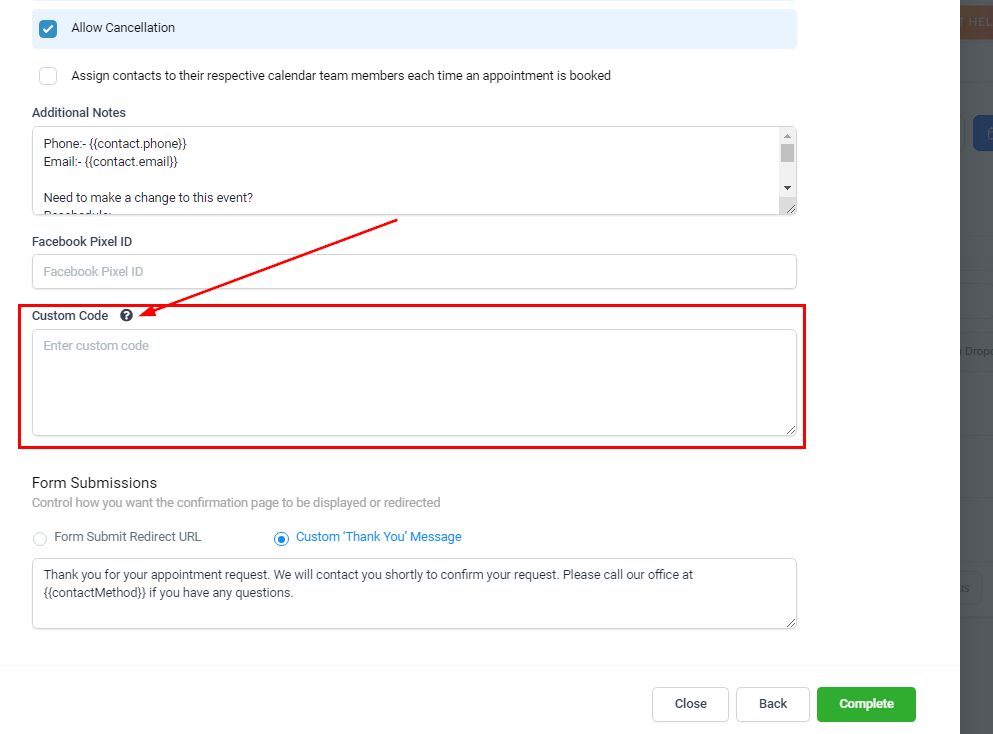
Form Submissions
Here you can choose what happens when your calendar form is complete. You can either choose to show the person a custom thank you message or you can redirect the person to a webpage of your choice.
