Contact Details
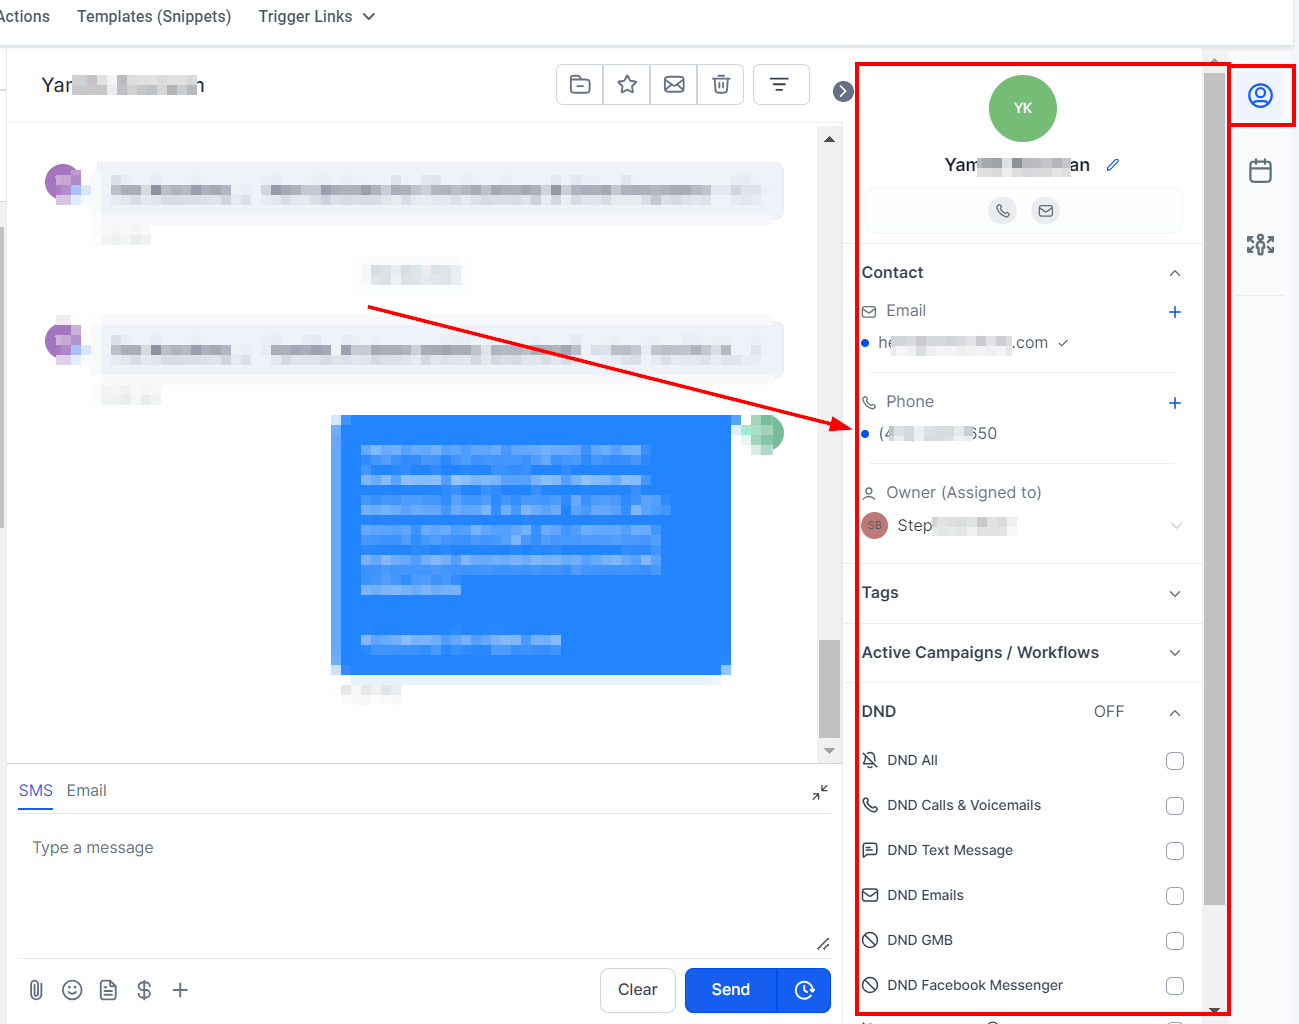
Upon opening a conversation, the contact details can be located on the right-hand side of the page. You can also perform certain actions such as creating a new opportunity for this contact, or scheduling them into an appointment all while having a conversation with them!
Contact
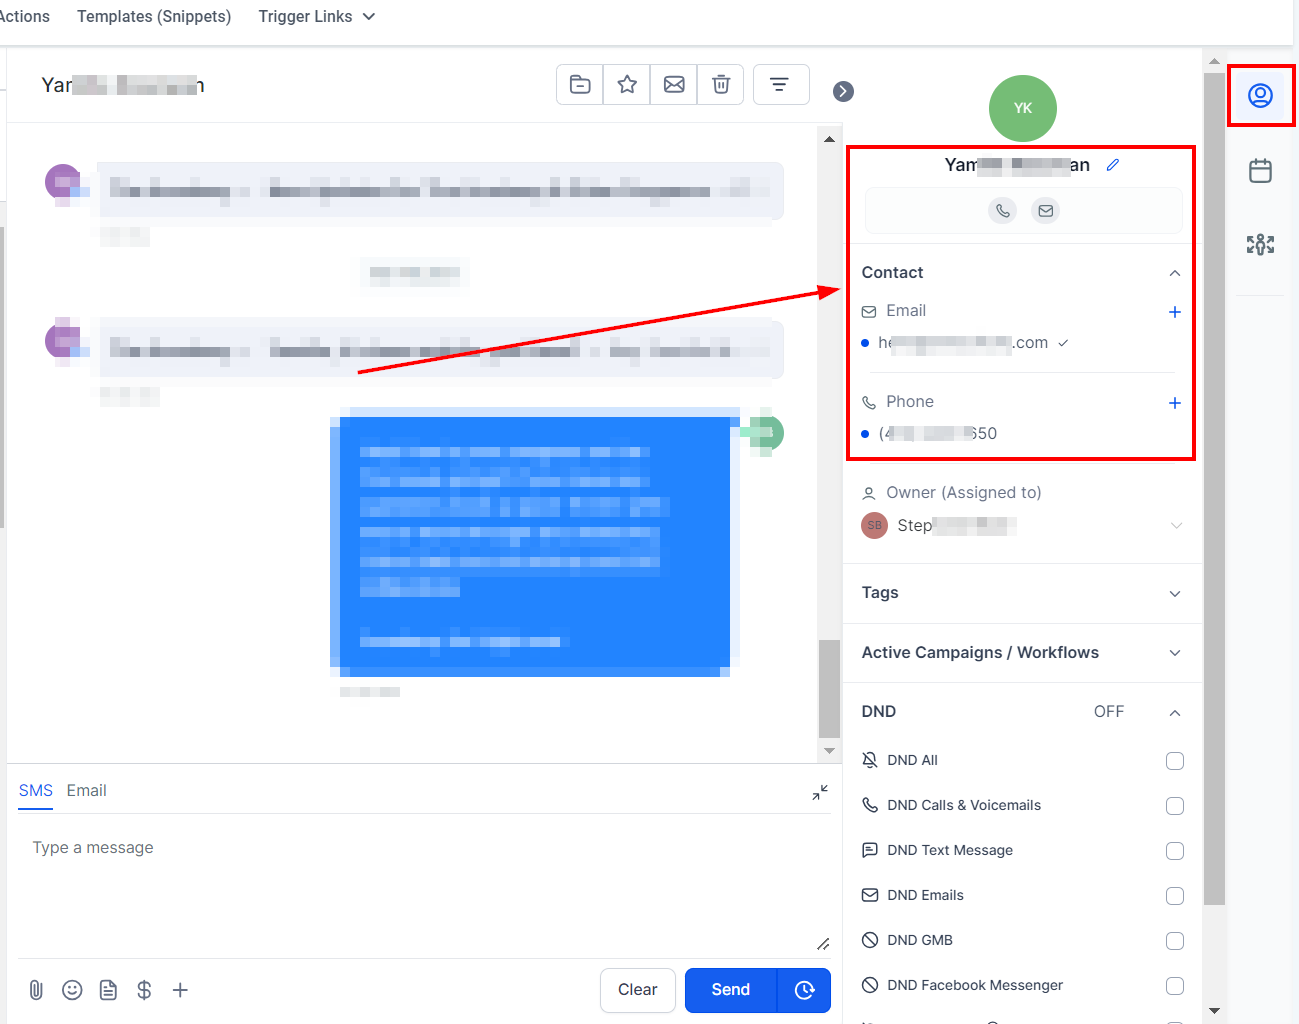
This section displays essential information such as the contact's name, phone number, and email address. Furthermore, it provides access to other elements like tags, Do Not Disturb (DND) settings, active campaigns, or workflows.
Contact Icon
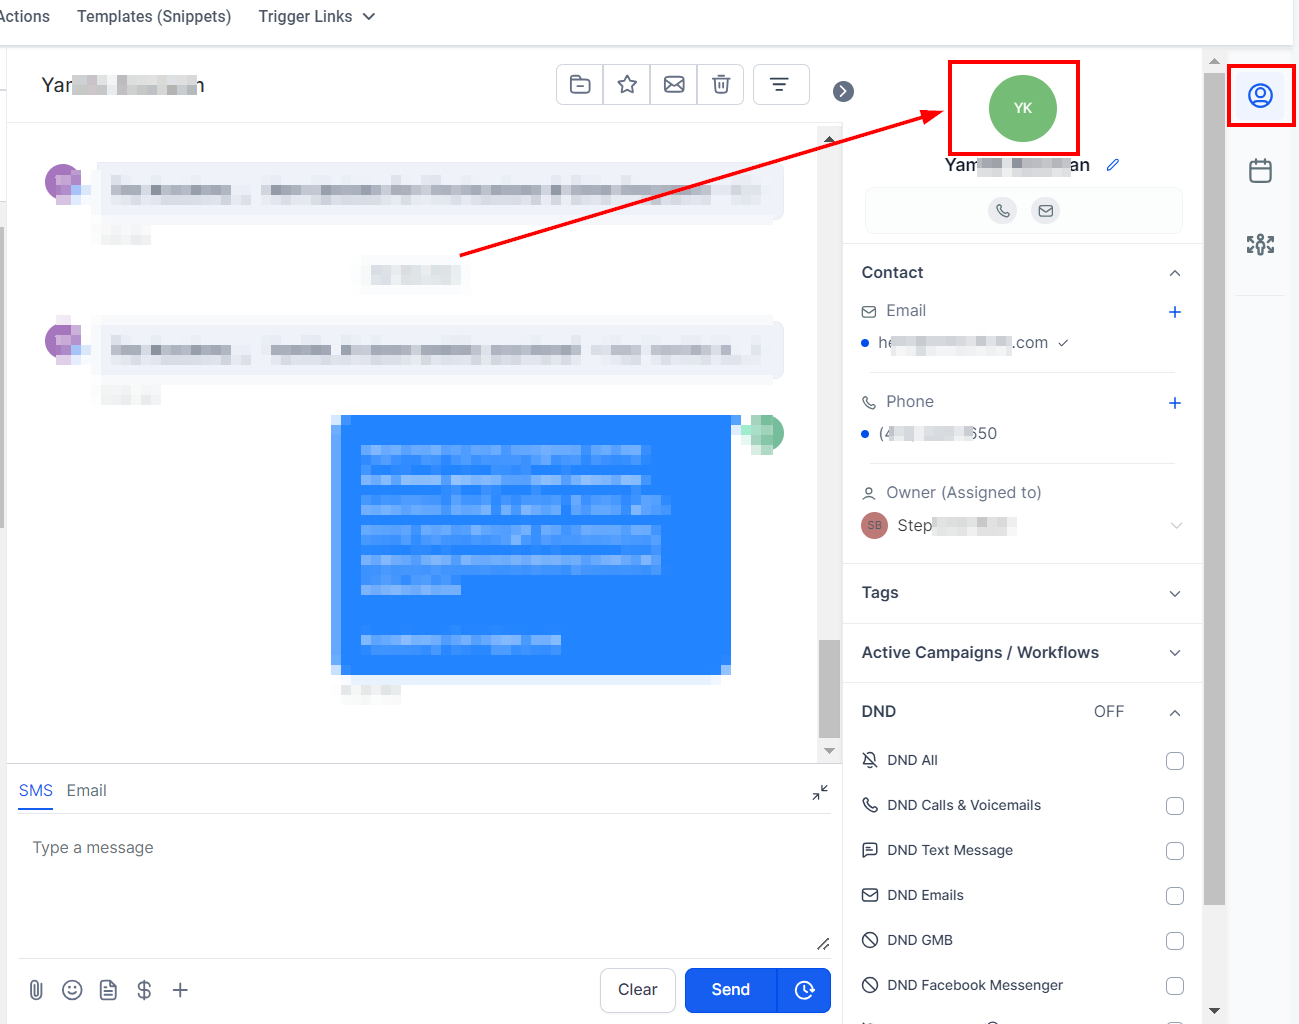
To view all of the contact details, including form/survey submissions and notes, click on the circle icon at the top of the contact card on the right-hand side of the page. This will take you to a new page where you can view all the details of your client and have additional fields where you can add customer information.
View and/or Edit Contact Details
To view or change a client's details, just look to the right of your conversation on the page. You'll find the customer's name, contact number, and email address there. Simply click on the desired field to edit it. Alternatively, you can choose who from your team should be in charge of them by clicking "Assign to" under their name and then selecting a team member from the dropdown list that appears.
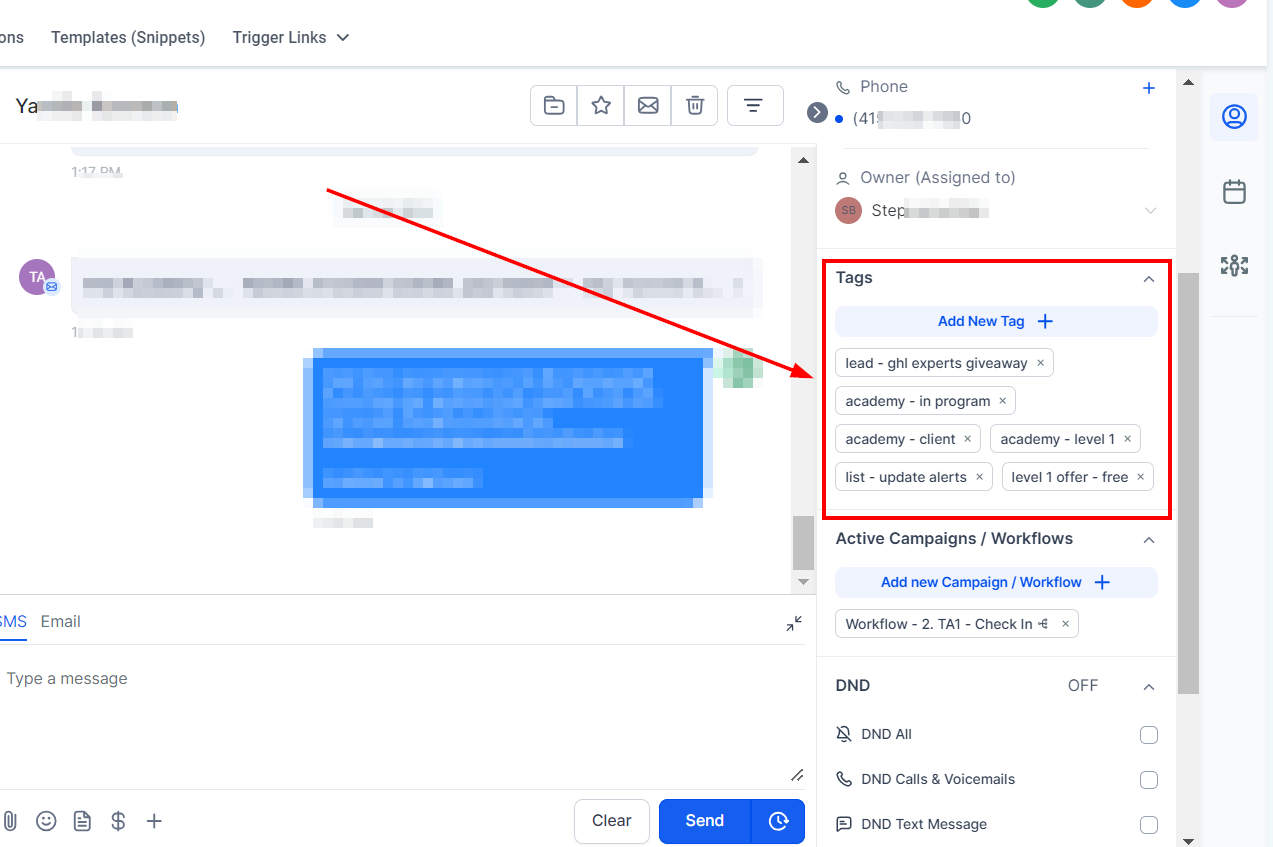
Add/Edit Tags
To add tags to a customer's details, simply click on "Add Tags” under the customer email on the right-hand side of your screen. Start typing in the tag you'd like to add and, if it already exists, it will appear in a drop-down beneath what you typed in. If the tag doesn't exist yet, hit the plus icon next to the desired tag and it will be added to your tags list.
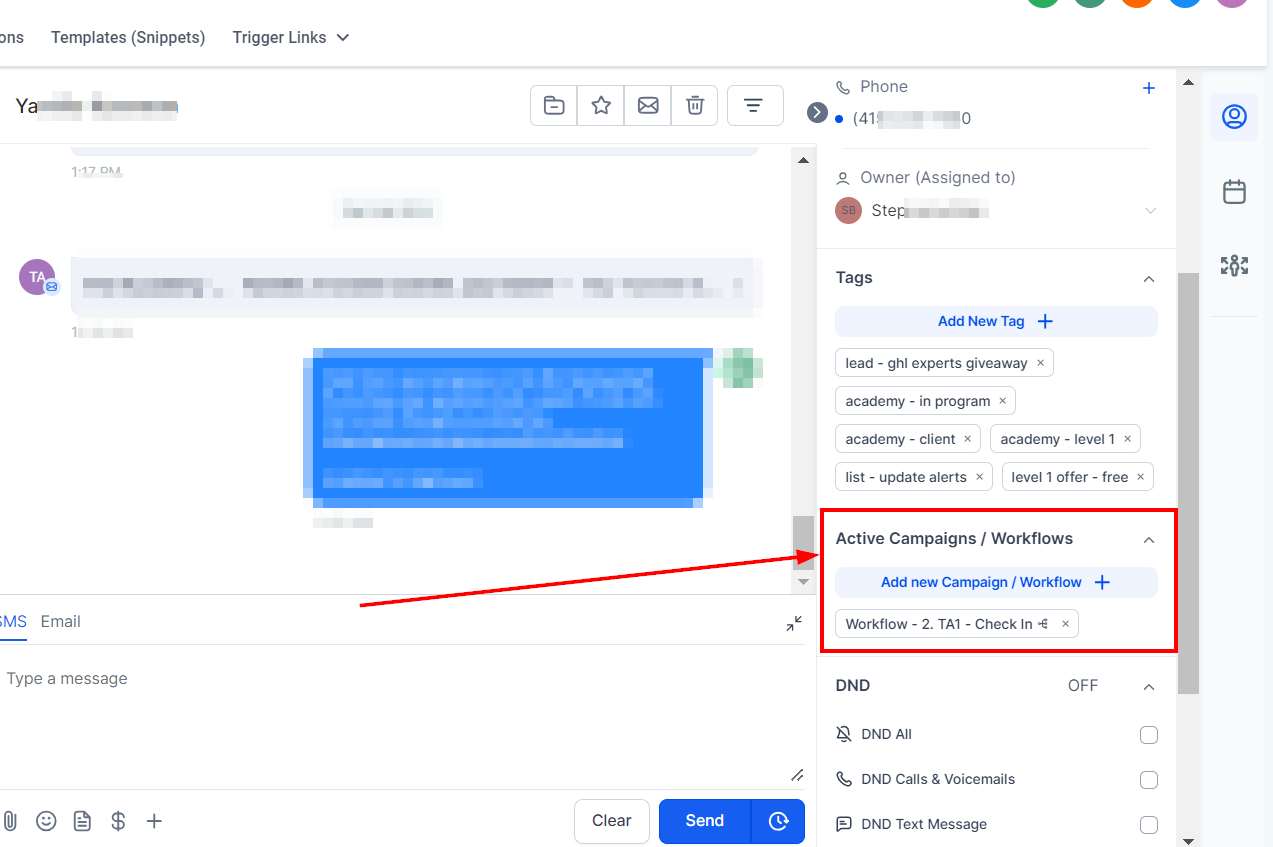
Workflows & Campaigns
You can view the workflows and campaigns the contact is currently in under the Active Campaigns/Workflows. If the contact is not currently active in a workflow or campaign, there will be none showing here. You can add the contact to a workflow or campaign by clicking on the “+ Add” button. A popup will appear for you to fill in the appropriate details.
List of active campaigns and workflows
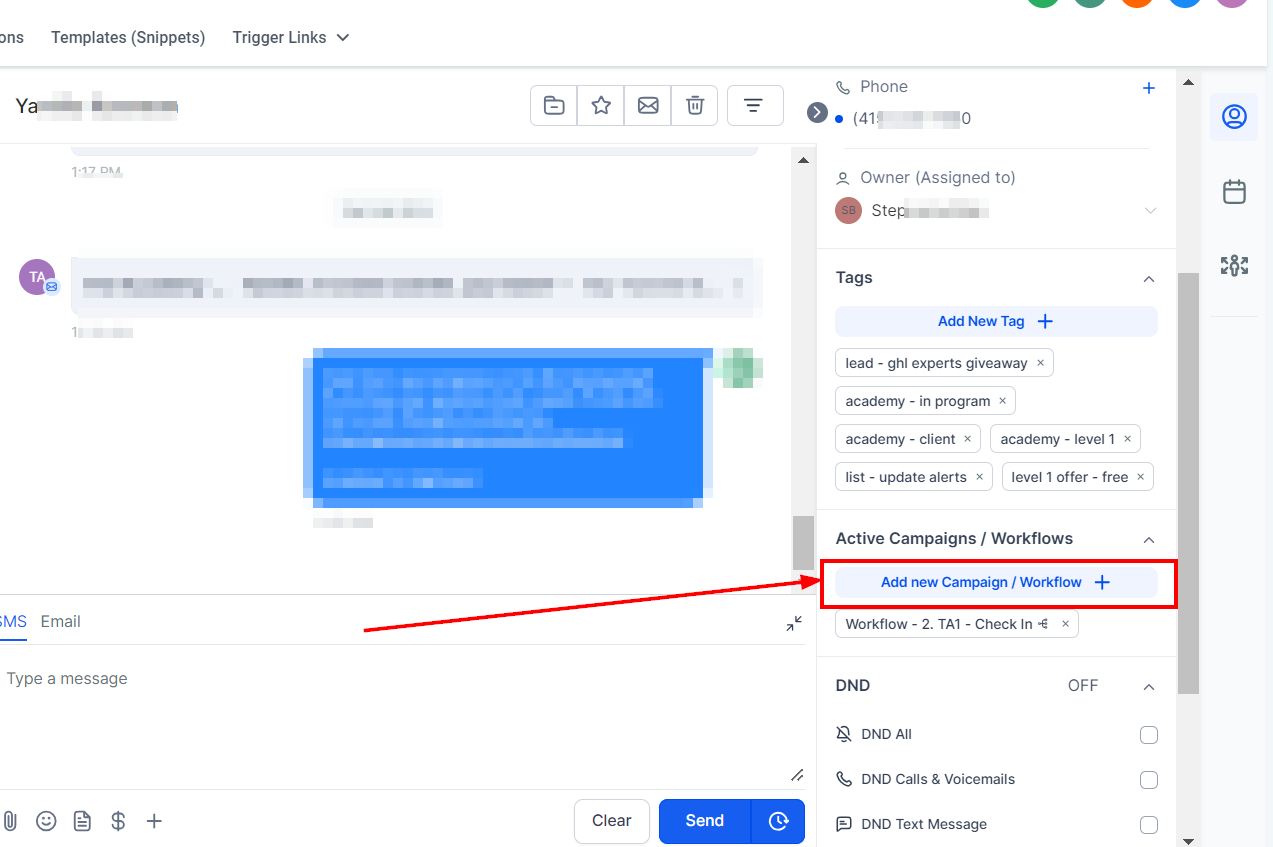
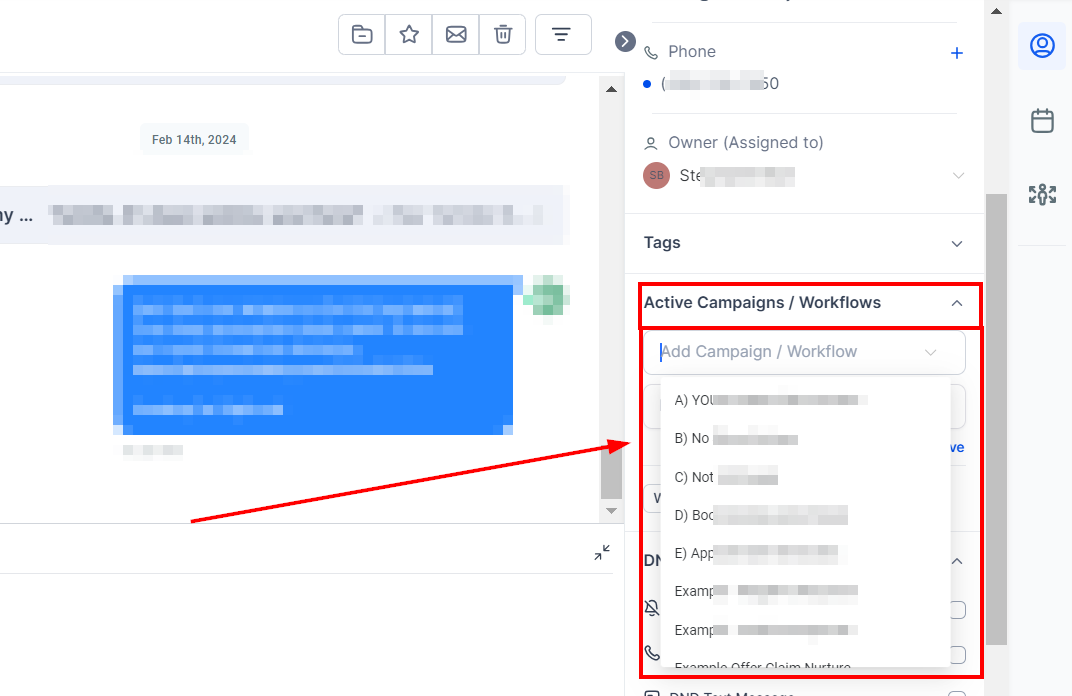
To quickly add contacts to campaigns and workflows, simply click this button.
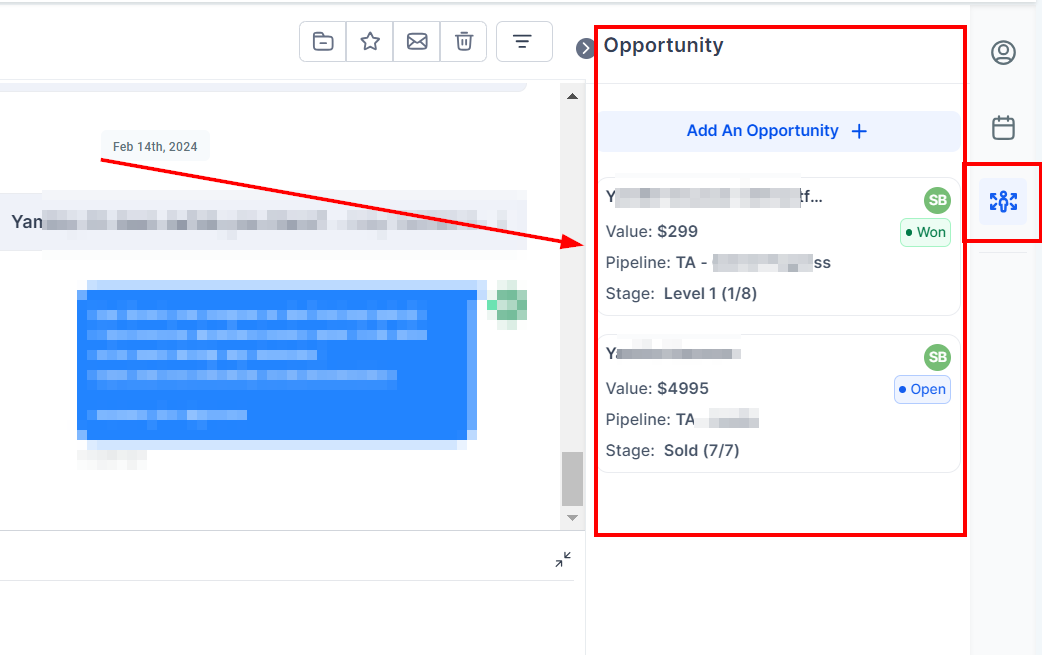
Current and Previous Opportunities
You can view current and previous opportunities for the contact where it says Opportunities in the contact card under Active Campaigns/Workflows. This will allow you to easily track where your customer is in your pipeline. If you would like to edit the current opportunity, click on the edit icon that looks like a pencil in a square. This will open a popup where you can view and update the opportunity.
Additionally, if you would like to remove an opportunity from the customer, you can click on the red Delete button on the bottom left of the Edit Opportunity popup.
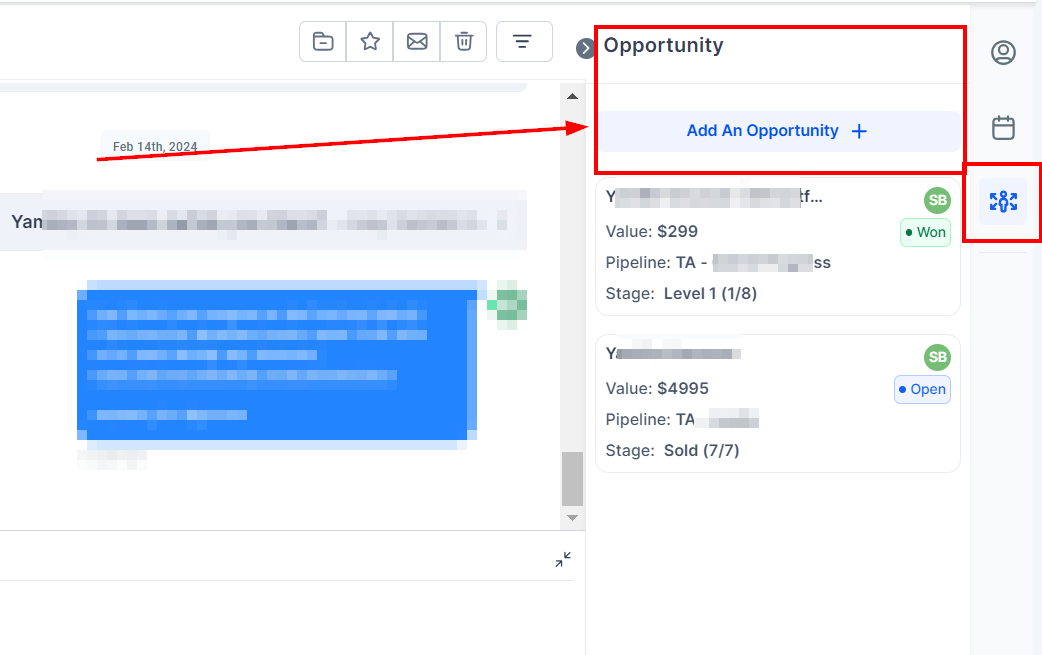
Create New Opportunity
If you want to create a new opportunity for your contact, click on the "Create Opportunity" button at the bottom of the right side of the page. A popup will appear and you can fill in the details. Begin with entering the Opportunity Name. Then select a Pipeline from the Select Pipeline dropdown and pick a stage from the Select Stage dropdown. Afterward, choose an opportunity status from the Status dropdown and if you have a value associated with this lead, add it in here too. Assign the lead to someone by selecting them from the Owner's dropdown and entering the source of opportunity in the Opportunity Source box. Click on the green Add button at the bottom right when you're done with details.
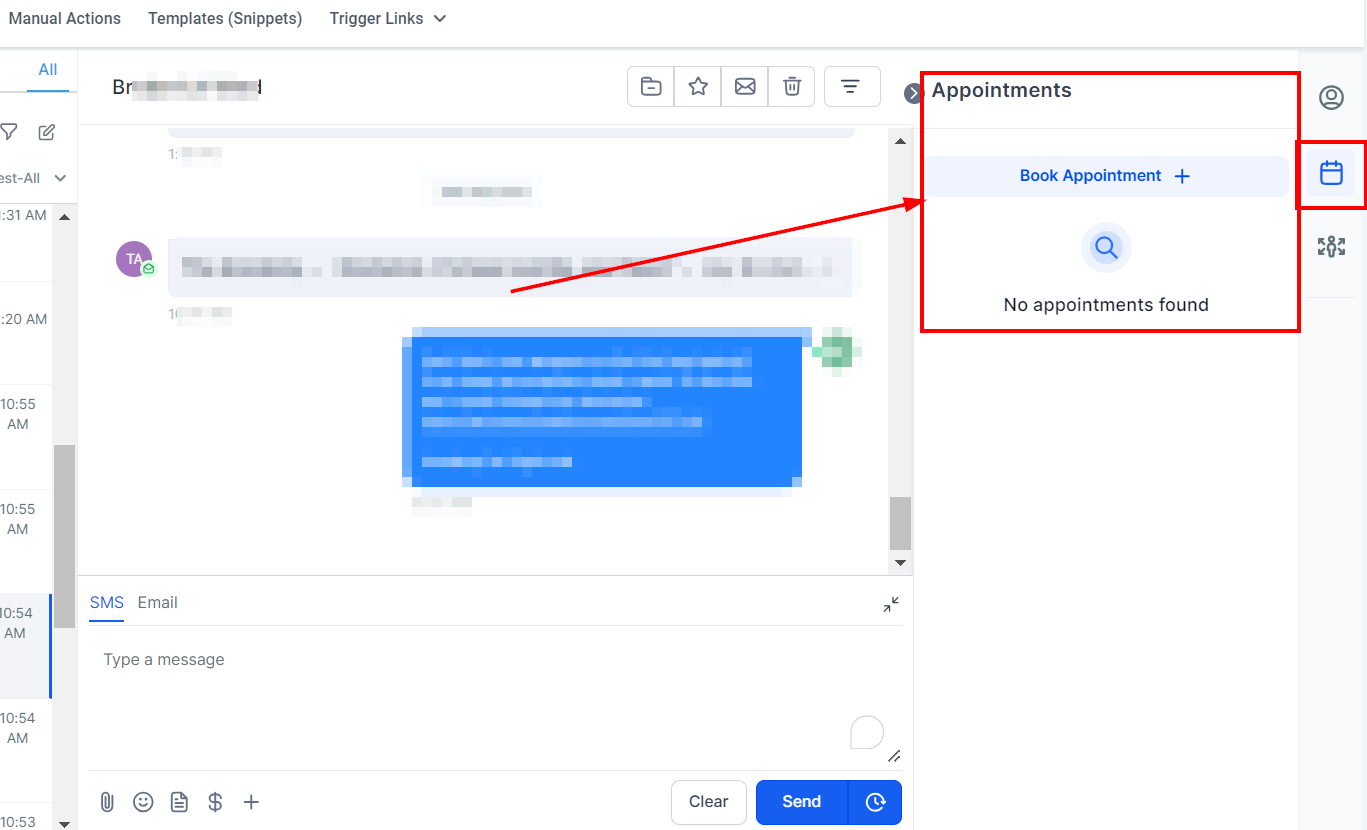
Schedule Appointment
To book an appointment for a selected client, click the blue "Book Appointment" button on the bottom of their contact card on the right side of your screen. A popup will appear and you can fill out the desired details.
First, choose the team calendar you'd like to assign it to, then pick the property timezone, date, and time slot. To set custom start and end times, click the "Custom" button in the Slot dropdown. Enter a title for your meeting and if you want to add a description or notes for it, click on Show Notes under Appointment Title. Also, you can select a Calendar Default or Custom location from "+ Additional Preferences". If it's Calendar Default, pick Confirmed or Unconfirmed from the Appointment Status dropdown. Otherwise, fill in your meeting location as well as choose Confirmed or Unconfirmed from request status.