
How to create an opportunity
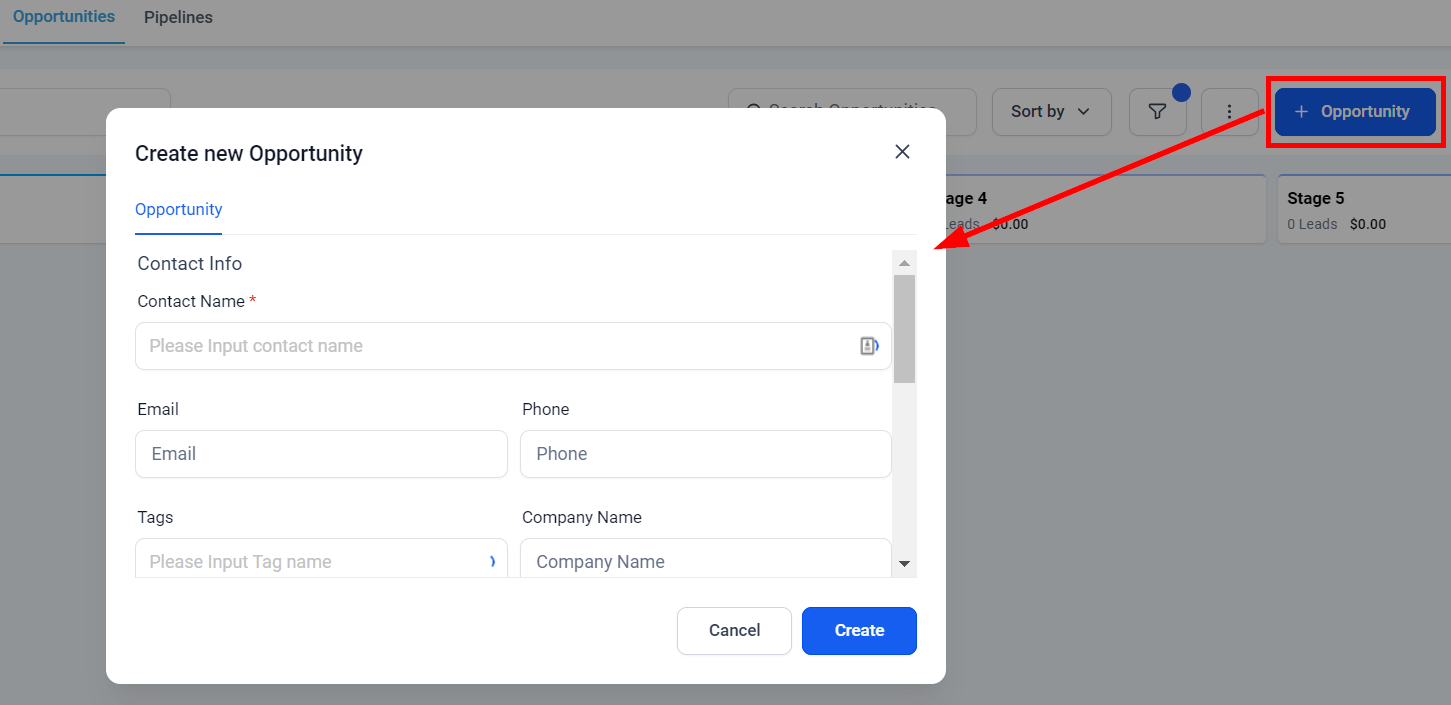
This section allows you to generate new opportunities manually from the beginning. While automation is commonly used to create opportunities, it is crucial to understand the process of crafting them from scratch as well. Creating opportunities for your clients makes keeping track of the sales process quick and simple. To commence the creation of a new opportunity, simply click the + New button and proceed with entering the required information.
Opportunity Tab
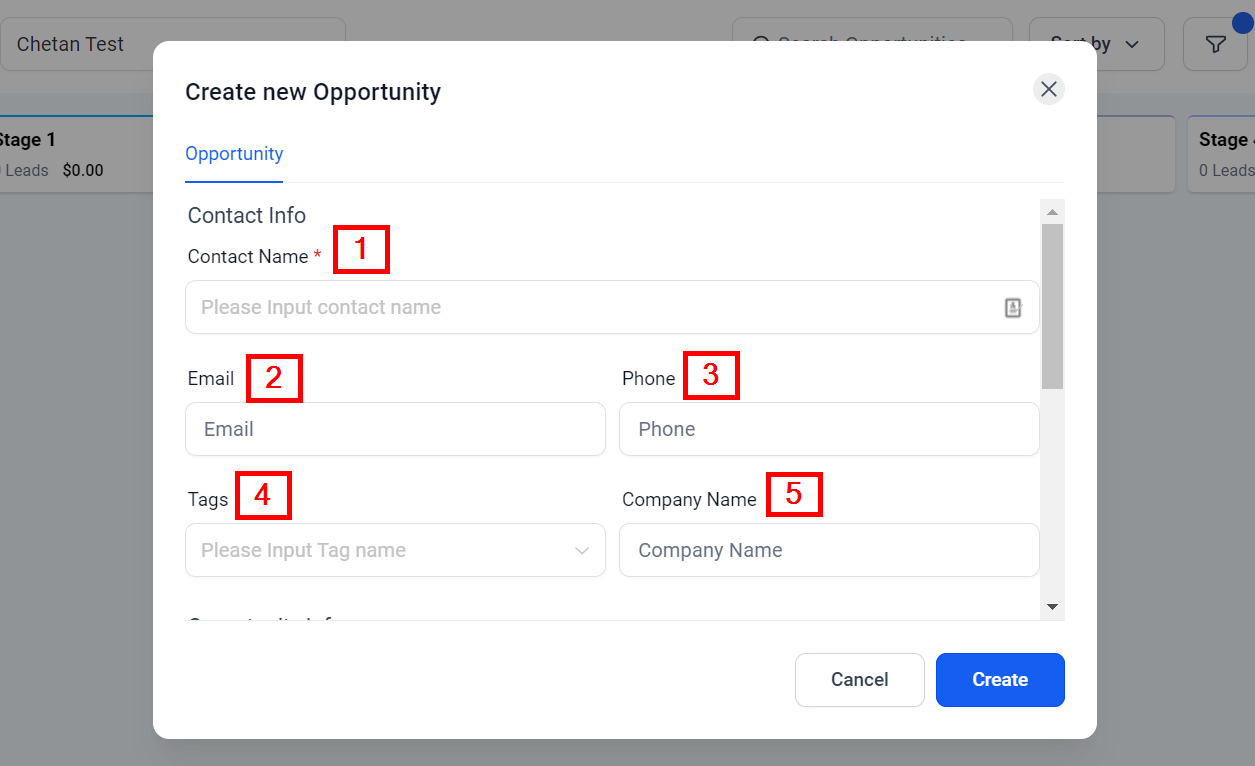
Contact Info
To create a new opportunity from scratch, you will use this panel
- Contact Name
Add or edit this opportunity's name.
Add or edit this opportunity's email.
- Tags
Add or edit this opportunity's tags.
- Phone
Add or edit this opportunity's phone number.
- Company Name
Add or edit this opportunity's company name.
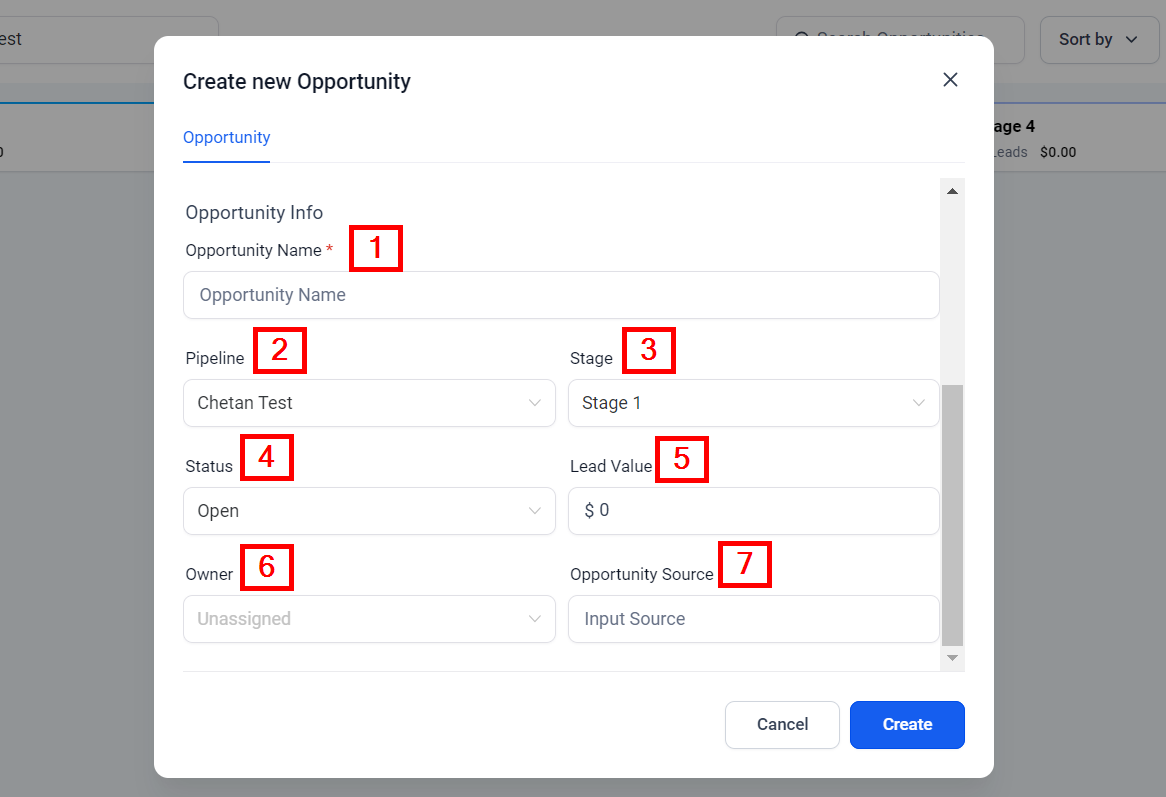
Opportunity Info
- Add Opportunity Name
You will need to give your opportunity a name. This is usually the full name of the opportunity or company name.
- Select Pipeline
Here you will select which pipeline you are allocating this new opportunity into. This is very important for organizational purposes and tracking data correctly throughout the pipeline.
- Choose a Pipeline Stage
You will need to assign the opportunity to a certain stage in your pipeline to show and track where they are at in the sales process.
- Select Status
You will need to assign the opportunity with a status. The status shows if the opportunity is still open, closed, or lost.
- Input Lead Value
In order to properly track conversion revenue and costs, you should add monetary values to the opportunities. By default, this is tracked in USD.
- Assign Owner/User
Here you can assign an owner or user to the opportunity. This is very useful when managing sales teams or Call centers so the agents know which opportunities are their responsibility.
- Opportunity Source
If you know where the opportunity came from, you can enter a source here to keep track of acquisition data.
Edit Opportunity
If you want to edit the opportunity, simply click on the contact card and it directs you to the edit popup.
Opportunity Tab
You can edit the opportunity tab you just created following this same format.
Book/Update Appointment Tab
If you would like to manually add or edit an appointment for a specific opportunity, you can do so here.
- Select A Calendar
The dropdown menu will allow you to choose the calendar from the list of calendars you have created within the system.
- Meeting Location
You can add a meeting location if you would like to. It is an option, not a requirement.
- Appointment Title
Here you can give it a title to the appointment. It's completely optional.

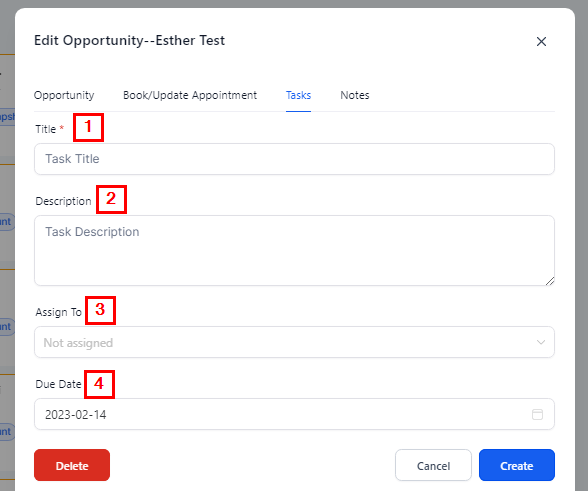
Tasks Tab
If you would like to manually add a new task for a specific opportunity, you can do so here.
- Task Title
Give your new task a title, so it can be easily identified.
- Task Description
The task description will mention the person responsible for the task and other details.
- Assign Task
You can assign any new task to a team member or leave it unassigned for all team members to see.
- Select Due Date
You will need to select a due date by which you would like this task accomplished.
Notes
You can view or edit notes in the notes tab on the far right of the Edit Opportunity tab. Here you can add important details related to the opportunity in your pipeline. These notes will show in the Opportunity Card as well as in the contact details within the contacts tab of your CRM.

Quick Card Action
These action icons at the footer of each card allow you to add and manage activities seamlessly.
- Call
When you click on the call icon it speed-dials the contact number
- View Conversation
When you click on this icon, it directs you to the contact's conversation thread.
- Add Tag
Click on this icon to add a tag to your contact card.
- Add Notes
This icon directs you to the Note tab where you can add any additional info about the contact.
- Add Tasks
When you click on this icon on a contact's card it allows you to assign any user in your team to a task specifically for that contact.
- Add an Appointment
Click on this icon to book an appointment with the contact.
- Added Tag
The "add tag" icon changes to this icon when tag(s) is added, it shows the number of tags added to each contact.
