
Recurring Invoices
Recurring Templates
A recurring invoice can be pre-scheduled to be sent automatically to customers who have purchased a recurring service or product. This process, often referred to as recurring billing or recurring invoicing, enables your customers to make automatic payments without the need for manual entry of payment information each time they conduct a transaction with you.
This feature is particularly beneficial for businesses that offer subscription-based products, as it allows you to send invoices periodically (e.g., monthly) for the upcoming payment due. To streamline this process and automate recurring invoice management, you can create and manage related settings within this section, ensuring efficient and accurate billing cycles for your customers.
We recommend using Stripe Connect with Invoices, in the event you do not wish to use Stripe Connect payments would need to manually record.

Search
This feature enables you to search for particular templates within the template list by providing specific information, such as the client's name or the associated business name. Once you input these details, the system will display the pertinent records that match your search criteria. Utilizing this search function allows you to efficiently locate the desired templates, streamlining your workflow and improving overall organization.

All Templates List
The All Templates List serves as the recurring template dashboard, displaying a comprehensive list of all templates created within your system.
Template Name - Shows the name of the template given to each template
Customer - Shows the Customer's contact information.
Last Issued On - This shows the last issue date of the individual template.
Frequency - Shows the frequency of each template such as monthly, weekly, or every 2nd date of every month, etc.
Amount - Shows the Invoice amount for the individual recurring invoice.
Status - This lets you know if an individual invoice is in draft mode or scheduled for later or already sent.

Actions Menu
The Actions Menu provides various options for managing each template in the list
View - Use this to view the recurring template/invoice.
End - Choose this if you wish to end an individual recurring invoice template from the list.
Delete - Select this option when you would like your system to delete the individual recurring template record.
Clone - You can duplicate your invoice by clicking on this button.

Invoice Details Tab
By clicking on Details, users can access information about the invoices sent and their status, displayed in the right panel.
Invoice Details
There can be four types of invoices status possible here, which will also be shown in the form of tooltips above the icons:
Sent: The invoice was successfully sent to the customer
Overdue: The invoice was successfully sent on time but has still not been paid by the customer
Paid: The customer has paid for the invoice
Not Sent: There was a system error in delivering the invoice to the customer, and the invoice needs to be sent again.


Create a Recurring Invoice
Open the "Invoices" tab under the payments section.
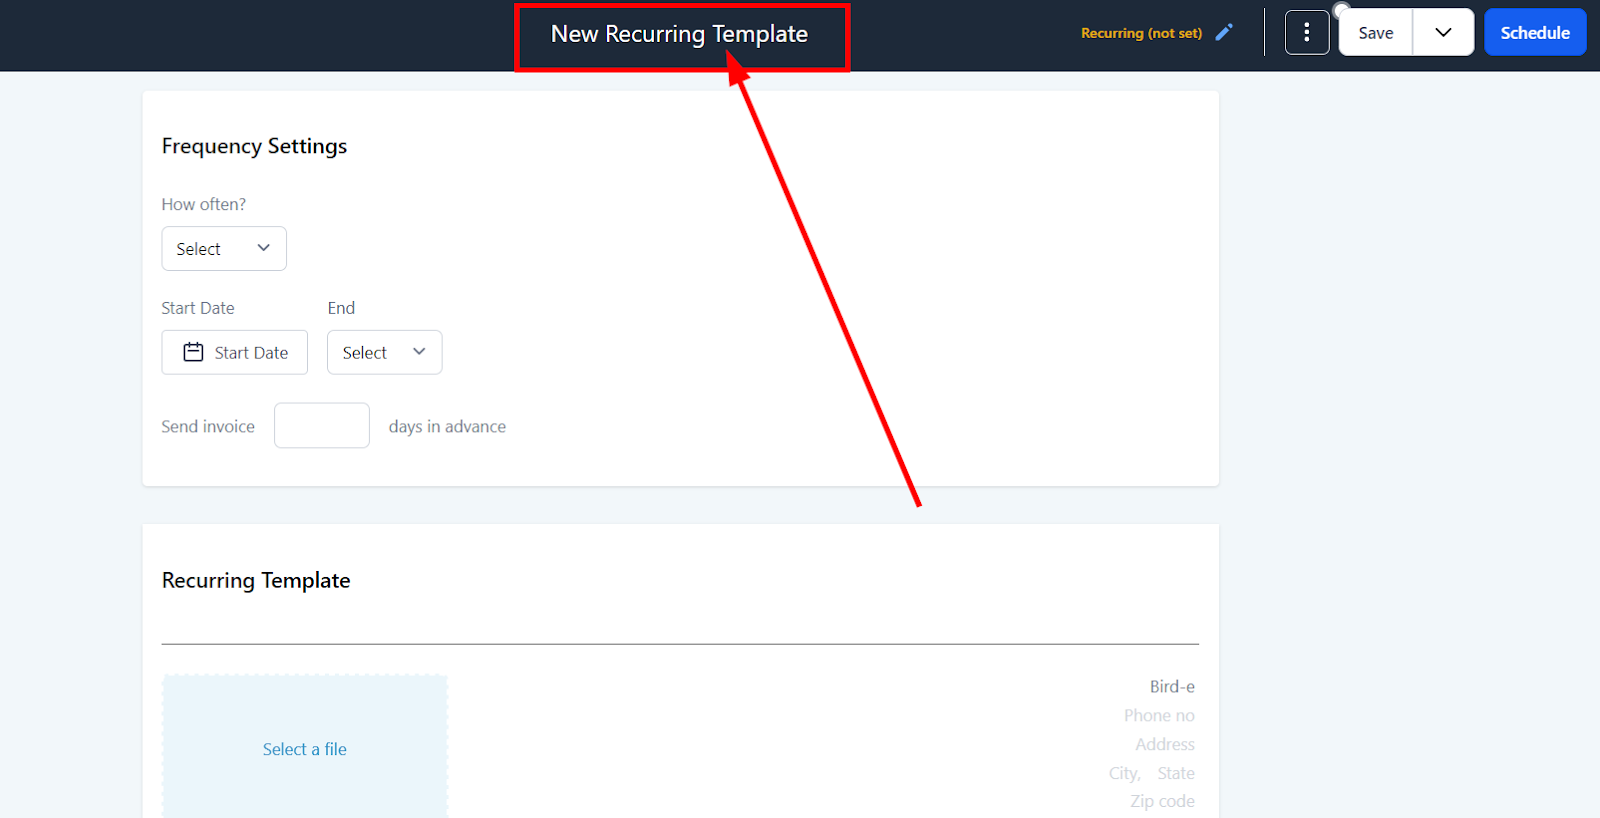
Select "New Recurring Template" by clicking New on the All Invoices or Recurring Templates page.

Editor's Page
Once you choose to create a new recurring invoice series, you'll be taken to the Editor's Page, where you can view and customize the new template.

Naming Template
To edit the name of your template, use the Naming Template option, which allows you to give your recurring invoice a unique and easily identifiable title.
Frequency Setting:
The Frequency Setting feature allows you to set up the frequency of your recurring invoice with advanced options.

Choosing Frequency
From the dropdown menu (see the image below) you can select if your recurring invoice is meant to be sent weekly, monthly, or at any specific time interval.
Daily - Use this to send the recurring invoice daily.
Weekly - Use this to send the recurring invoice weekly.
Monthly- use this to send the recurring invoice monthly.
Yearly - Use this to send the recurring invoice yearly.

Start Date
Allows you to select the start date of your recurring invoice with the calendar dates.

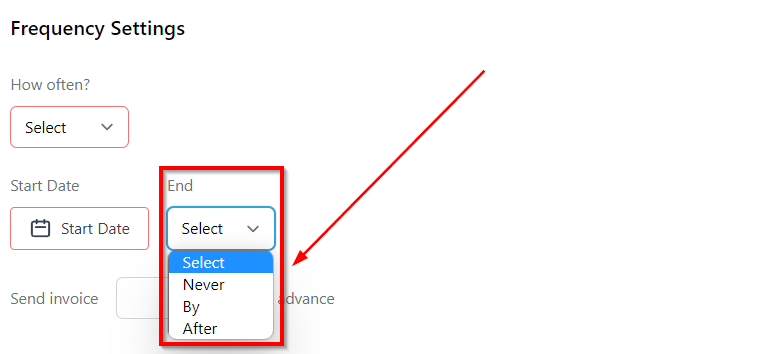
End Date
Use this to set the end date for your invoice series.
Never - If you're not sure when your recurring invoice needs to stop, you can choose this option.
By - This option will allow you to select the date on which the recurring invoice needs to stop.
After - If you would like to stop the recurring series after x number of occurrences, you can do so by using this option.
Advance Invoicing
Allows you to send the invoice before x number of the scheduled date to make sure your client is informed a few days before the payment date.

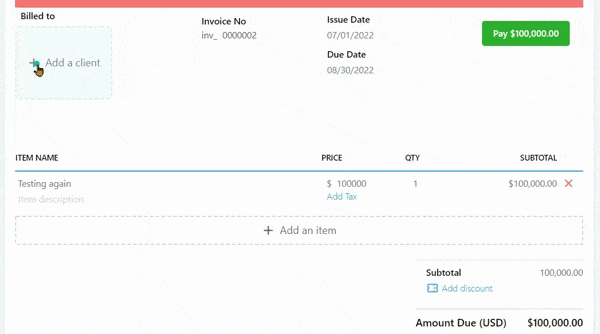
Adding Invoice Info
Here are the Six (6) pieces of information you need to fill out in the invoice before sending them out:
From Info Edit the “from info” by just clicking on the text and it will allow you to edit that information.
Image You can upload your business logo from here. Clicking on this option will open the media library of your CRM. If you haven't uploaded your business logo image in your media library yet, you will first need to do it so you can access the image to paste it on your Invoice.
Billed To Then you can add the client by clicking on the box and you can edit the Invoice number, Issue, and Due dates.
You can either select from your contacts or add new contacts.
Every time you create a new Invoice, the system generates a sequential number which is assigned to each invoice automatically. The invoice number can be edited provided the Invoice number you enter is either the next available number in the sequence or the number that was never utilized by the system.
Add an Item Click "Add an Item" to add the products that you have created on your products tab.
Once you add the product it will allow you to edit the price and quantity by clicking on them. If you need to know how to create products in your CRM, you can refer to the Products in Payments.
This allows you to add taxes for your products or services. Your clients can see the breakup of the total amount they are paying and the tax amount included in the final price.
It also shows the Subtotal for each of the items selected.
Subtotal The subtotal sum up the total amount from the items selected.
You can also add any discount you want here and the "Amount Due" shows the Final price you will be getting from your client.
Add Note/Terms Your preset Notes/Terms will appear here. You can edit this based on your specific goals for an individual invoice.


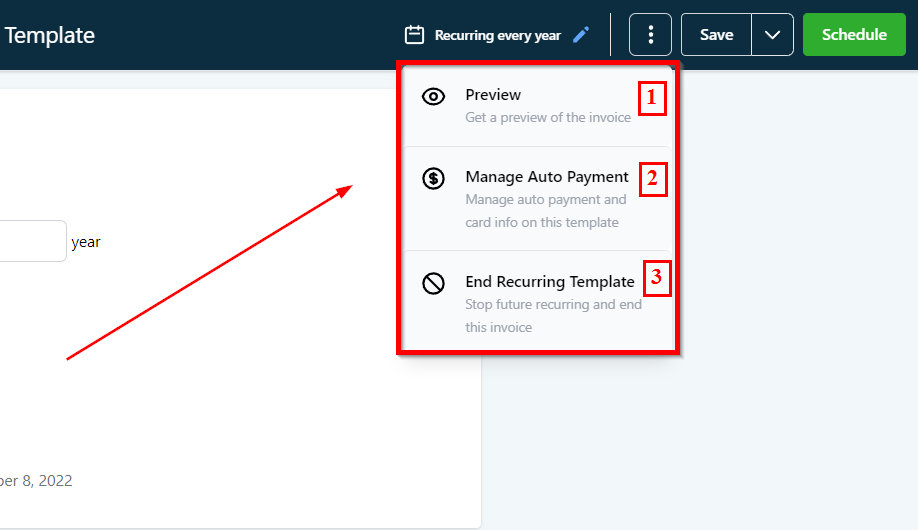
Template Actions Tab
The Template Actions Tab is accessible by clicking on the three dots menu, offering multiple options for managing your invoice template.
Preview - You can preview the template before sending it.
Manage Auto Payment - Provides you the option for Auto Payment.
End Recurring Template - Use this to stop future recurring and end the invoice.
Save & Close
Gives you the ability to save the changes you have made before closing the template.

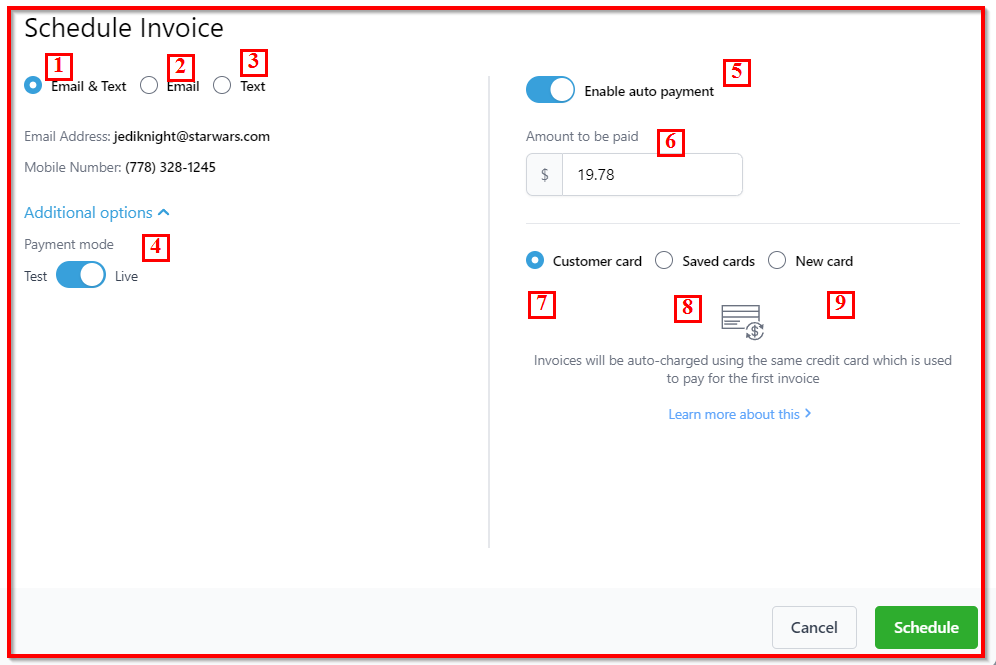
Invoice Scheduling
Here you can schedule your invoice with some additional options. Let's go over each option below;
Schedule tab
Use this tab on your invoice template to schedule your recurring invoice.

Scheduling Options
Here you can perform several actions concerning scheduling your recurring invoice.
Email & Text - Choose this if you need to send the invoice to your client's email and text both.
Email - Choose this if you want to send the invoice through email only.
Text - Choose this if you want to send the invoice through Text only.
Payment mode - Test mode will allow you to review your payment settings before you go live. Turn the toggle on or off depending on your objective.
Enable Auto Payment - If you would like to use the existing payment method used for a client on an ongoing basis without having to insert payment information every time, you can enable the auto payment option.
Amount to be paid - This shows the invoice amount payable by the client.
Customer Card - Select this if you have added the card information of the client as a payment method.
Saved Card - Choose this if you have saved the card information of the customer for payment purposes.
New Card - Choose this if you need to add new card information.
Add New Client
If you think you will need your contact information on an ongoing basis, it would be a good idea to create them as new contact in your CRM so you can always use them for invoice purposes.

Creating New Contact
Fill up the contact information and save the changes to be able to add your client's information as a new contact in your CRM so you access it as and when needed.
Full Client List
Here you can access your CRM contact list and scroll down to find out all of your existing CRM contacts to be able to use for your invoice.

Removing Client
Use this to remove existing contact information added to your invoice. If you have mistakenly added a wrong contact you can quickly remove it to add the correct one.

Editing Client Information Manually
Here you can add or edit your client's information manually. Useful when you have to modify some part of the client's information for Invoicing purposes.

Add Tax
This allows you to add taxes for your products or services. Your clients can see the breakup of the total amount they are paying and the tax amount included in the final price.

Selecting the tax
This table will show you the taxes you have created in your CRM system. you will have to check the appropriate checkbox to add the selected tax to your invoice.

Name of Tax
Here you will see the name you have given to the individual tax.

Tax Rates
Here you will see how much tax is applicable for each tax in the list.

Tax ID Number
This will show the Tax ID number you have created for each type of tax in the list.

Add Discount
The Add Discount feature allows you to apply a discount to the invoice, making it easy for you to offer special promotions or price reductions to your clients.

Setting Discount Rate
As shown in the image below, to set the discount rate, you can either enter a specific number to establish the discount percentage or use the toggle bar to select the desired discount amount.

Understanding Setting invoice frequency.
The below table explains different cases of setting invoice frequency:

Status and action types in recurring templates.
Please Note: Canceled and Completed invoices can be deleted only if no invoice has been sent out to the customer. Deleted recurring templates are not shown in the list view.