Proposals and Estimates
In this section, you will learn more about how to add proposals and estimates to Payments. It allows users to craft detailed outlines of services or generate succinct cost agreements through a versatile document builder featuring text, images, videos, tables, and more, as well as digital signatures and document state management, this feature continues to serve as a comprehensive solution for professional business communication.
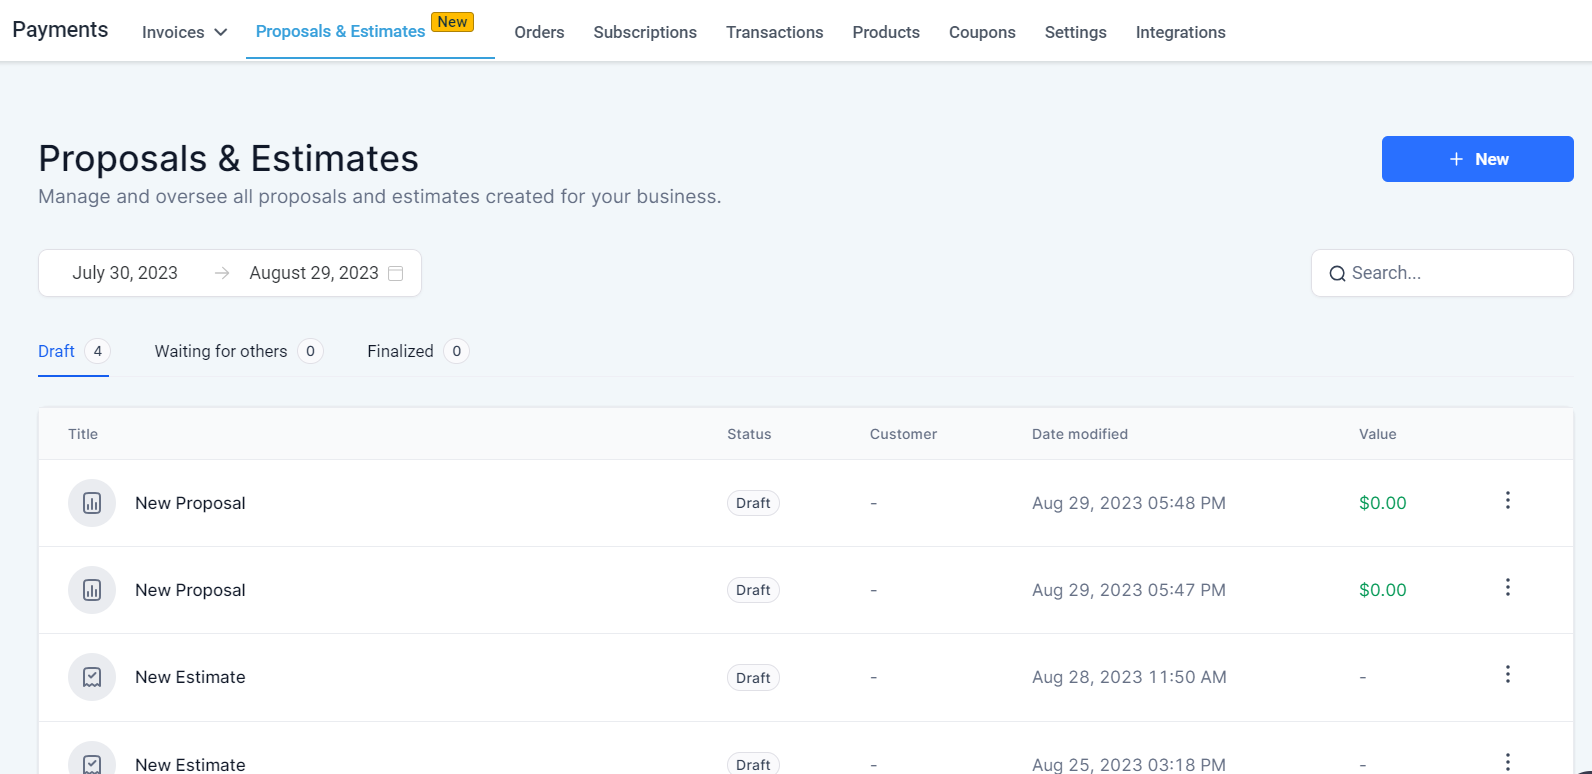
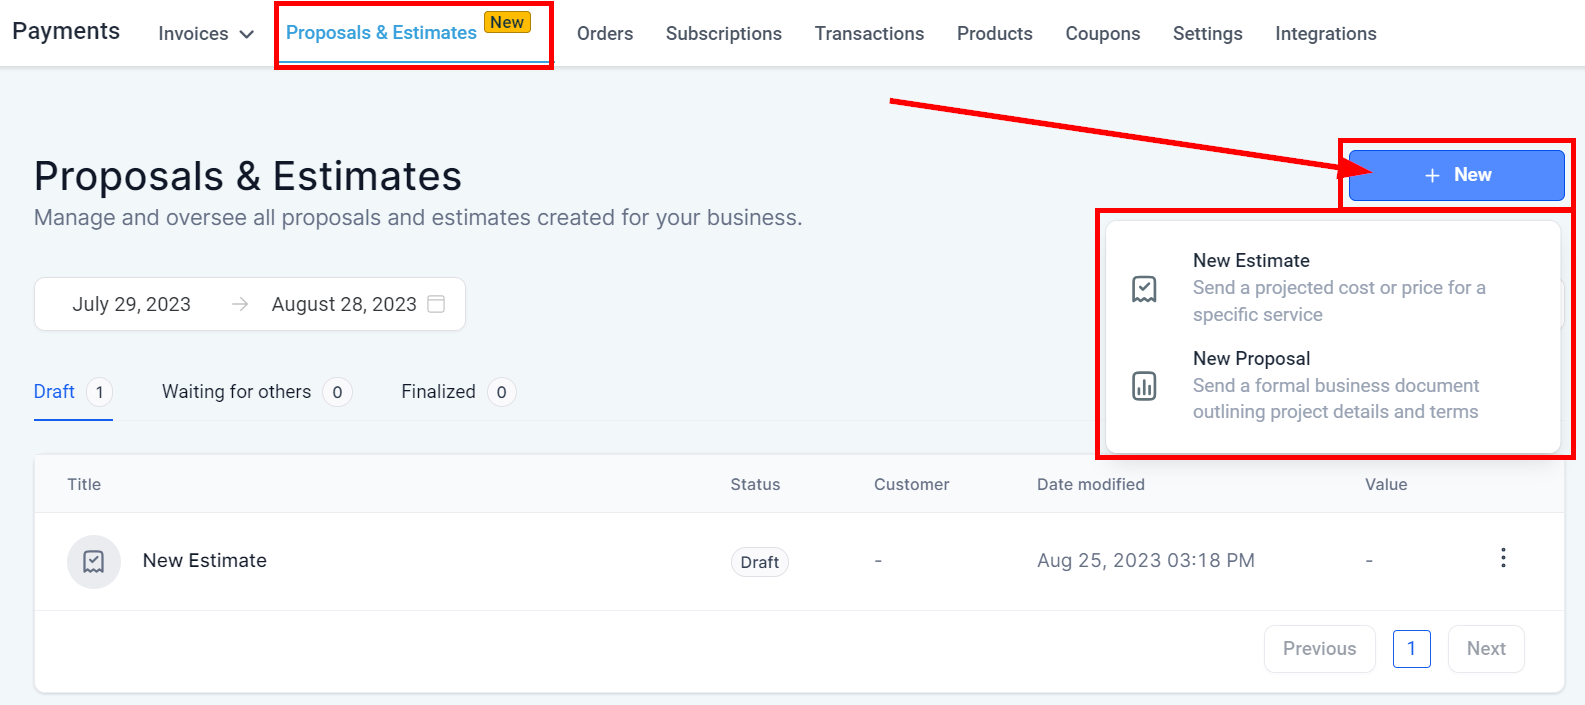
In the Overview, you can access and manage all your proposals and estimates here.
Filters
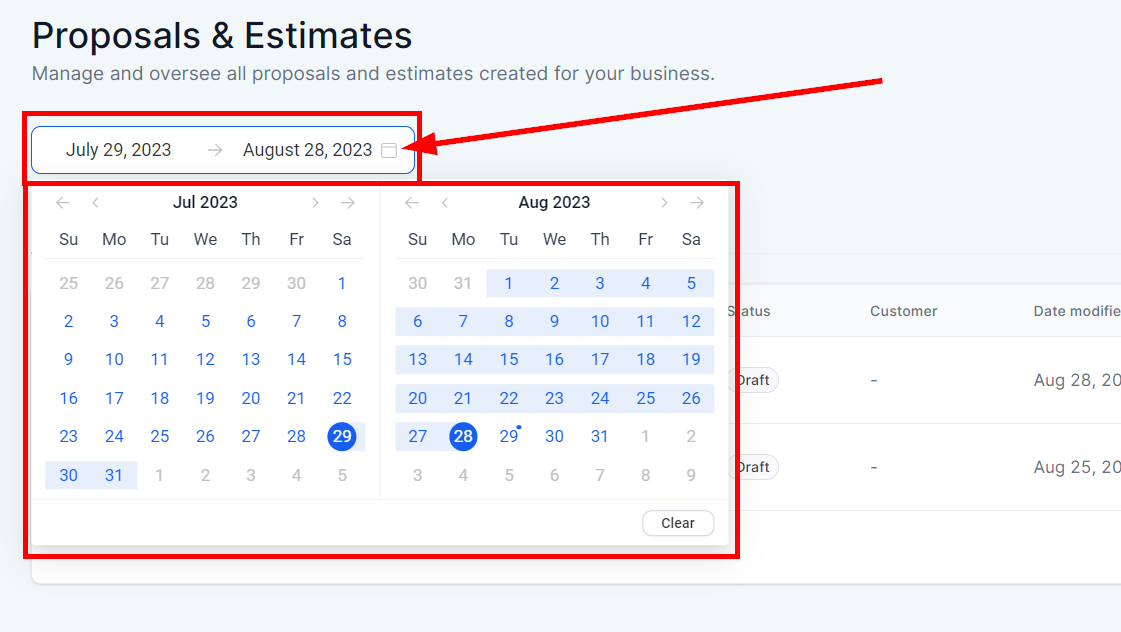
Date Range
You can filter your proposal and estimate using the date range.
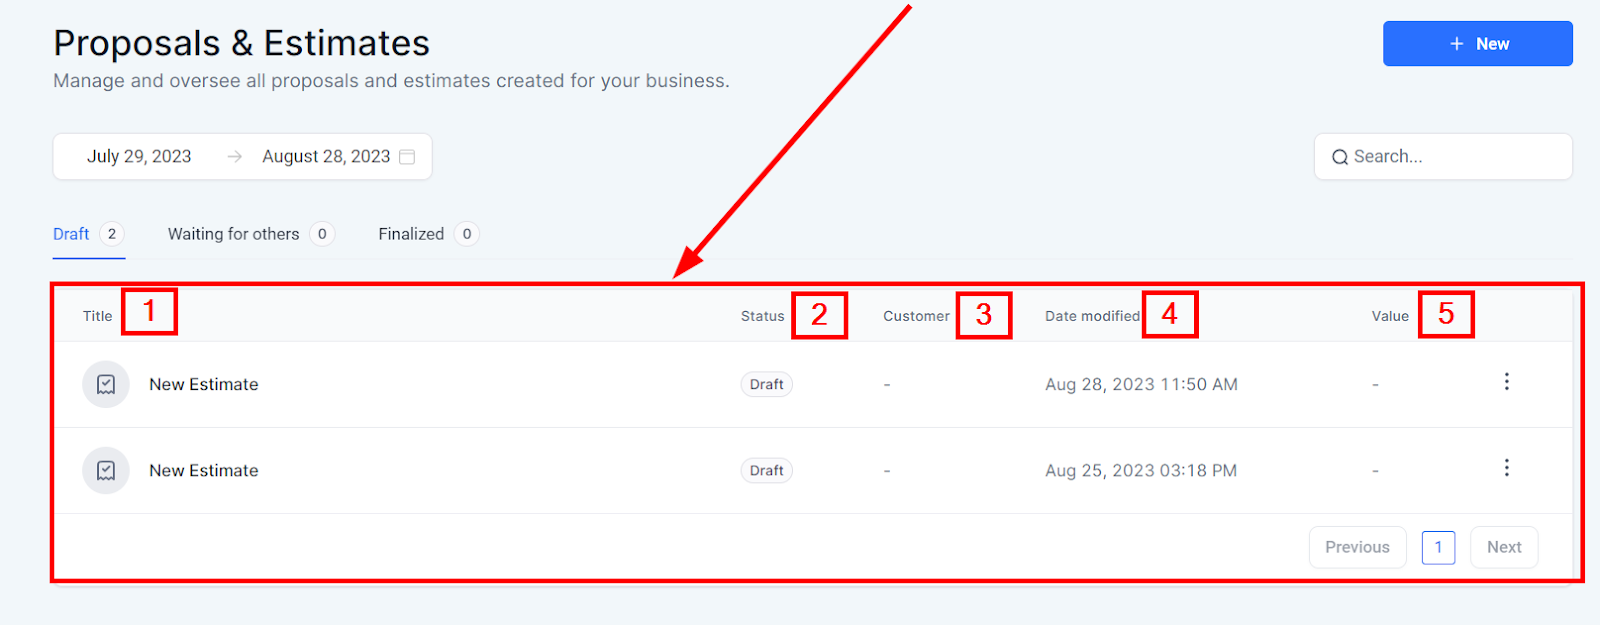
List
Title Here you can see the titles of your proposals and estimates.
Status You can view the status here; if it is in the draft, waiting for others, or finalized.
Customer You can see the contacts added to each proposal and estimate.
Date Modified The date and time of each proposal and estimate are shown here.
Action Menu
Edit: Modify the content, format, or details of a document.
Clone: Create an exact copy of a document, useful for repetitive tasks or templates.
Delete: Permanently remove a document, often subject to permissions and organizational policies.
Mark as Completed: Manually set a document's status as finalized, indicating no further action is required.

Estimate
It’s a simpler document that gives prospective clients a general idea of the costs of a project or service. You don’t need to include a detailed breakdown of how the job /task will be done, you just need the estimated cost for the job/task.
Create An Estimate
To start creating an Estimate, click on the “+Add” button and select the “Estimate” option.
Proposal
It’s a detailed document to convince prospective clients to choose a particular service or product. It outlines the specific problem or need of the client. It provides a comprehensive solution, including how the work will be carried out, the timeline, terms and conditions, and often a cost estimate.
Create a Proposal
Click on the “+Add” button and select “Proposal” to start.
Editor’s Page
Once you select the “Estimate” option, it directs you to the Editor’s page where you can start building your estimate or proposal.
Elements
Start by adding elements to your estimate. Drag and drop the element into the gray area.

Text Element
When you insert a Text element, it adds a Heading by default.
Text Editing Tools You can edit it to paragraphs or bulleted lists, and change the font style and size, line height, alignment, color, add custom values, etc. by using the Text editing tools above to style your text.
Properties Click on the Filter button to access the right sidebar where you can see the Properties.
Background Color: This is the color behind the text. Using contrasting colors for text and background can enhance readability.
Margin: Margins control the space around the text element. You can set different values for the top, right, bottom, and left margins to create various effects, such as centering or indentation.
Padding: This refers to the space between the text and its container's border. Adjusting padding can create effects like making the text look inside a button or a label.
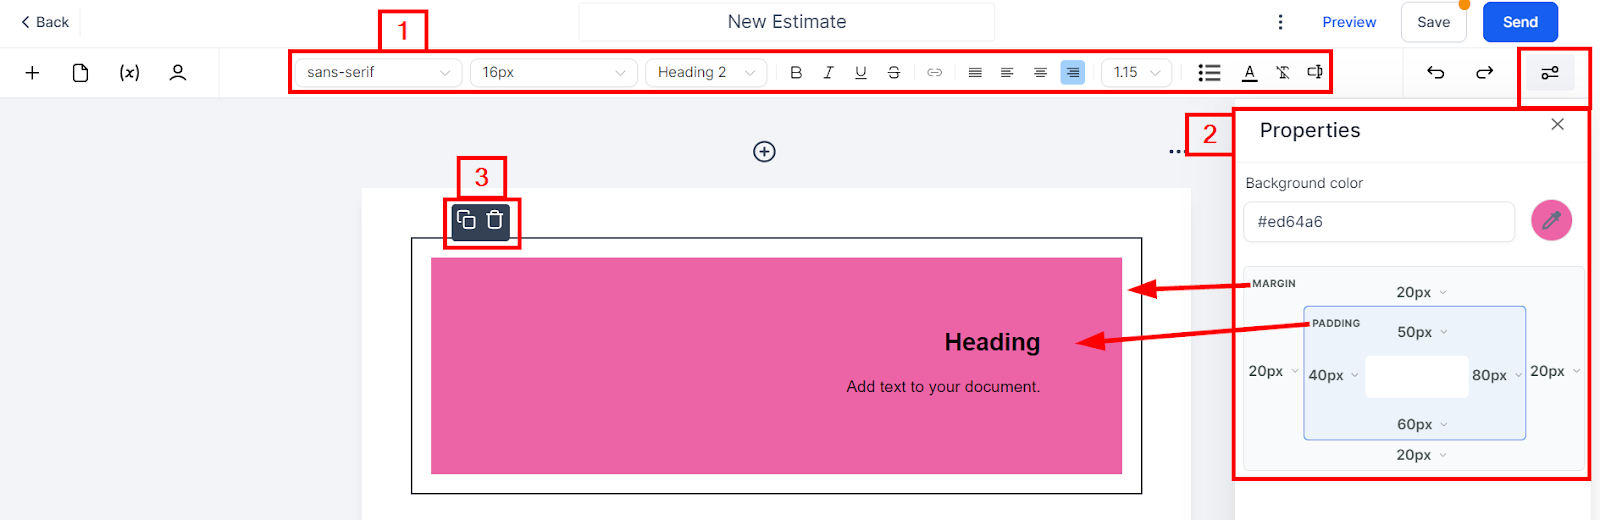
Image Element
Insert images for professional document building. An image can be fetched from the Media Library or a non-private image URL source.
Properties Click on the Filter button to access the right sidebar where you can see the Properties.
Image URL: This field is where you input the URL of the image you want to embed in the document. It should be a direct link to the image file itself, hosted online (or in the Media Library).
Align: This option allows you to align the image within the document. Common alignment options include left, center, right, or justified. Aligning the image correctly helps improve the document's overall layout and visual flow.
Image Effects: You can choose between Full Color and Black and white as color themes for your image. These effects can add aesthetic value to the document or emphasize certain aspects of the image.
Background Color: This option sets the background color behind the image. It might be used if the image has transparent areas or if you want to create a visual frame or contrast against the document's background.
Height & Width: These fields allow you to set the specific dimensions for the image, controlling how much space it takes up within the document. Adjusting these dimensions can help the image fit well with the surrounding text and other elements.
Margin: Margins control the space around the text element. You can set different values for the top, right, bottom, and left margins to create various effects, such as centering or indentation.
Padding: This refers to the space between the text and its container's border. Adjusting padding can create effects like making the text look inside a button or a label.

Video Element
Insert videos for better communication with the potential client.
Properties Click on the Filter button to access the right sidebar where you can see the Properties.
Video URL: This is the direct link to the video that you want to embed in your document. The video will be embedded and played directly within the document by pasting the URL here. Supported platforms for embedding include YouTube, Vimeo, Wistia, and Vidyard.
Background Color: This is the color that will be displayed behind the video. It can be defined using a hexadecimal color code (e.g., #ffffff for white). This may be useful if you want the background to match the theme of your document or if you want to create a specific visual effect.
Height: This is the vertical size of the embedded video in pixels (px). You can set it to define how much space the video will take up on the page vertically.
Width: This is the horizontal size of the embedded video in pixels (px). This setting defines how wide the video will appear on the page.
Margin: Margins control the space around the text element. You can set different values for the top, right, bottom, and left margins to create various effects, such as centering or indentation.

Table Element
Insert a table to better structure data inside the document.
Editing Tools You can edit it to paragraphs or bulleted lists, and change the font style and size, line height, alignment, color, add custom values, etc.
Properties Click on the Filter button to access the right sidebar where you can see the Properties.
Add Row Above: Insert a new row directly above the currently selected row in the table.
Add Row Below: Insert a new row directly below the currently selected row in the table.
Add Column Before: Insert a new column to the left of the currently selected column in the table.
Add Column After: Insert a new column to the right of the currently selected column in the table.
Toggle Header Row: Enables or disables the top row as a header, often changing its appearance to distinguish it from other rows.
Toggle Header Cell: Enables or disables the selected cell as a header, often changing its appearance to set it apart.
Delete Row: Removes the currently selected row from the table.
Delete Column: Removes the currently selected column from the table.
Merge Cells: Combines the selected cells into one larger cell, allowing for a customized layout within the table.
Split Cells: Divides a merged cell back into individual cells.
Background Color: This allows you to set the background color for selected cells, rows, or the entire table.
Border Color: This allows you to set the color of the borders for selected cells, rows, or the entire table.
Margin: Margins control the space around the text element. You can set different values for the top, right, bottom, and left margins to create various effects, such as centering or indentation.

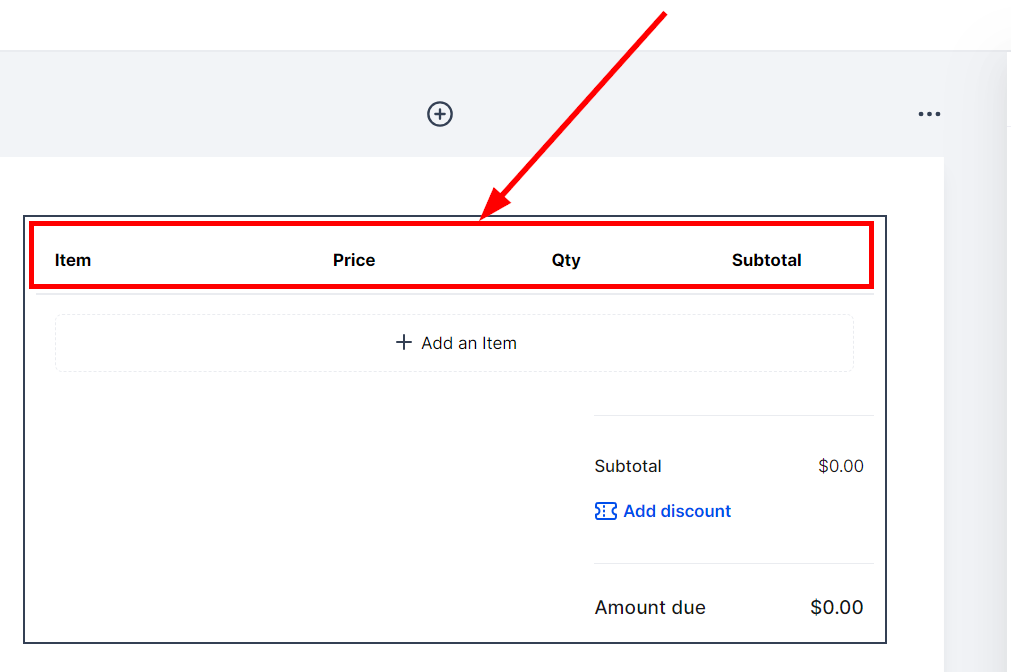
Product List Element
The product list offers a list of services offered and adds taxes and discounts.
Properties
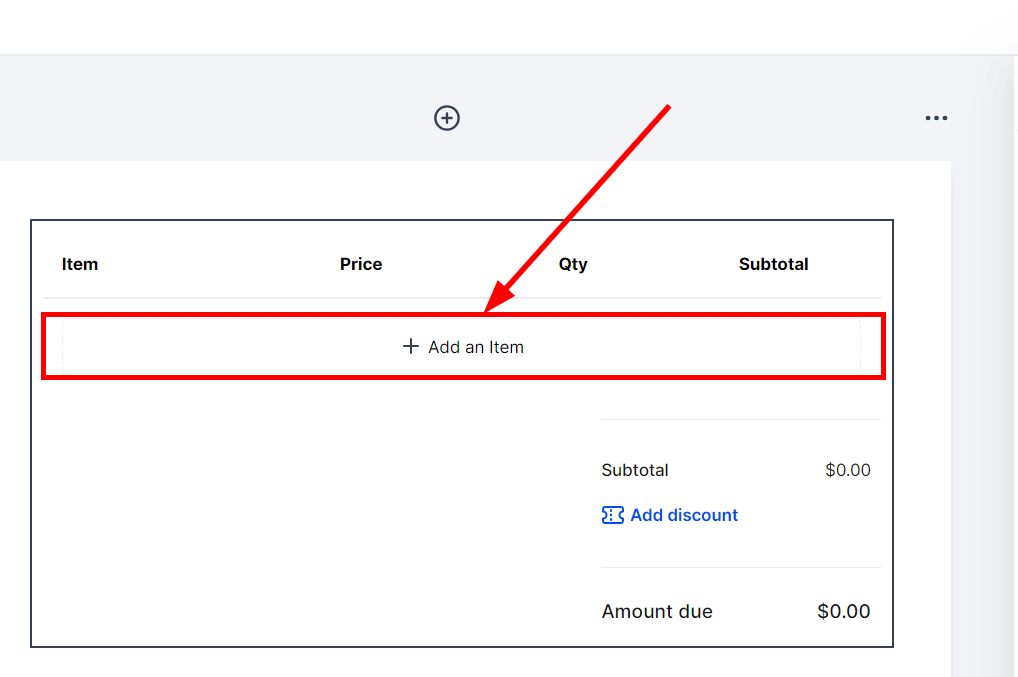
Create a New Item: This section provides the ability to define a new product or service, with fields for:
Product Name: The name of the new product.
Product Type: The category or type of the new product.
Price Name: A label for the specific pricing option.
Amount: The individual price for this product.
Save for Later Use Checkbox: An option to save this newly created item for future use within other documents, storing it along with other products and prices in the CRM.
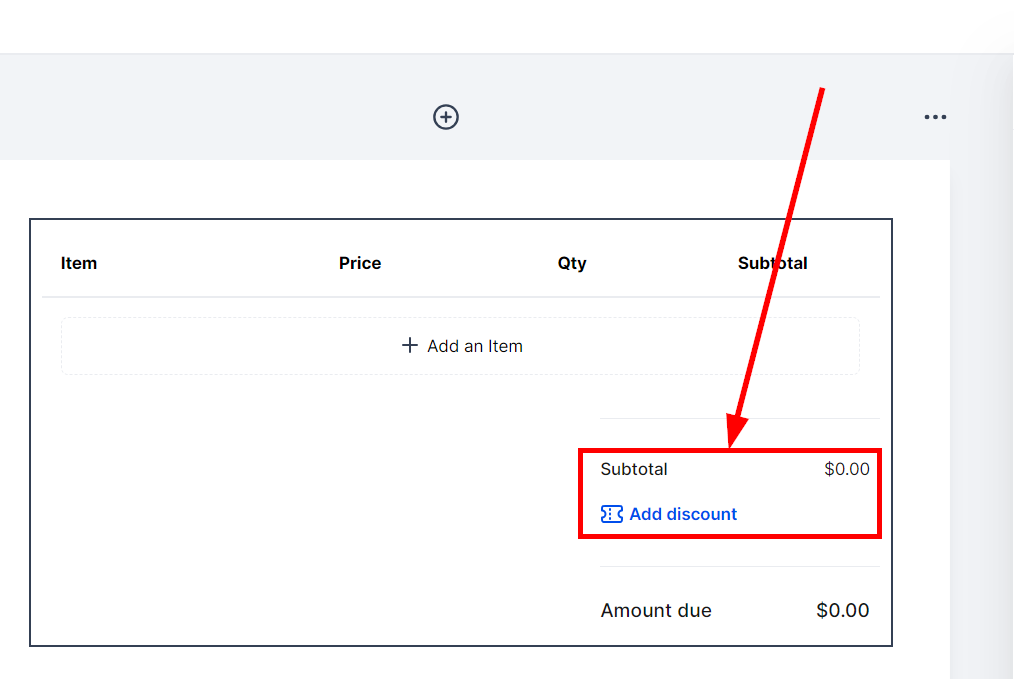
Subtotal: This field calculates the total cost for all listed items before any additional charges or discounts.

Add Discount: This option allows the application of a discount to the subtotal, affecting the final amount due. The "Add Discount" feature in the context of a proposal or estimate document provides a way to reduce the subtotal amount by either a fixed monetary amount or a percentage. Here's how the options work:
Custom Amount: By selecting this option and entering a specific monetary value, you can directly reduce the subtotal by that amount. This might be useful if you want to offer a specific cash discount, such as $50 off.
Percentage: This option allows you to reduce the subtotal by a certain percentage. You can either type in the desired percentage or use a slider to choose the percentage. The percentage must be between 0 and 100, inclusive. This kind of discount might be used to offer a seasonal promotion, such as 10% off.
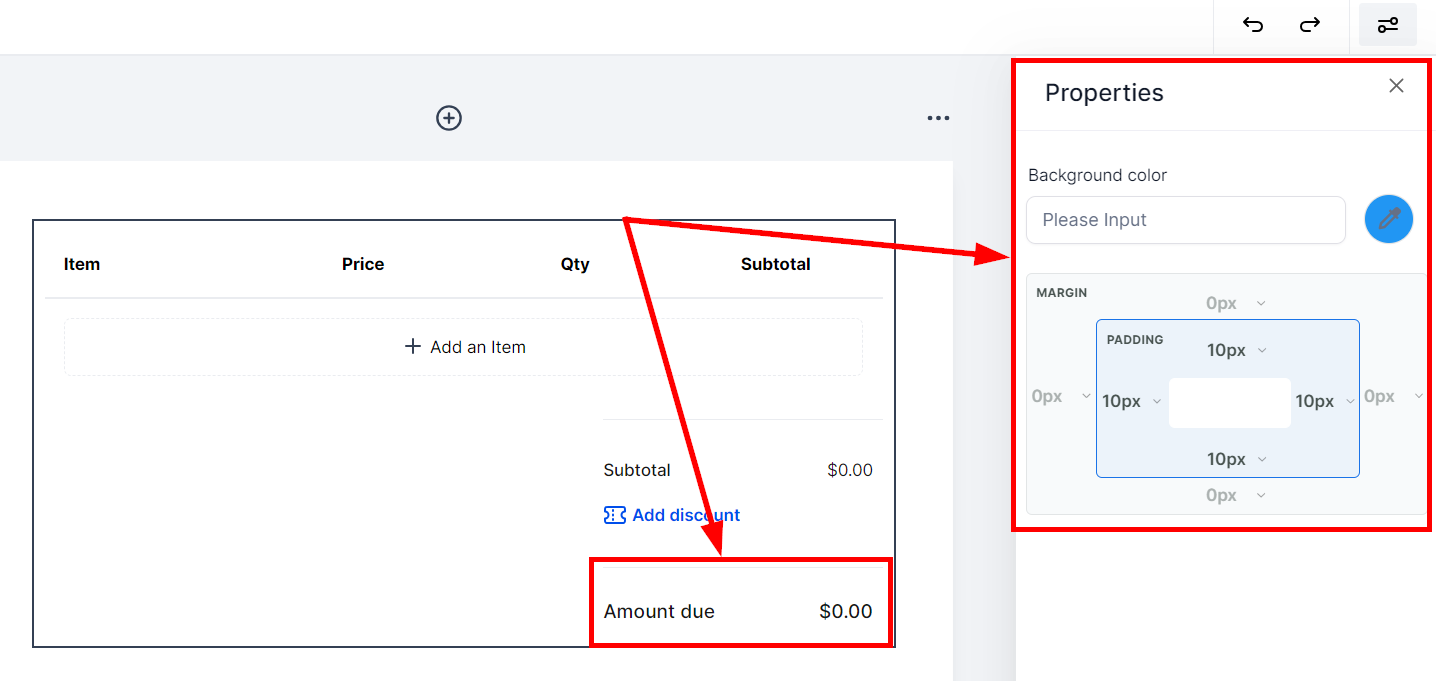
Amount Due: This field displays the total amount due, reflecting the subtotal and any applied discounts.
Background Color: This is the color behind the text. Using contrasting colors for text and background can enhance readability.
Margin: Margins control the space around the text element. You can set different values for the top, right, bottom, and left margins to create various effects, such as centering or indentation.
Page Break Element
Insert page breaks for better readability in a pdf.
Action Menu
Page Properties Clicking on this will direct you to the background color edit for the new page you added
Duplicate page You can duplicate your page by clicking here which will automatically add a new page same as the duplicated one.

Signature Element
It accepts digital signatures, formalizes agreements, and takes leads to closure. The "Signature" feature in a proposal or estimate document is a vital component that facilitates the formal agreement between parties. Its various properties ensure that the document can be officially authenticated and agreed upon by the necessary parties. It brings the convenience of digital agreement to business processes, enabling quicker turnaround times and reducing the need for physical paperwork. Whether it's sealing a deal with a client or getting internal approval, the signature feature adds a level of professionalism and legality to the document.
Properties: Click on the Filter button to access the right sidebar where you can see the Properties.
To be signed by: This option allows the document creator to designate who is required to sign the document. It can usually be linked to contacts within a system, such as a client, a representative of the company, or another relevant party.
Placeholder: This might be a visual representation of where the signature should go, guiding the signee on where to place their signature. It can help in maintaining the format and layout of the document.
Signature: This represents the actual area where the electronic or digital signature will be placed. It may allow for different types of signatures, such as drawn signatures or typed authentication.
Align: This property lets the user align the signature field within the document. Proper alignment ensures that the signature appears neatly within the intended space, adhering to the overall design of the document.

Pages
You can view all the pages you created here.

Document Variables
Document variables are placeholders that can be placed within a document and replaced with actual values when the document is executed. They offer dynamic content control and are crucial for templating and automation.
Search/Create Variables You can search for an existing Variable or create a new one with the “+” button and fill out the form:
Variable name: Add a variable name that is a unique identifier for the variable within the document. Be sure to adhere to certain rules or conventions, such as avoiding spaces or special characters.
Variable value: Add a value to your variable. This specific data or content will replace the variable name when the document is generated or executed and the value could be text, a number, a date, or other data types, depending on what the variable represents.
Document created Date This shows the date the document was created.
Document Reference Number You can see the reference number here. It will help for easy identification of this document.

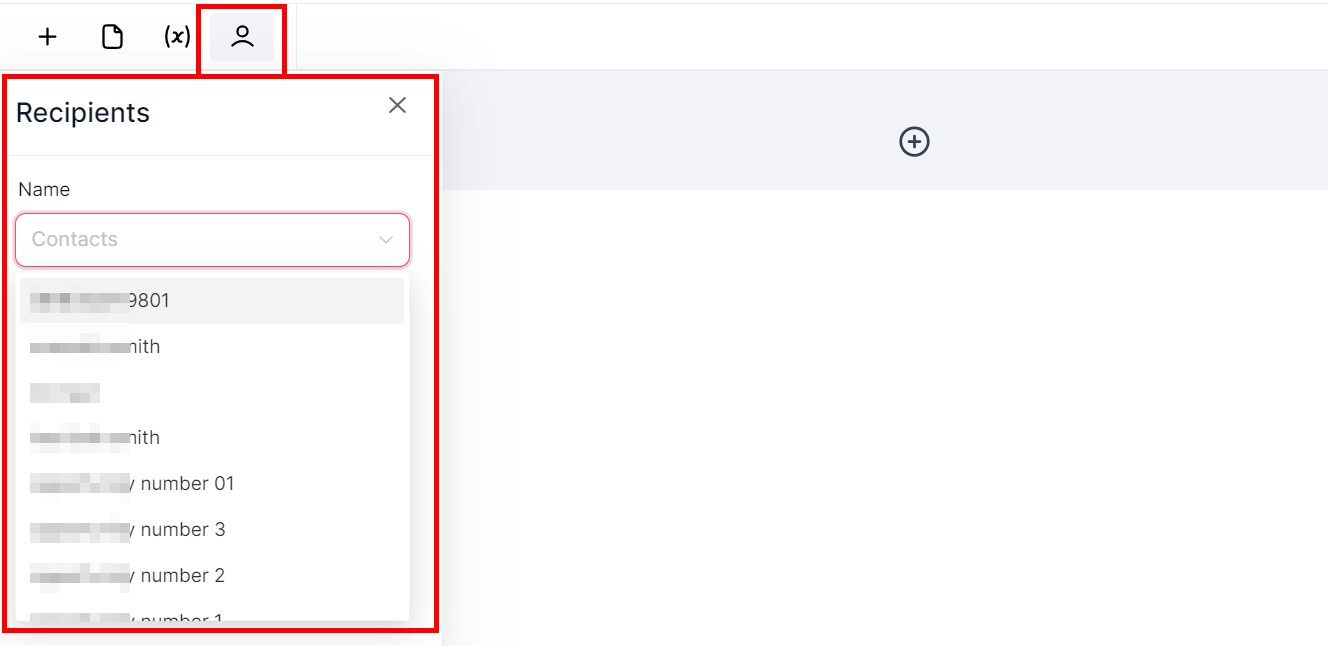
Adding Recipient
Adding a recipient to the document is vital for document management, tracking, and execution. Search for contacts from your CRM and add them here.