How To Add A 2-step Order Form To A Funnel
You can use this element to get the shipping details of your customer and some other information. For the 2-Step Order Form, you will have the Shipping details and the information in two separate forms.
This element allows you to obtain essential shipping details about your customers swiftly. Furthermore, for 2-Step Order Forms, you can acquire this detail in two separate fields. With this element, obtaining the information you need from your customers is easier than ever before! In other words, this element provides an uncomplicated solution both for retrieving basic information and ensuring it's collected accurately; there's no simpler way to input as much data into web forms!
General Settings
Element Name/Title
Under General Settings, you can view the default name or title of the editing option you are working on under Element Name/Title. You have the option to keep the default title or rename it to your liking.

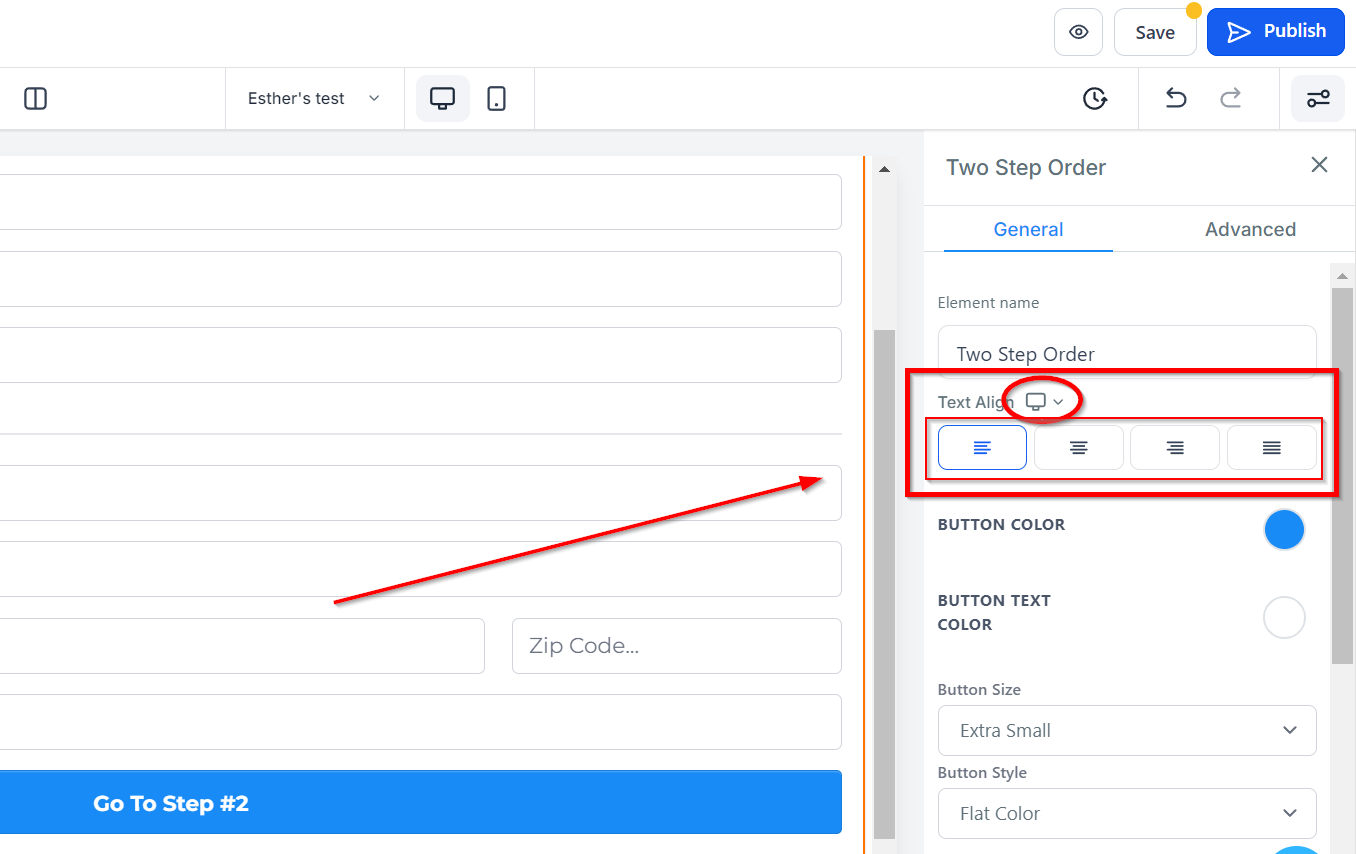
Text Align
Under Text Align, you can adjust the position of your text as desired. You can choose to align it to the left, center, right, or justify it.
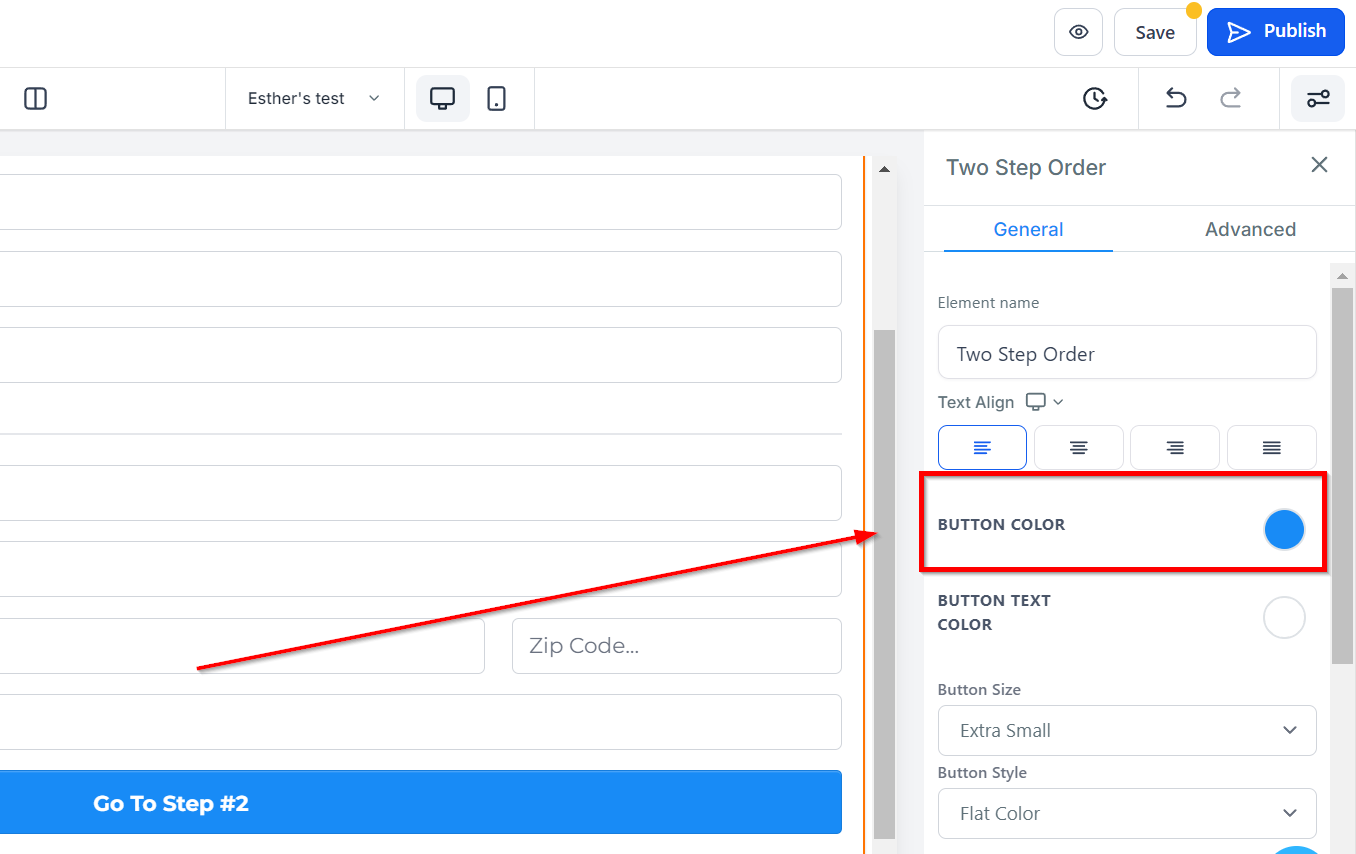
Button Color
If you want to change the button color of your order form, you can do that by clicking on the color you want to change it to.
If you didn't find your color, you can also add custom colors if you have the color code of the exact color you are going for, just type it in the space provided and click "add color".
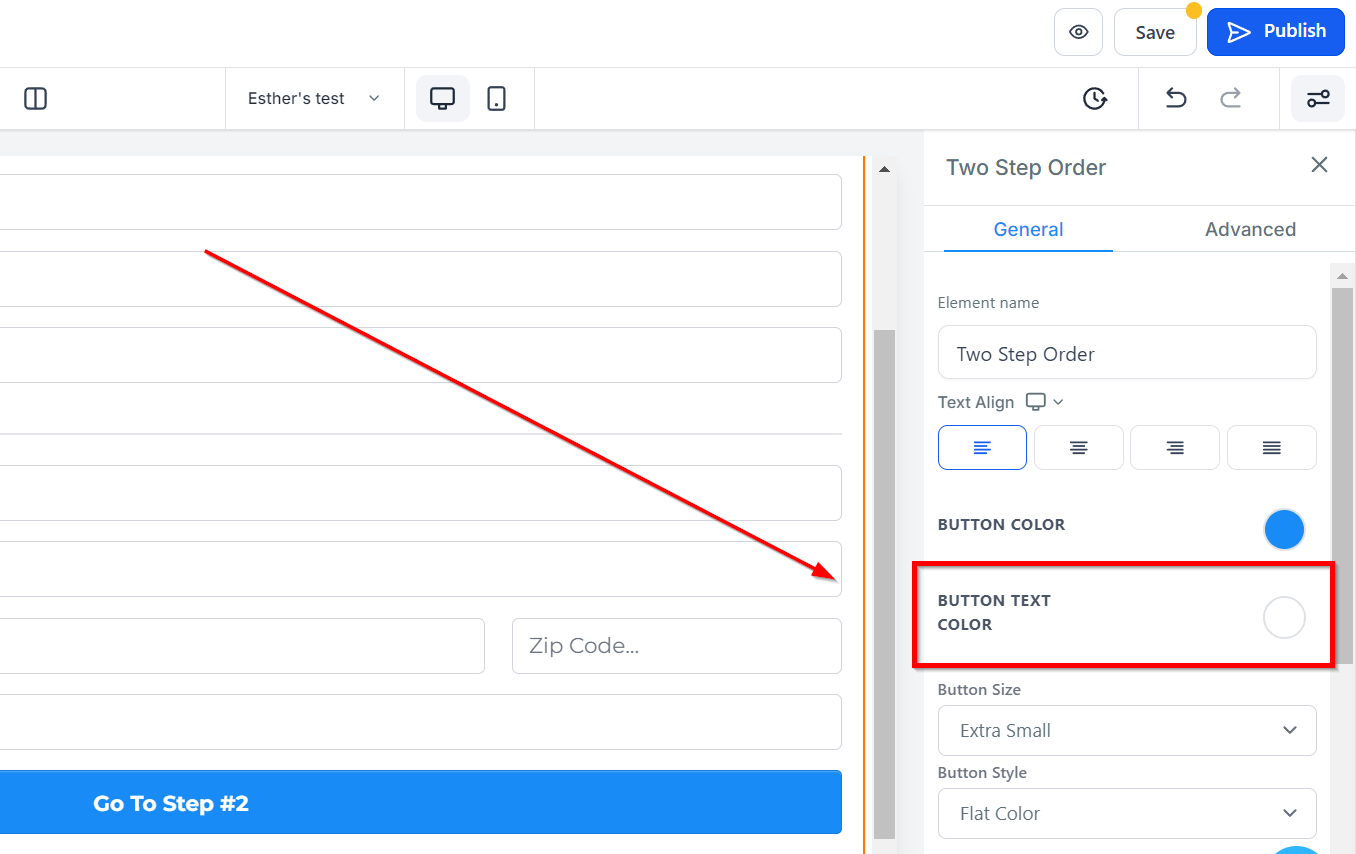
Button Text Color
If you want to change the button text color of your order form, you can do that by clicking on the color you want to change it to.
If you didn't find your color, you can also add custom colors if you have the color code of the exact color you are going for, just type it in the space provided and click "add color".
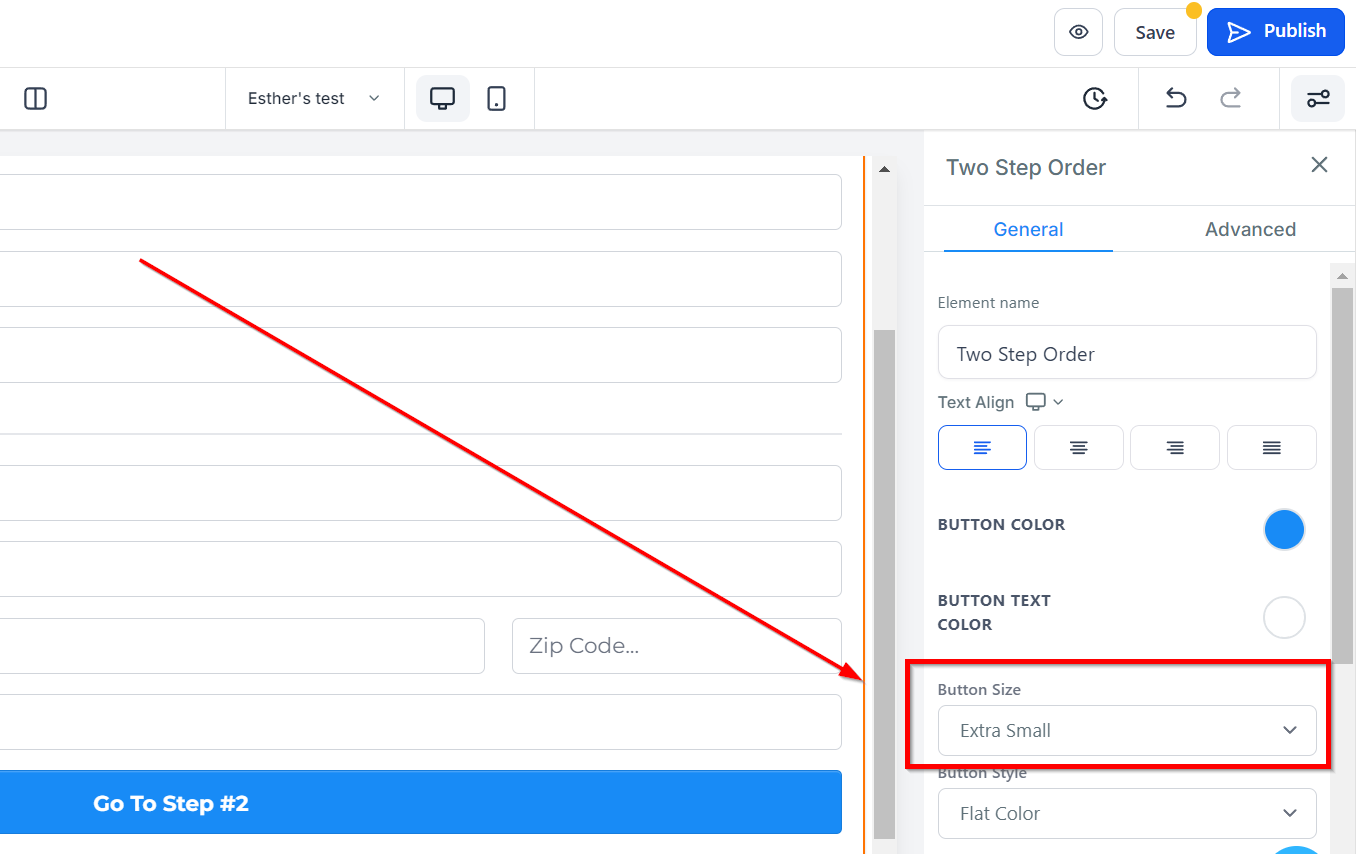
Button Size
Under Button Size, you can adjust the size of your button according to your preference. You can choose from Extra Small to Extra Large sizes.
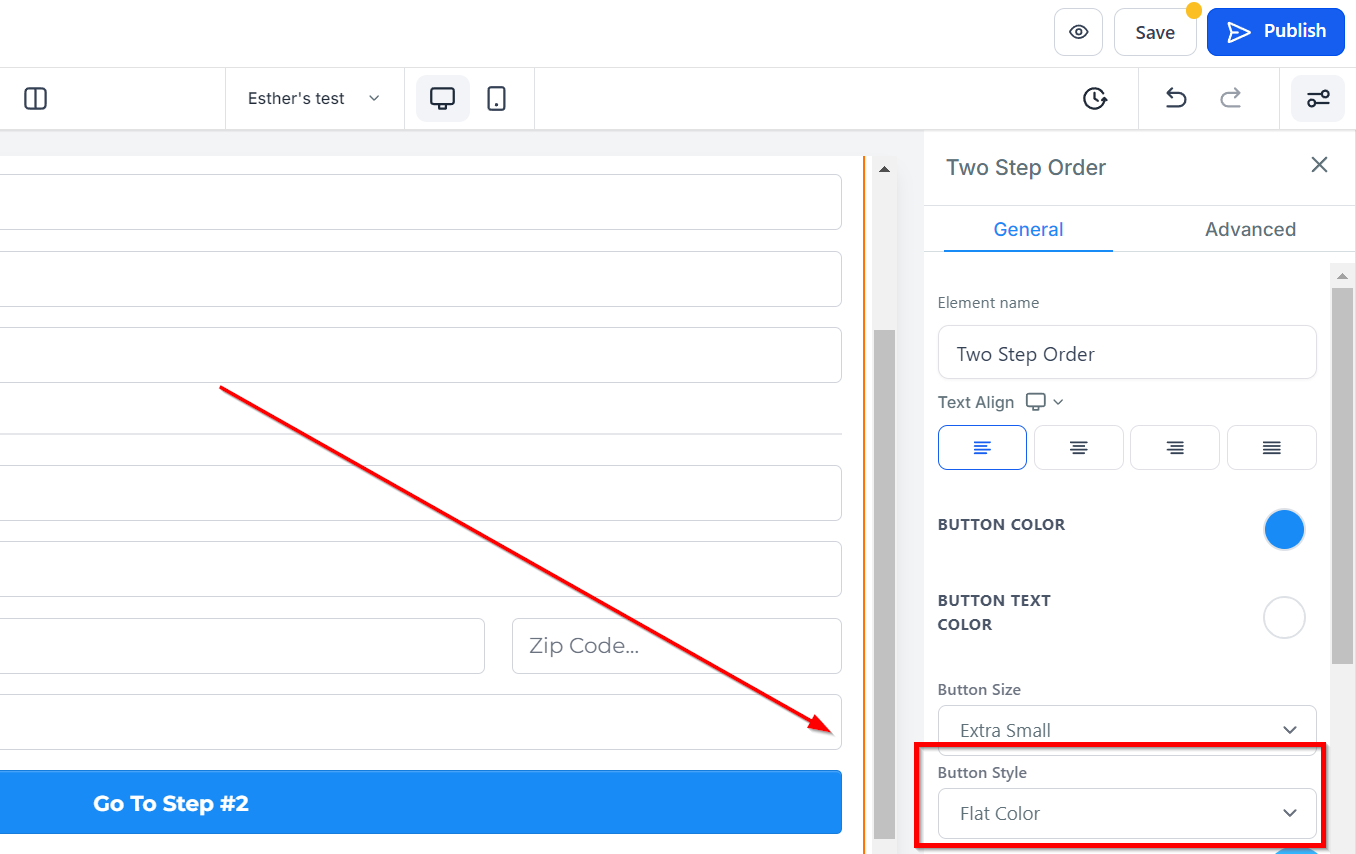
Button Style
For Button Style, you can select a style for your button by choosing from the available options: Flat Color, Gradiant, Subtle Style, and Border Bottom.
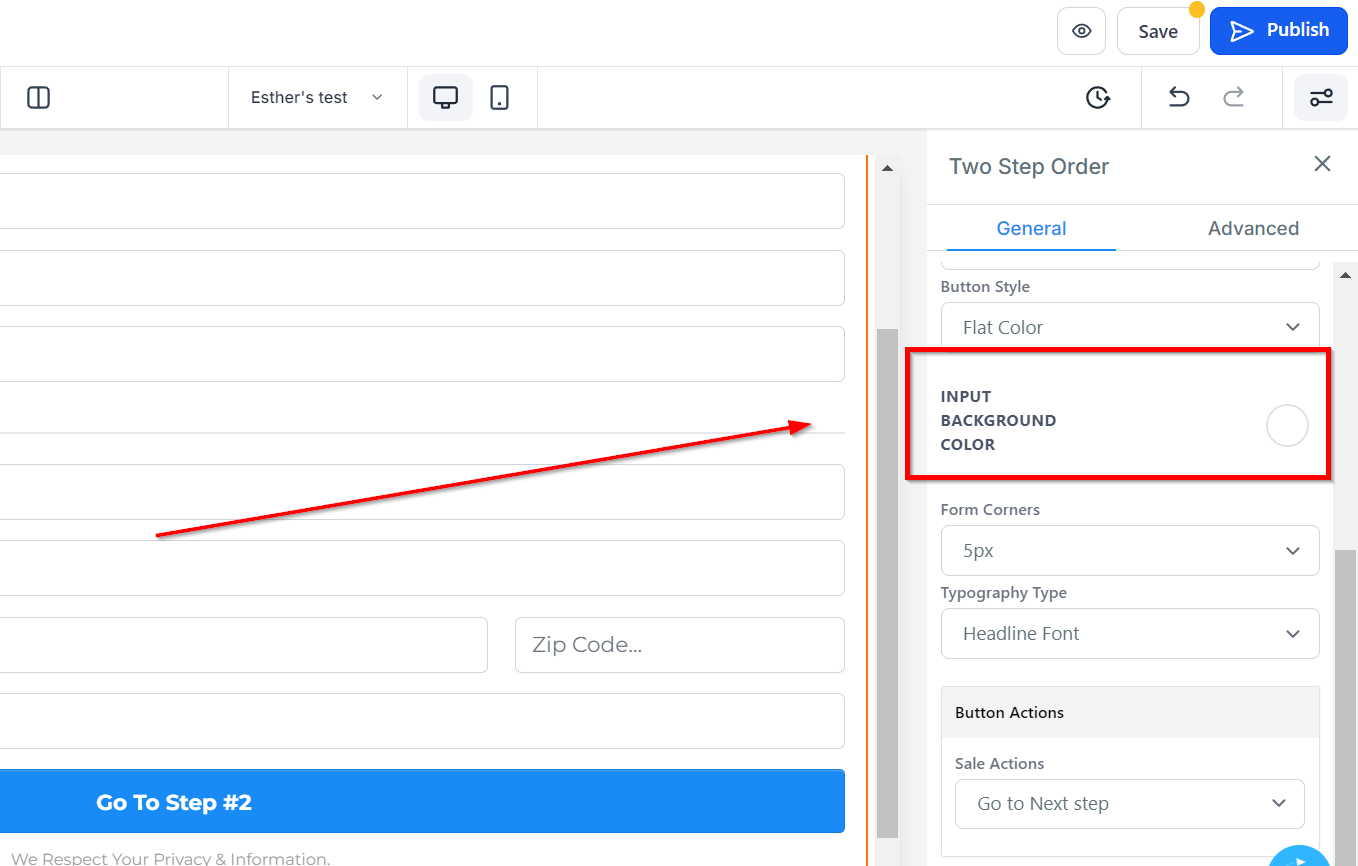
Input Background Color
If you want to input background color to your order form, you can do that by clicking on the color you want to change it to.
If you didn't find your color, you can also add custom colors if you have the color code of the exact color you are going for, just type it in the space provided and click "add color".
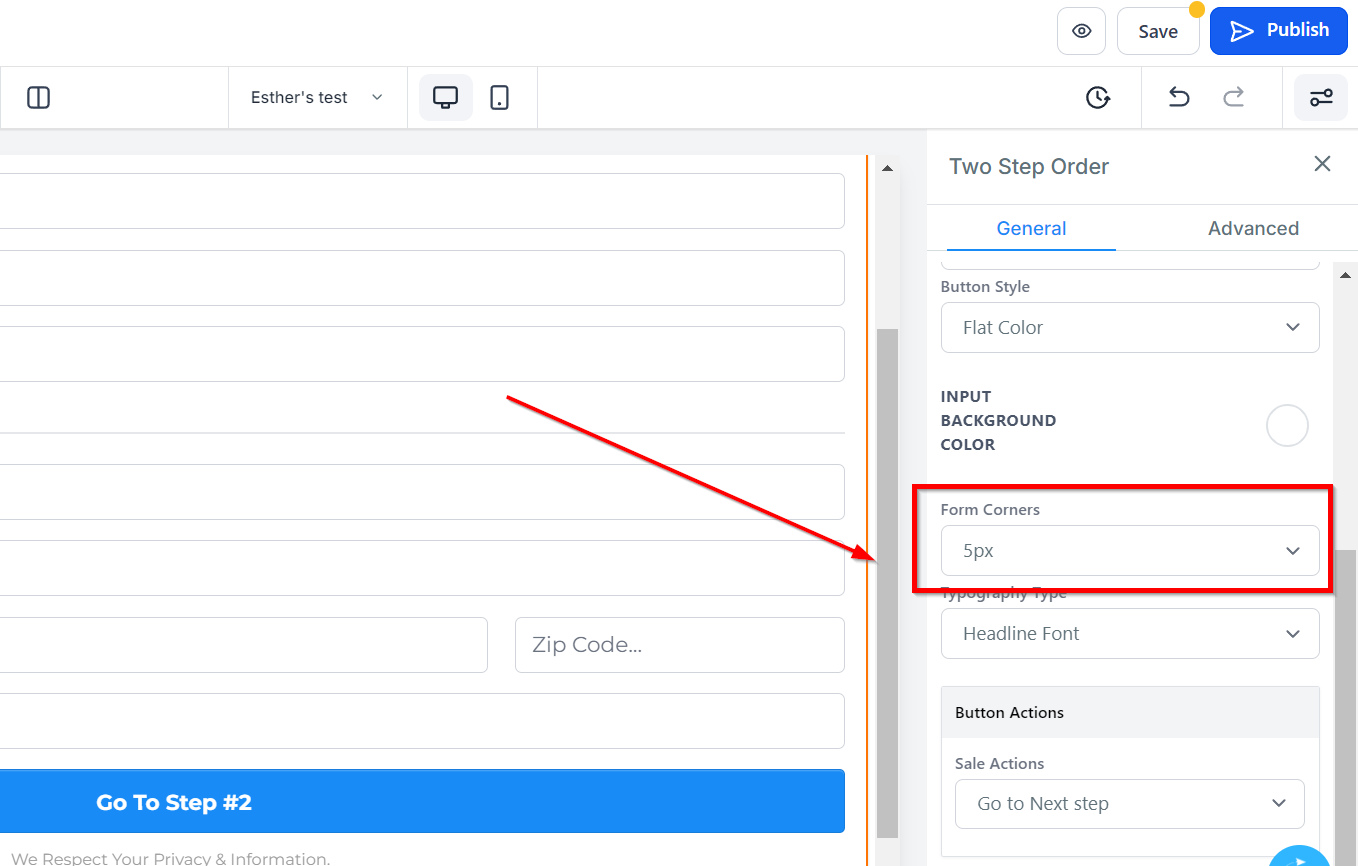
Form Corner
Under Form Corner, you can adjust the degree of curvature for the edges of your form fields.
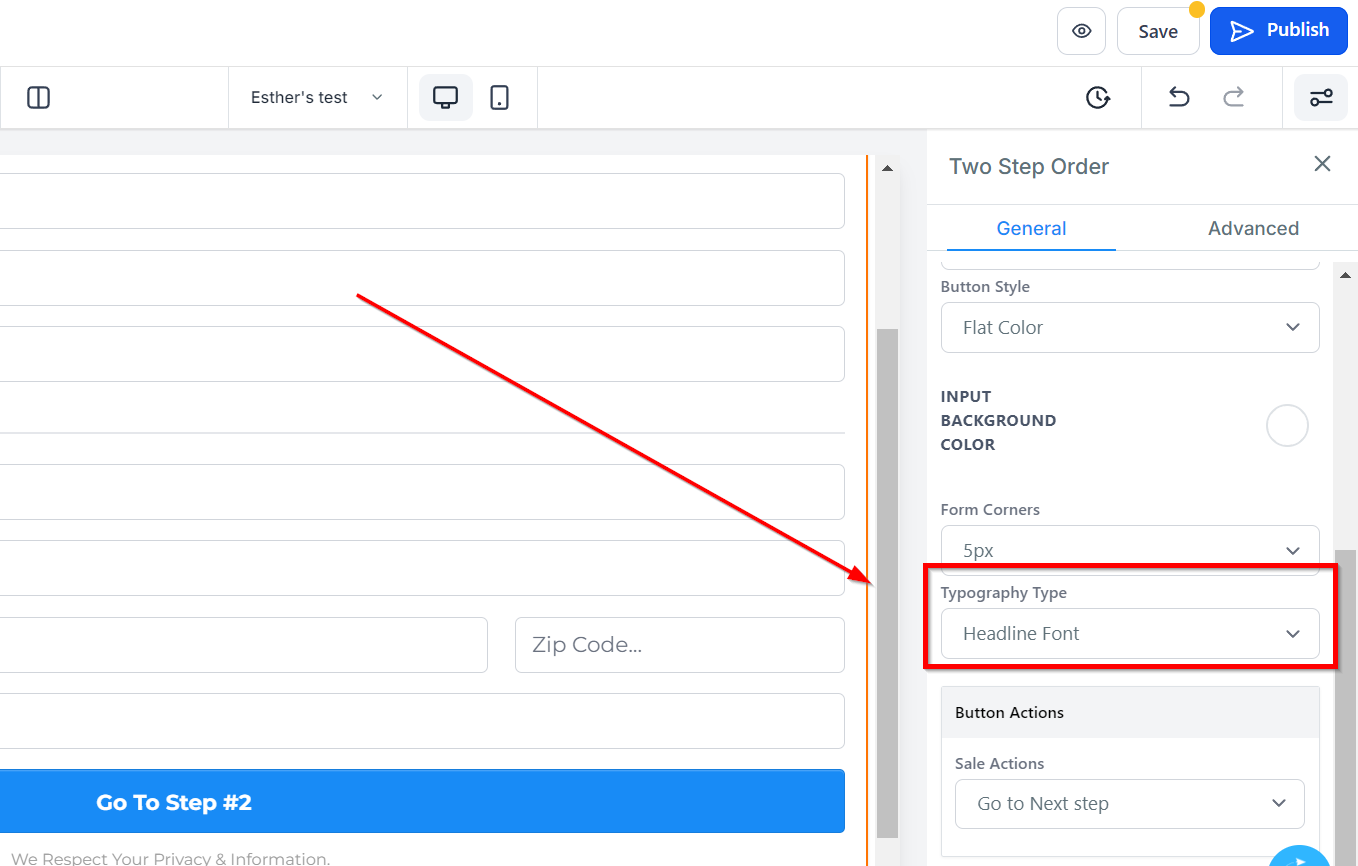
Typography Type
You can choose the font type for your form by selecting options from the dropdown. You can choose to use the headline or content font that was set-up in settings, or choose a custom font and select from a variety of fonts from the given dropdown.
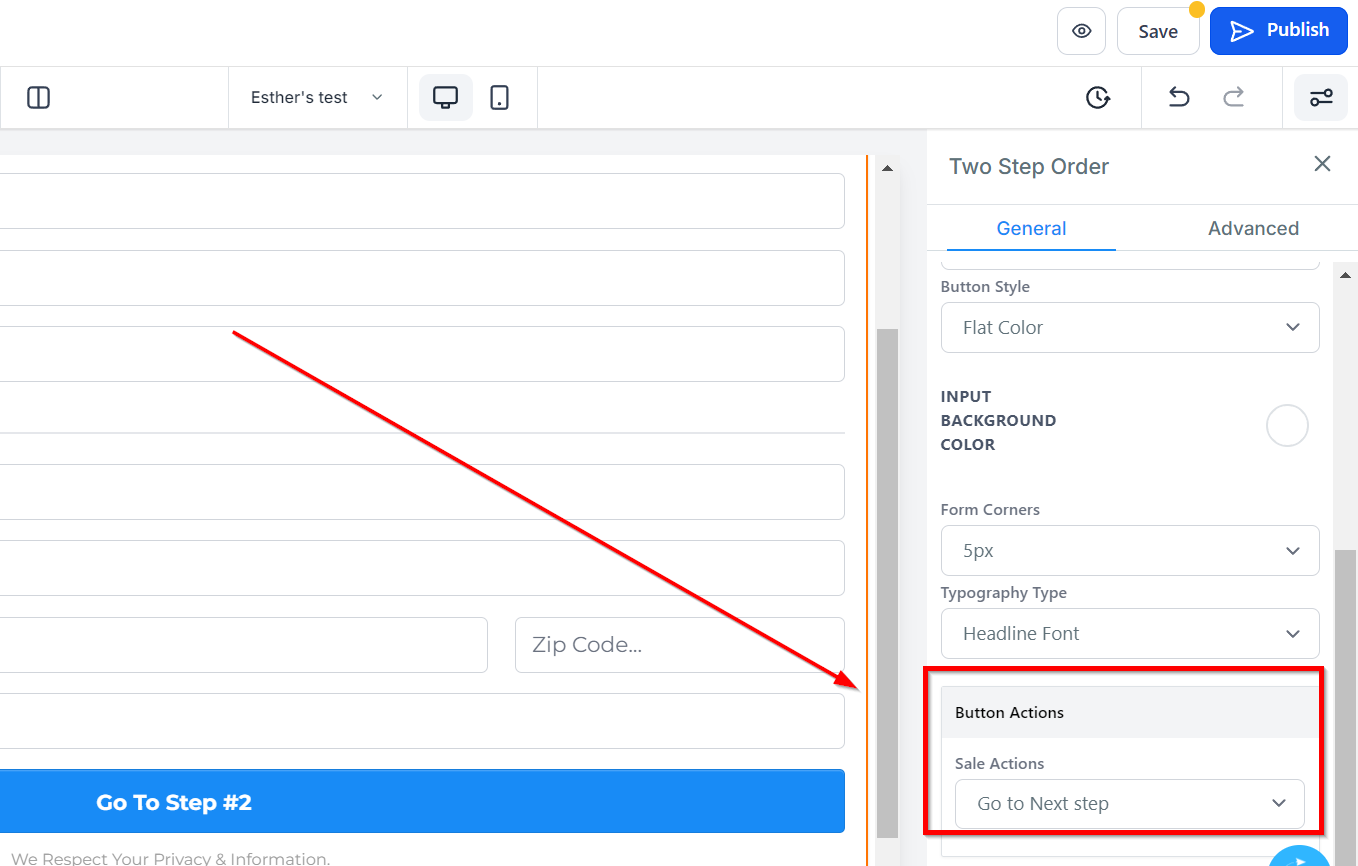
Button Action
Sale Actions
Under Button Action, you have the option to choose between Open the popup or Go to website URL for Sale Actions.
- Website
When you select "Go to website URL" in the "Image Action" icon, it will require you to select which website page you will be settings.
- Open In New Tab
If you want the website to direct visitors to a new tab when they perform an action, simply toggle it on.
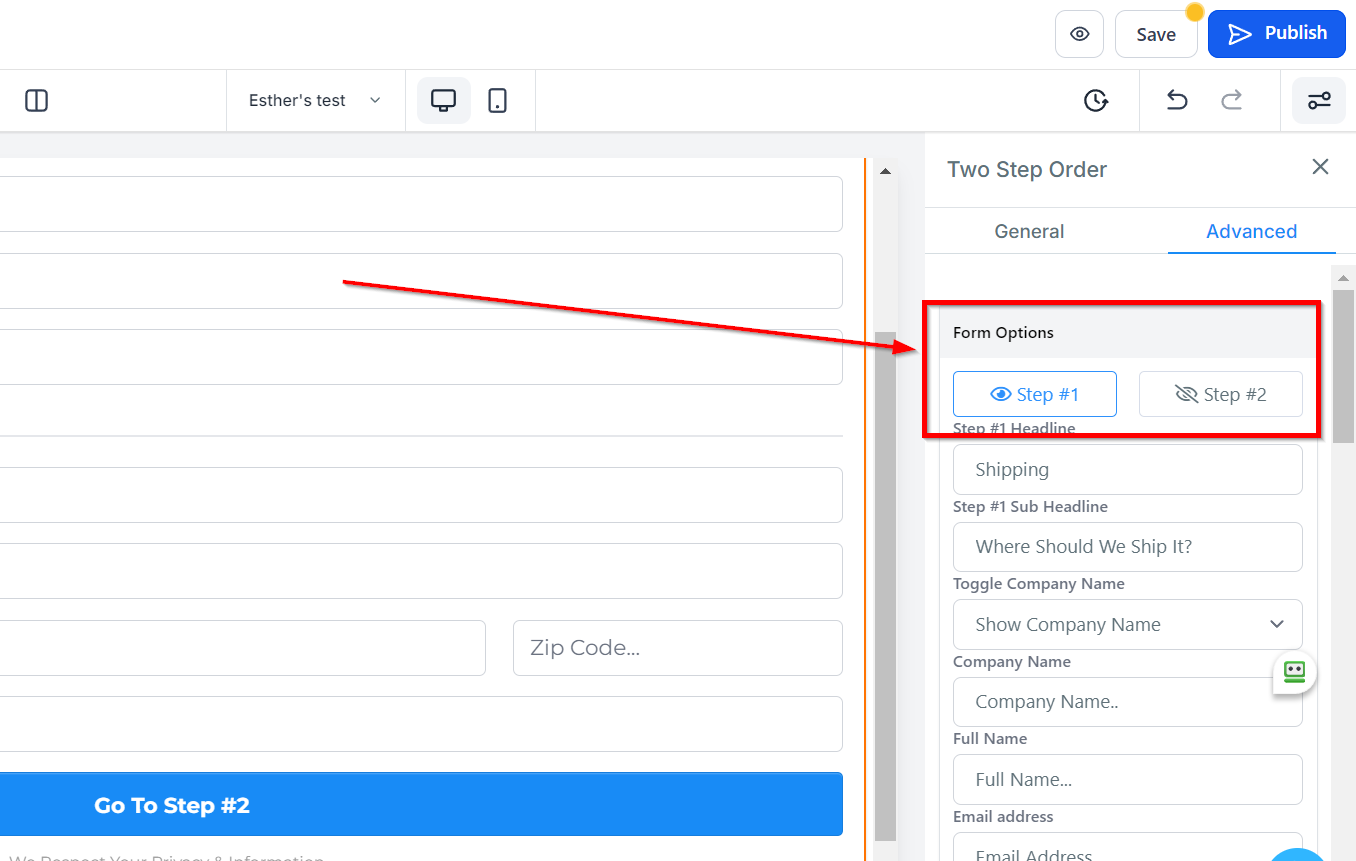
Advanced Settings
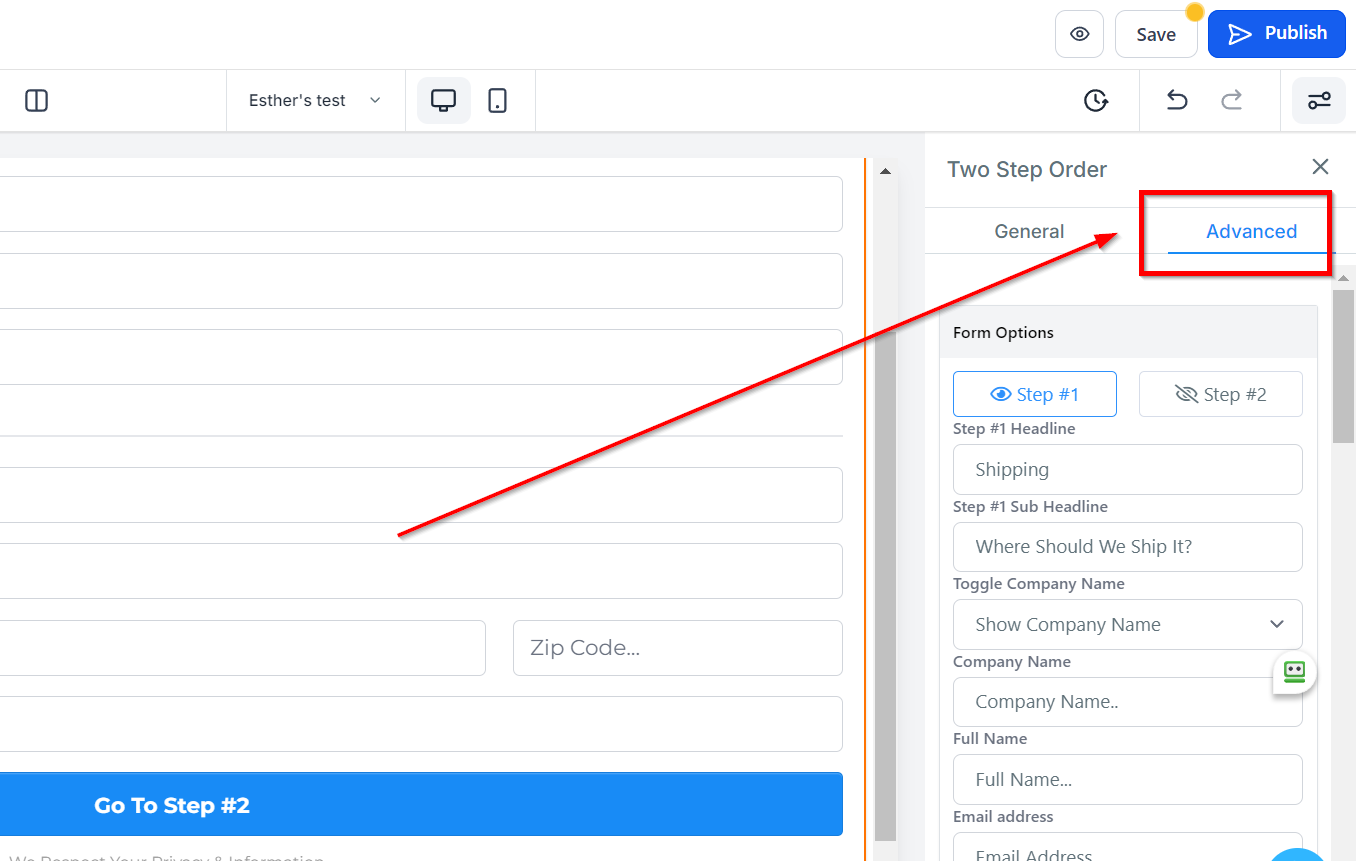
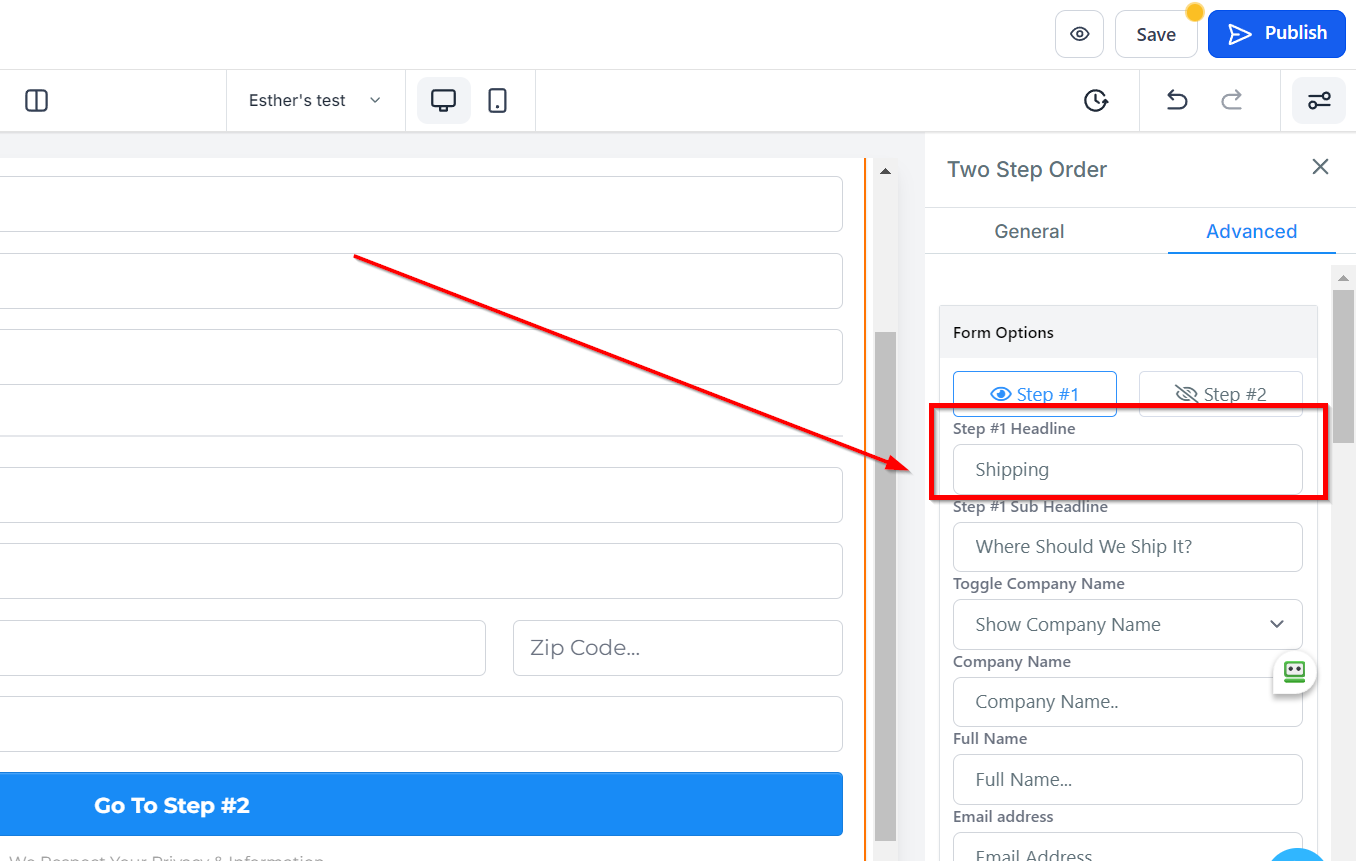
Step 1
Headline
Here you will see the default headline name and you can decide to leave at that or rename it.
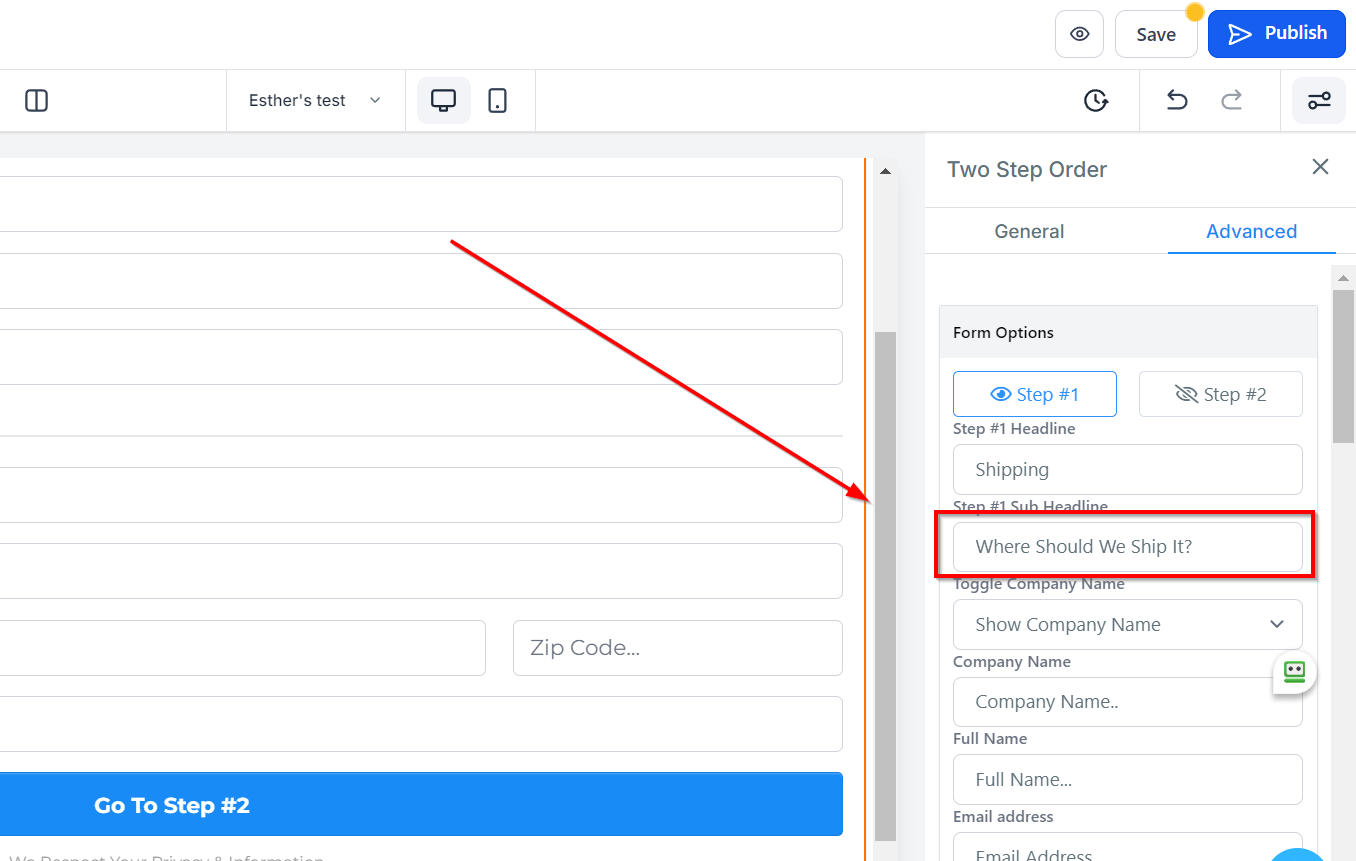
Sub-Headline
Same as the Sub-headline name, you can decide to change it or leave it as it is.
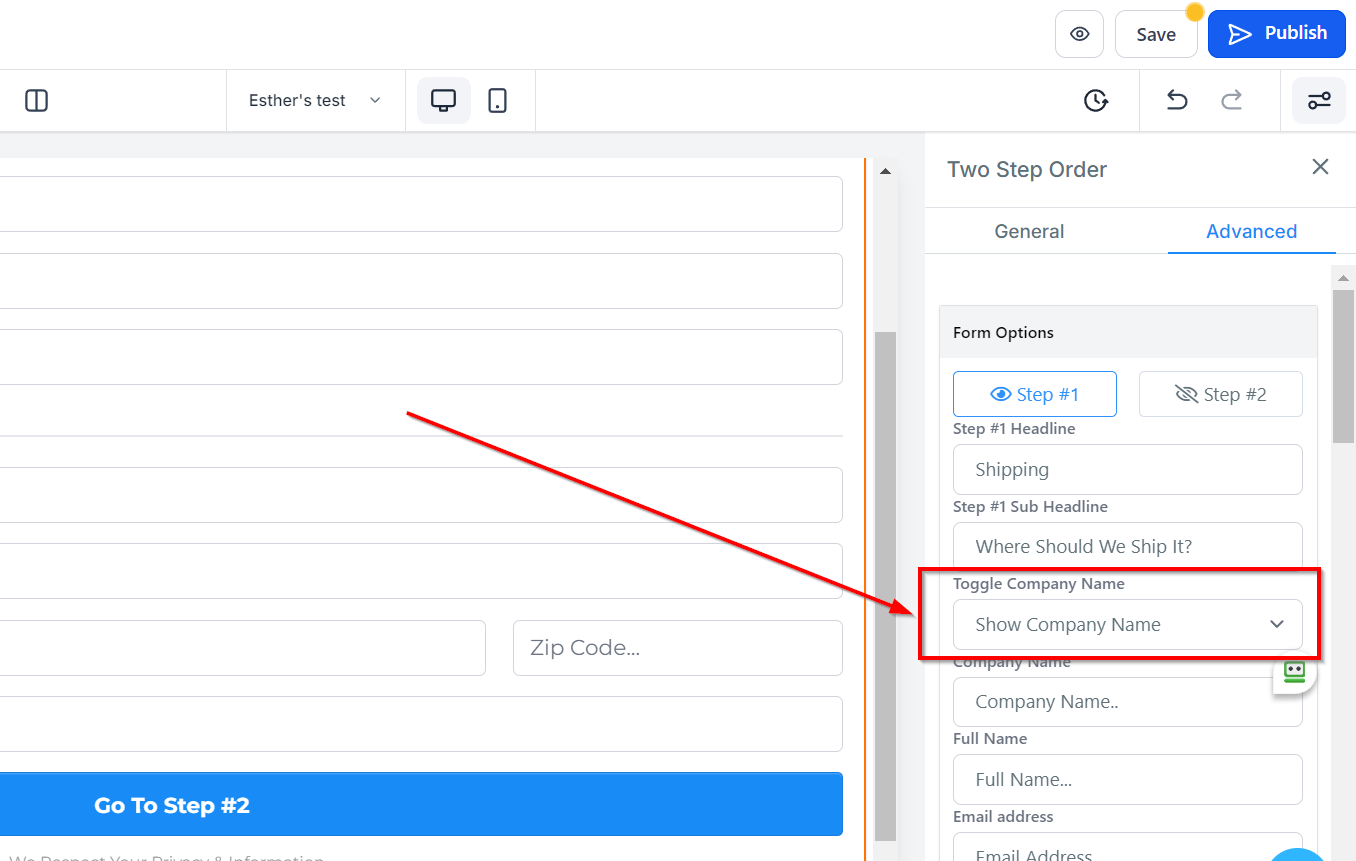
Toggle Company Name
You can decide to show a form field for the "Company name" or you can hide it.
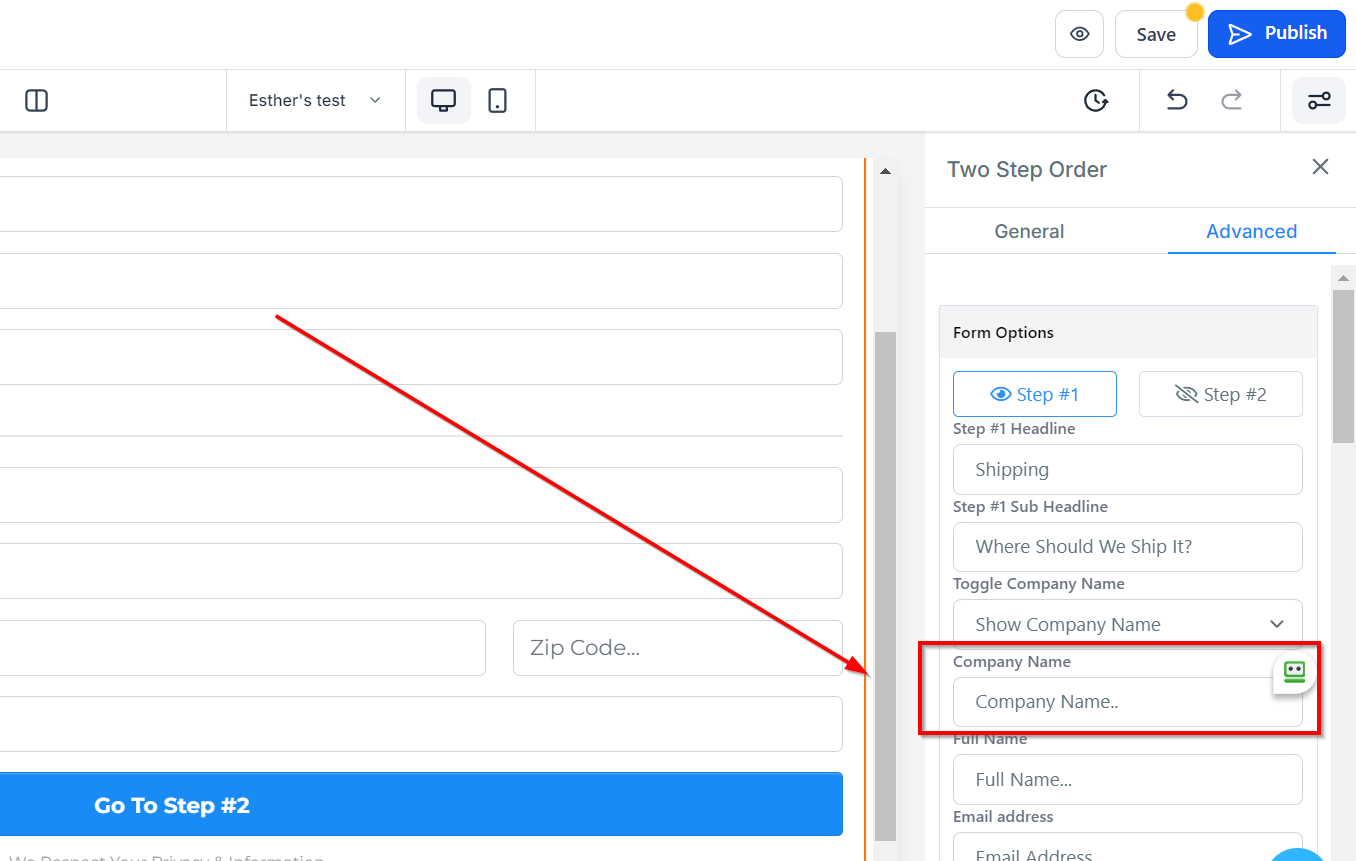
Company Name
You can edit the description in the company name form field here.
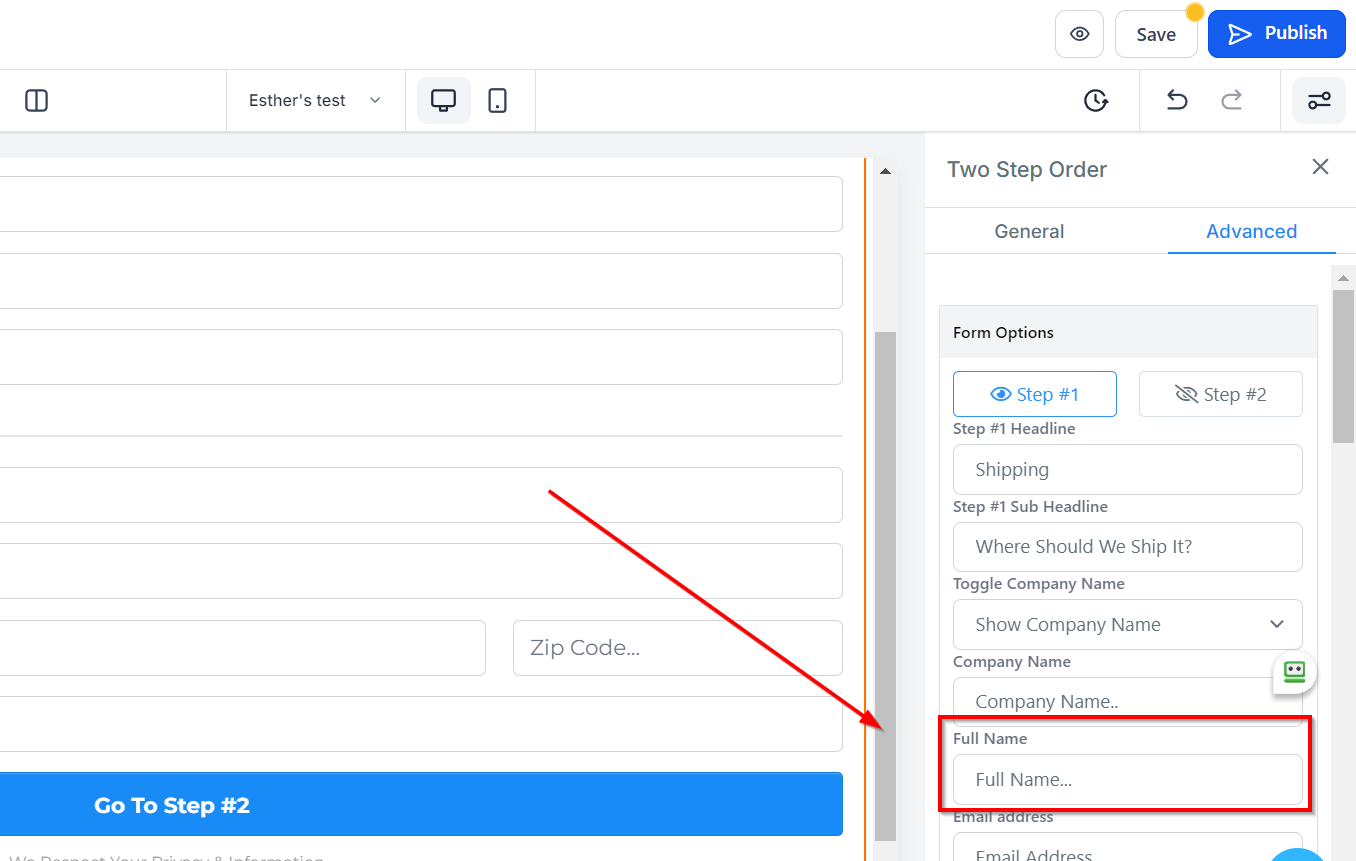
Full Name
You can edit the description in the full name form field here.
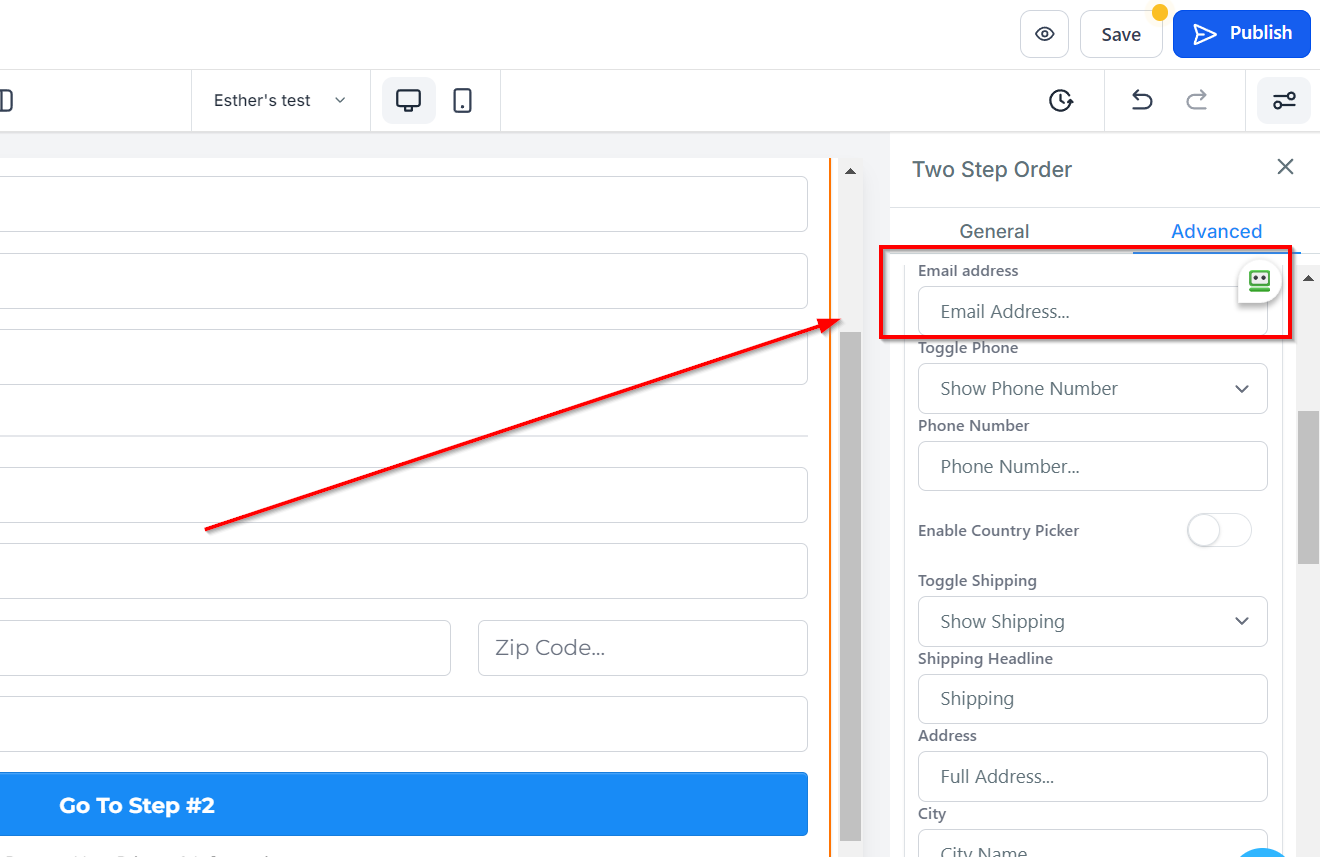
Email Address
You can edit the description in the email address form field here.
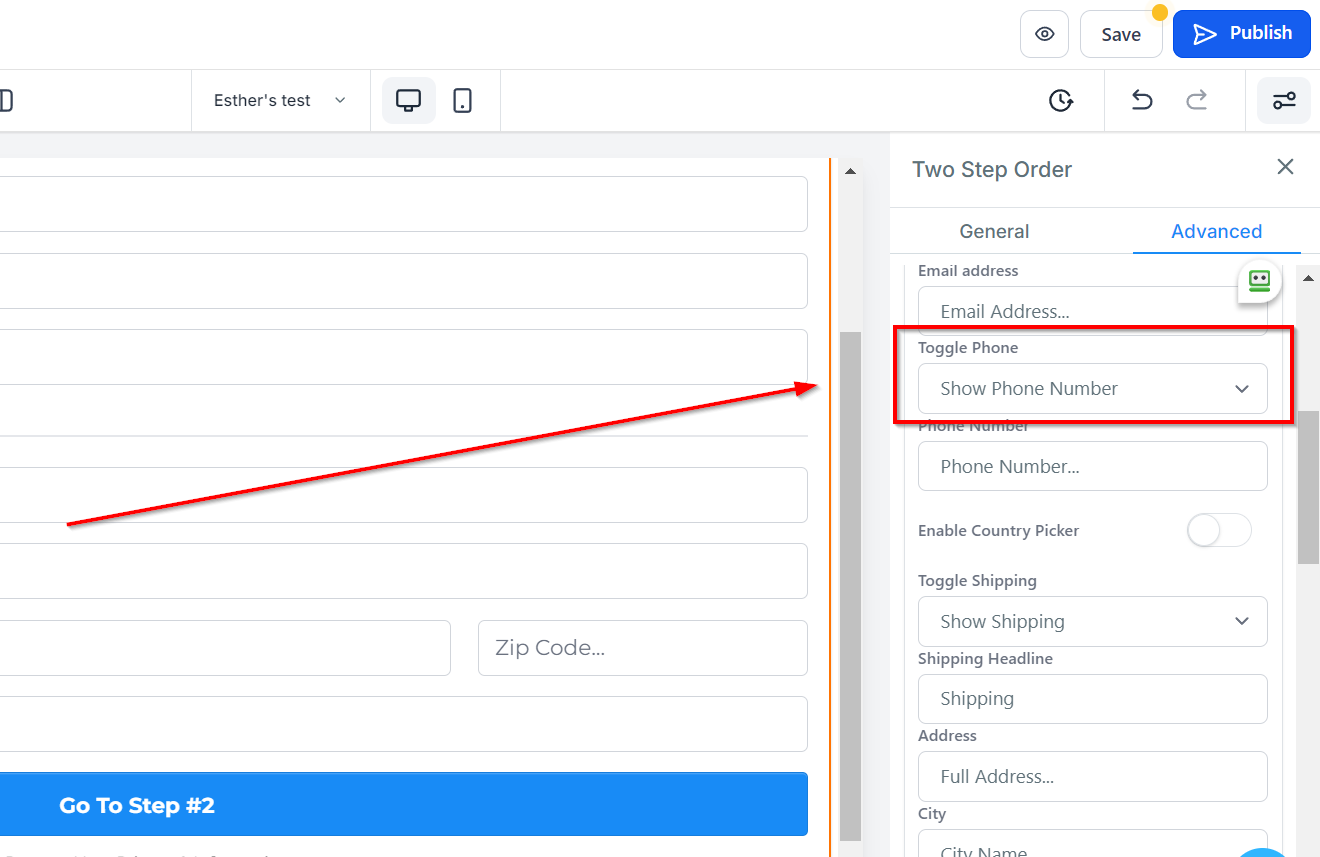
Toggle Phone
You can decide to show a form field for the Phone number or you can hide it.
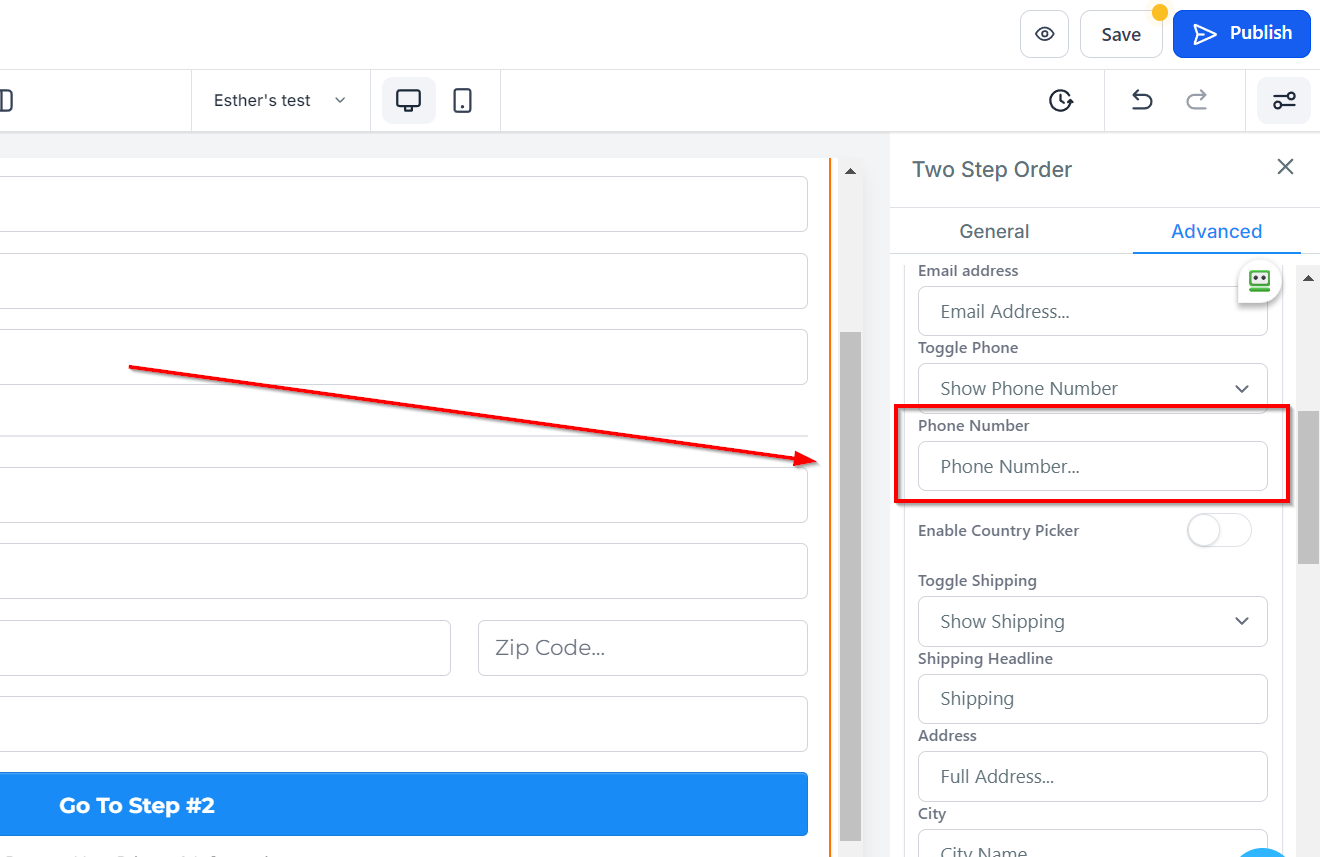
Phone Number
You can edit the description in the Phone number form field here.
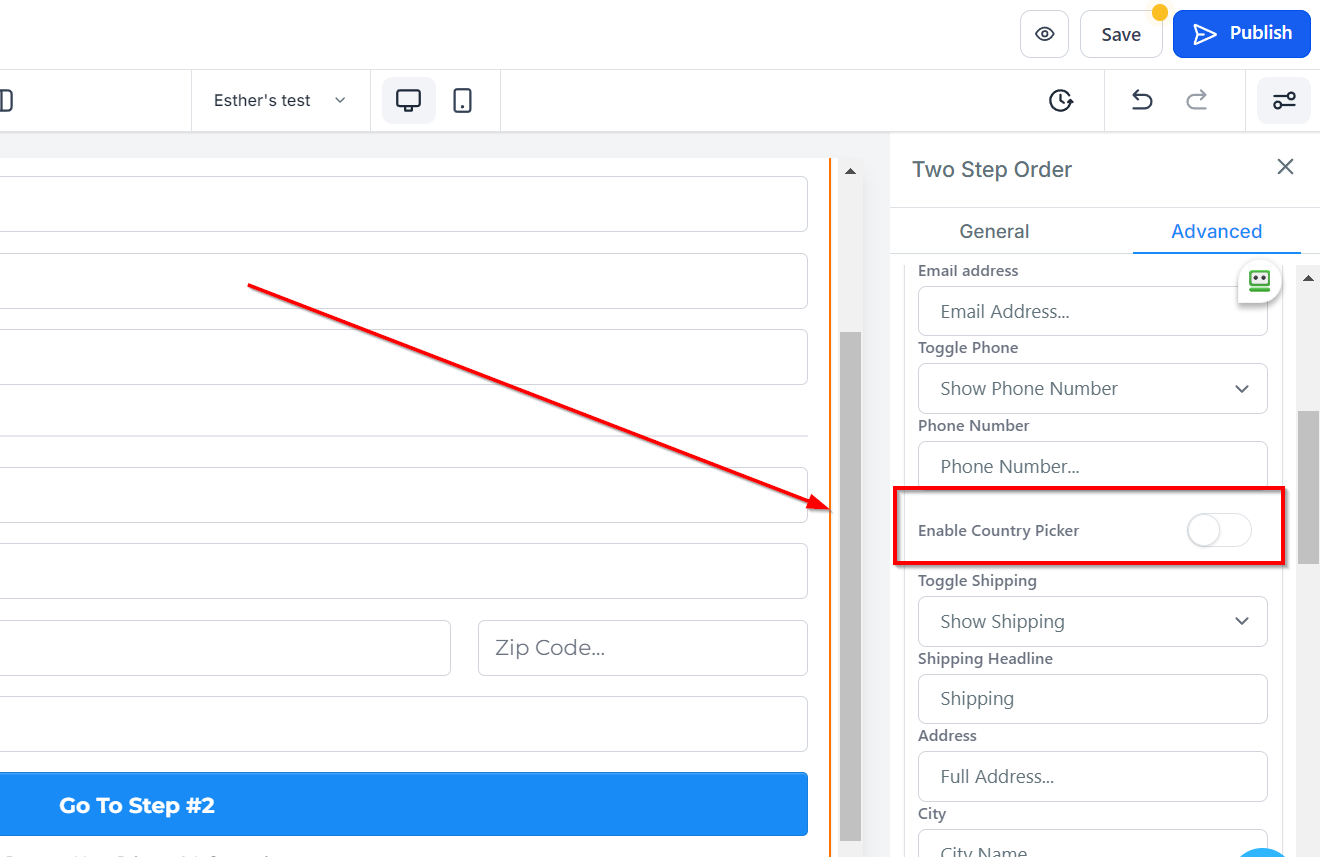
Enable Country Picker
You can enable or disable the country picker using Enable Country Picker.
Toggle Shipping
You can choose whether to display or hide the form field for Shipping info using the Toggle Shipping feature. If you have shipping info toggled on, you will have options for those fields.
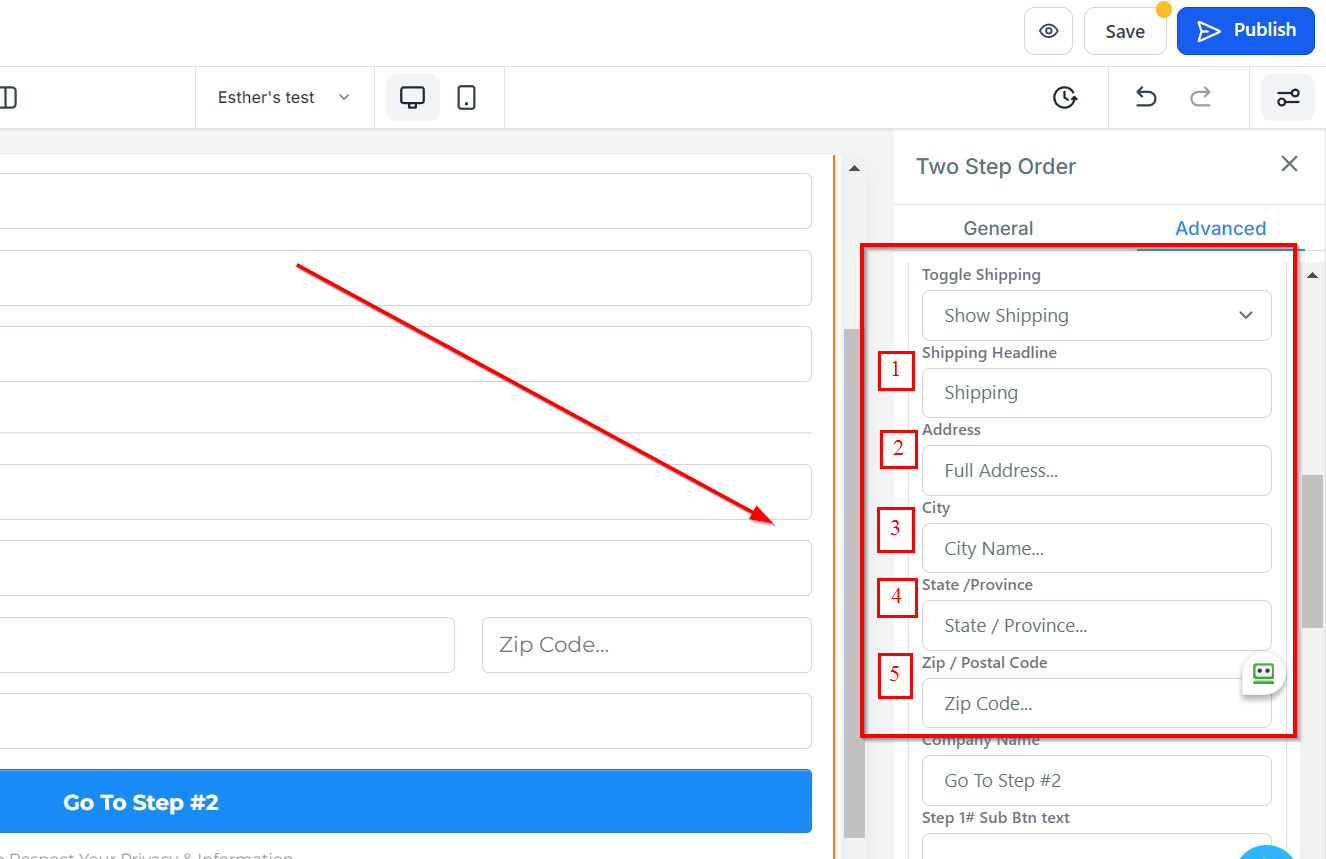
Shipping Headline : Here you will see the default shipping headline name and you can decide to leave at that or rename it.
Address : You can edit the description in the Address form field here.
City : You can edit the description in the City form field here.
State/Province : You can edit the description in the State/Province form field here.
Zip/Postal Code : You can edit the description in the Zip/postal code form field here.
Btn Text
Under Btn Text, you can customize the button text for the next form by editing the text.

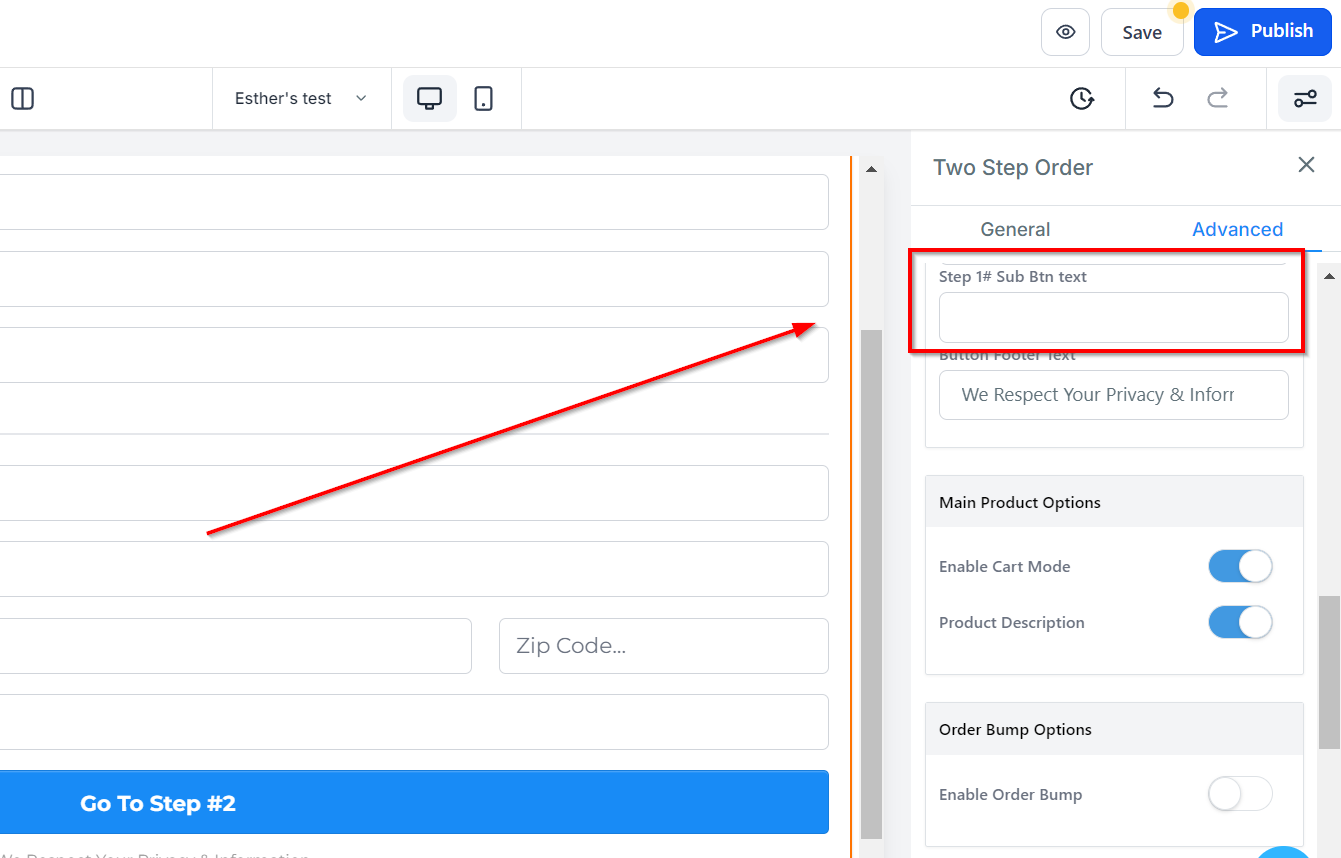
Sub Btn Text
You can add a sub-text to the button by inputting what you would like to name it.
In Sub Btn Text, you can add a sub-text to the button by adding the preferred name.
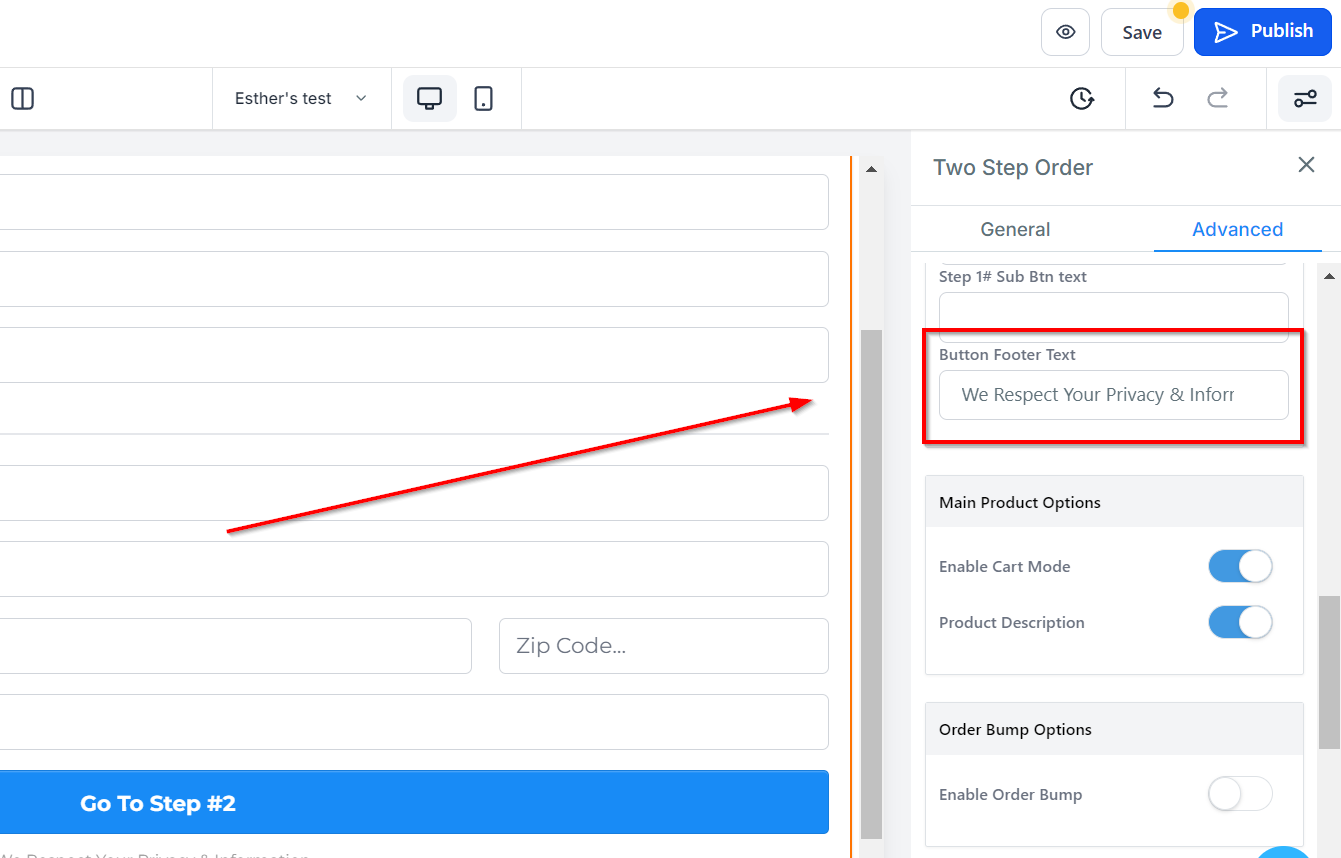
Button Footer Text
You can add any other information you will your visitor/client to be aware of here.
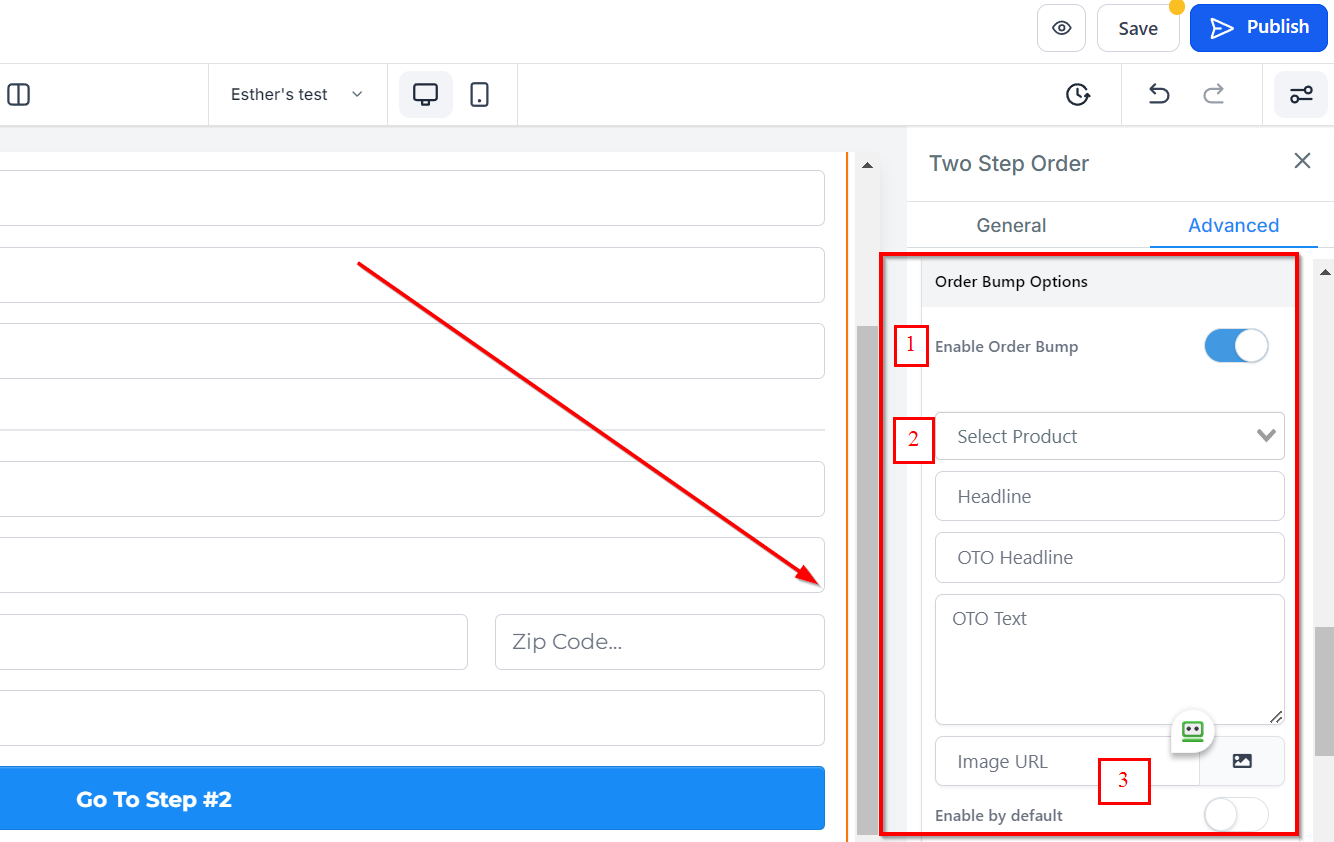
Order Bump Options
Enable Order bumps : When you toggle on the border bumps, it enables you to order bumps.
Select Product : You can select the product you will like to add here.
Enable by default : "Enable by default" allows you to set the order bumps to turn on by default.
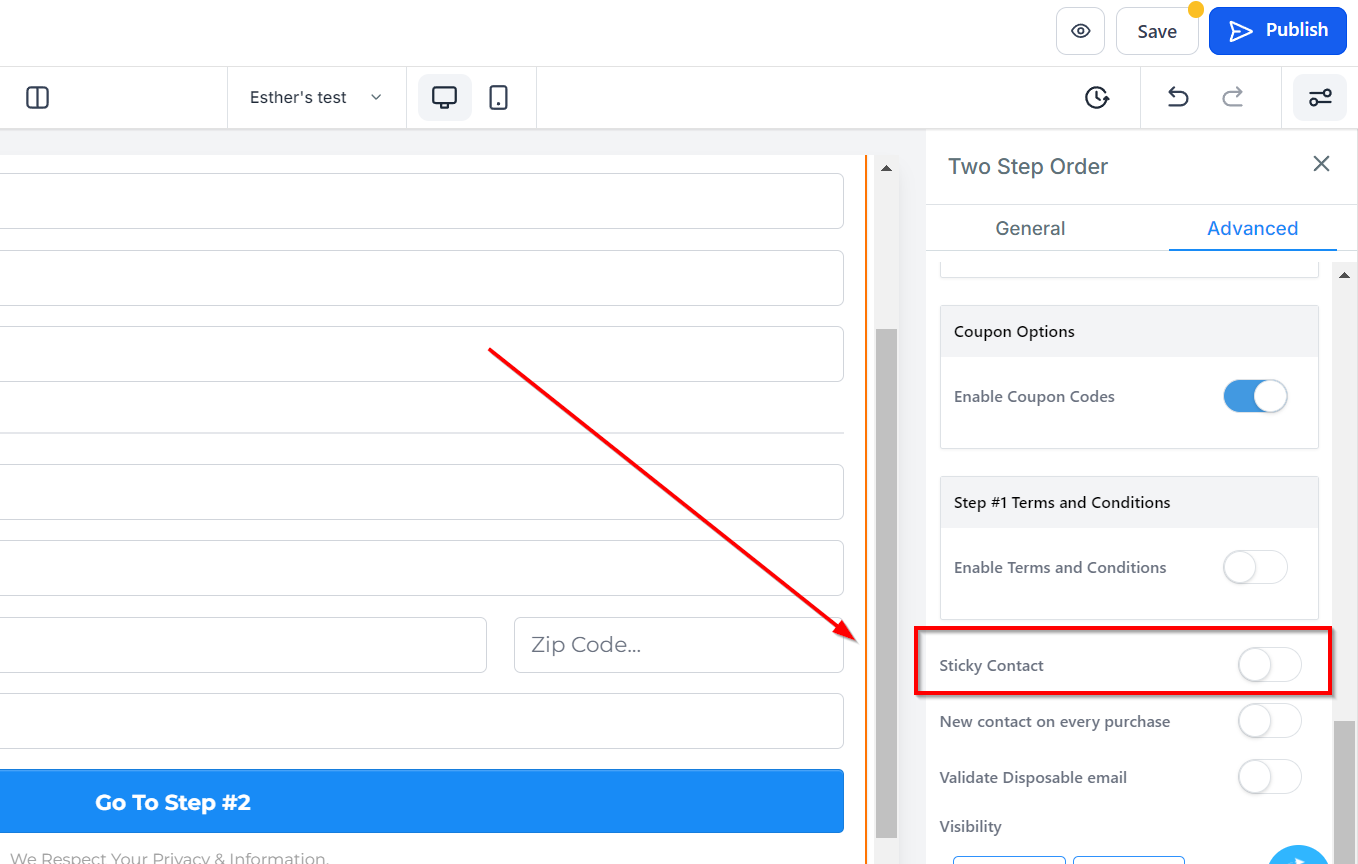
Sticky Contact
Toggle on or off to add or remove the sticky contact. When turned on, this will auto-fill a customers information.
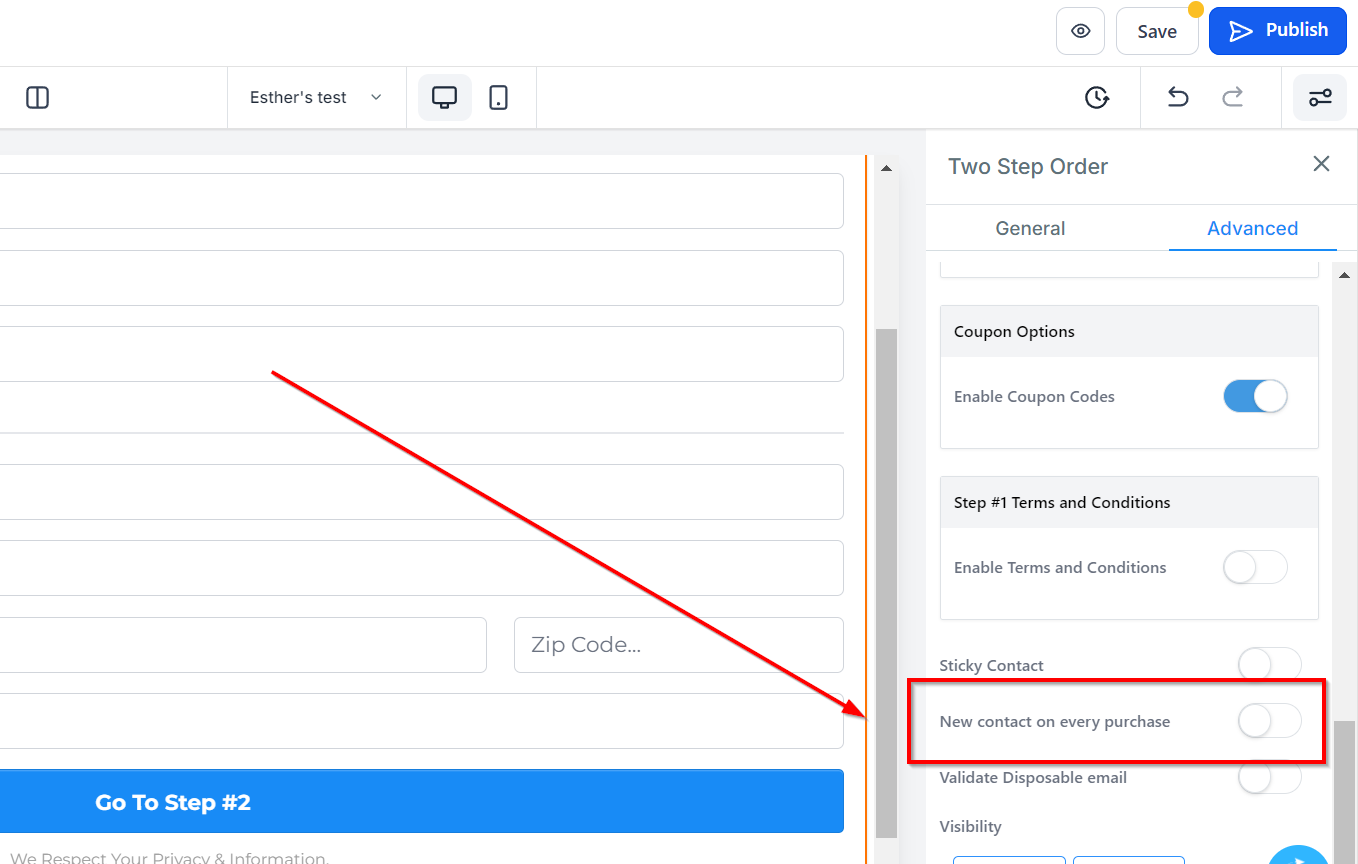
New Contact on Every Purchase
To create a new contact for every purchase, toggle on or off the New Contact on Every Purchase tab.
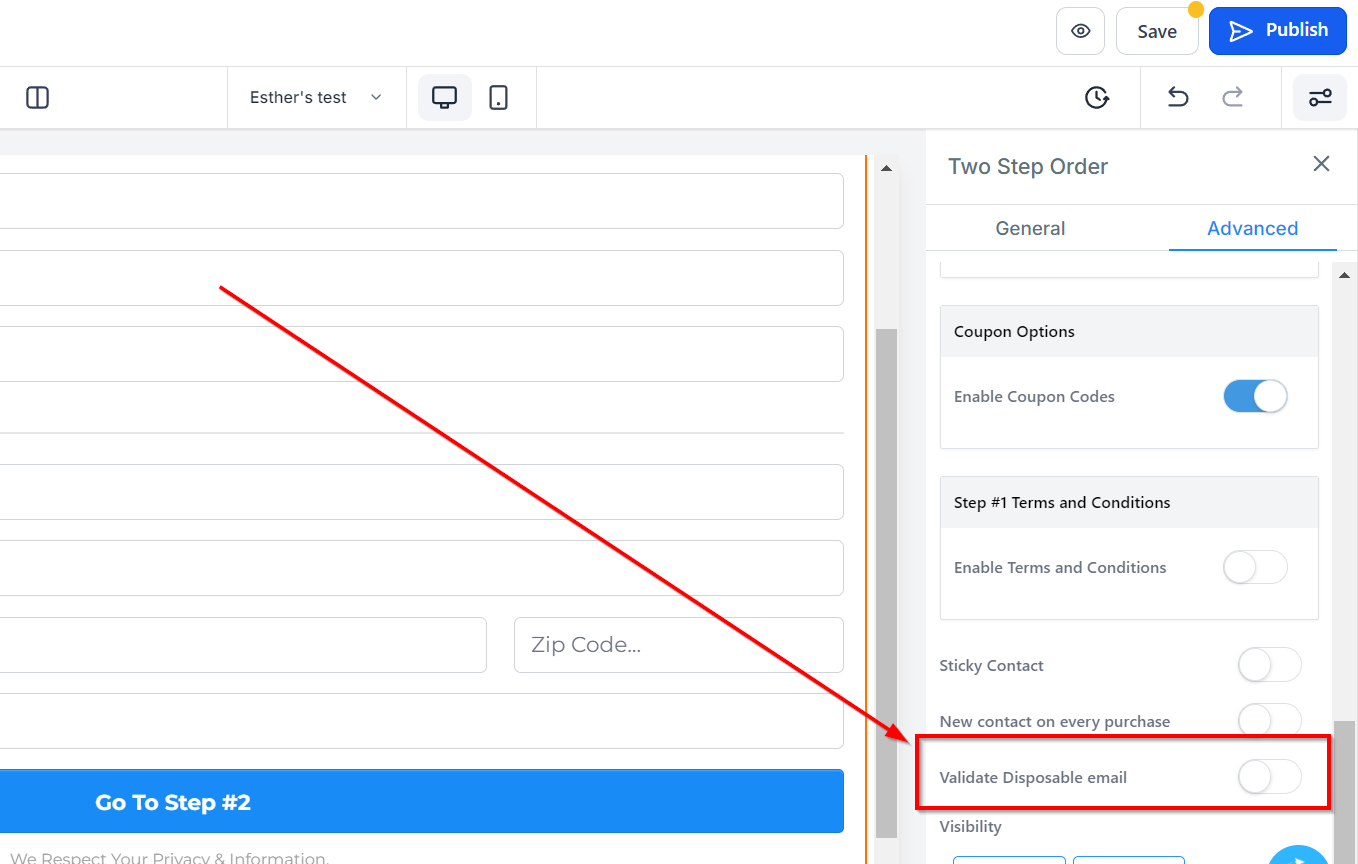
Validate Disposable Email
You can validate any disposable email by toggling this on.
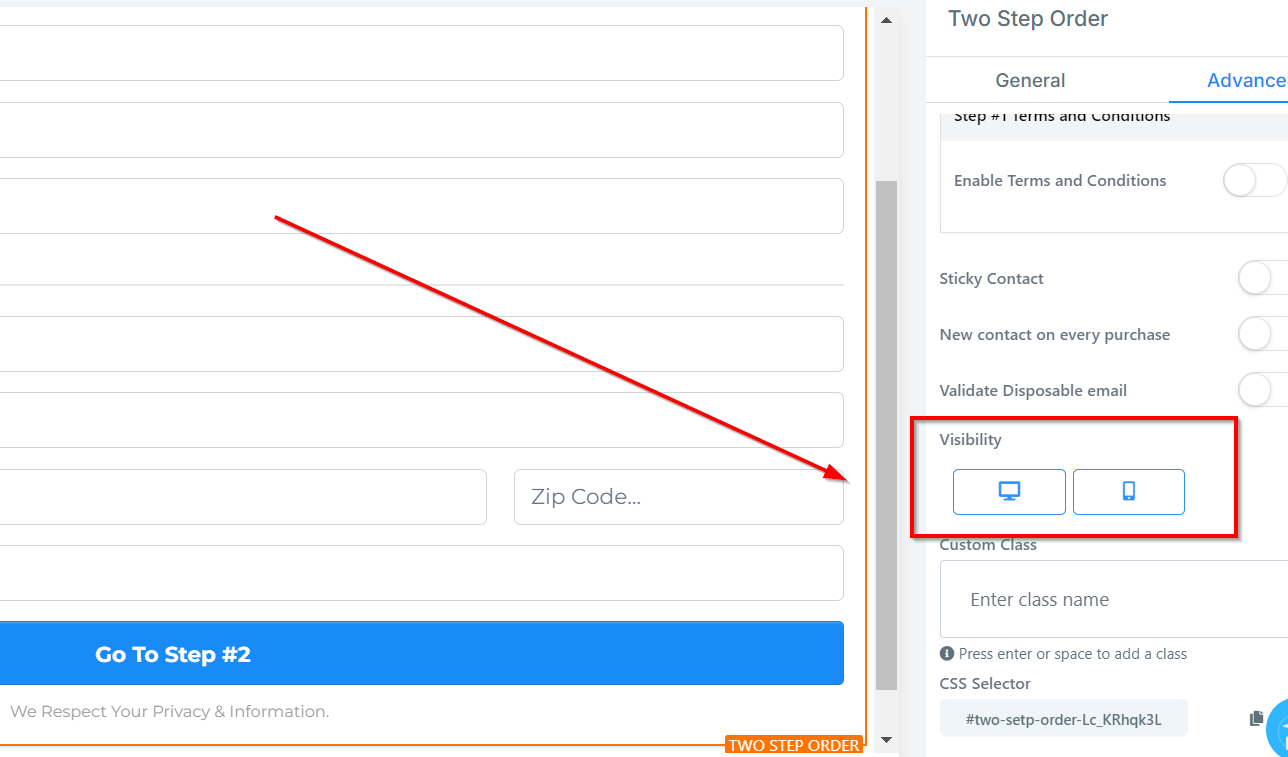
Visibility
You can decide if you want this particular Edit option to be visible on only mobile devices, desktops, or both by clicking on it to highlight the icon.
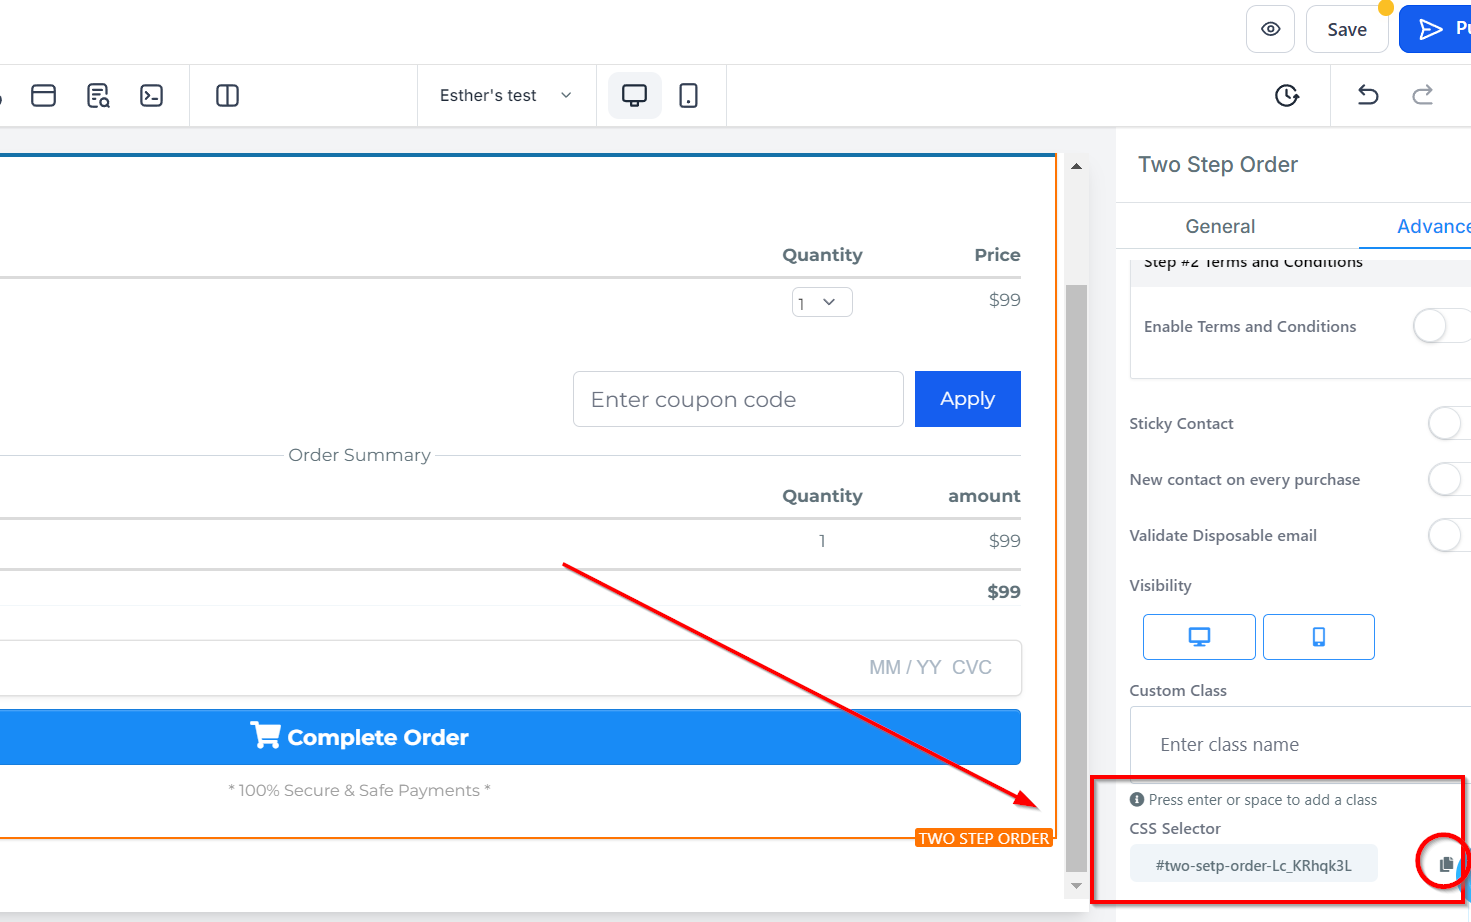
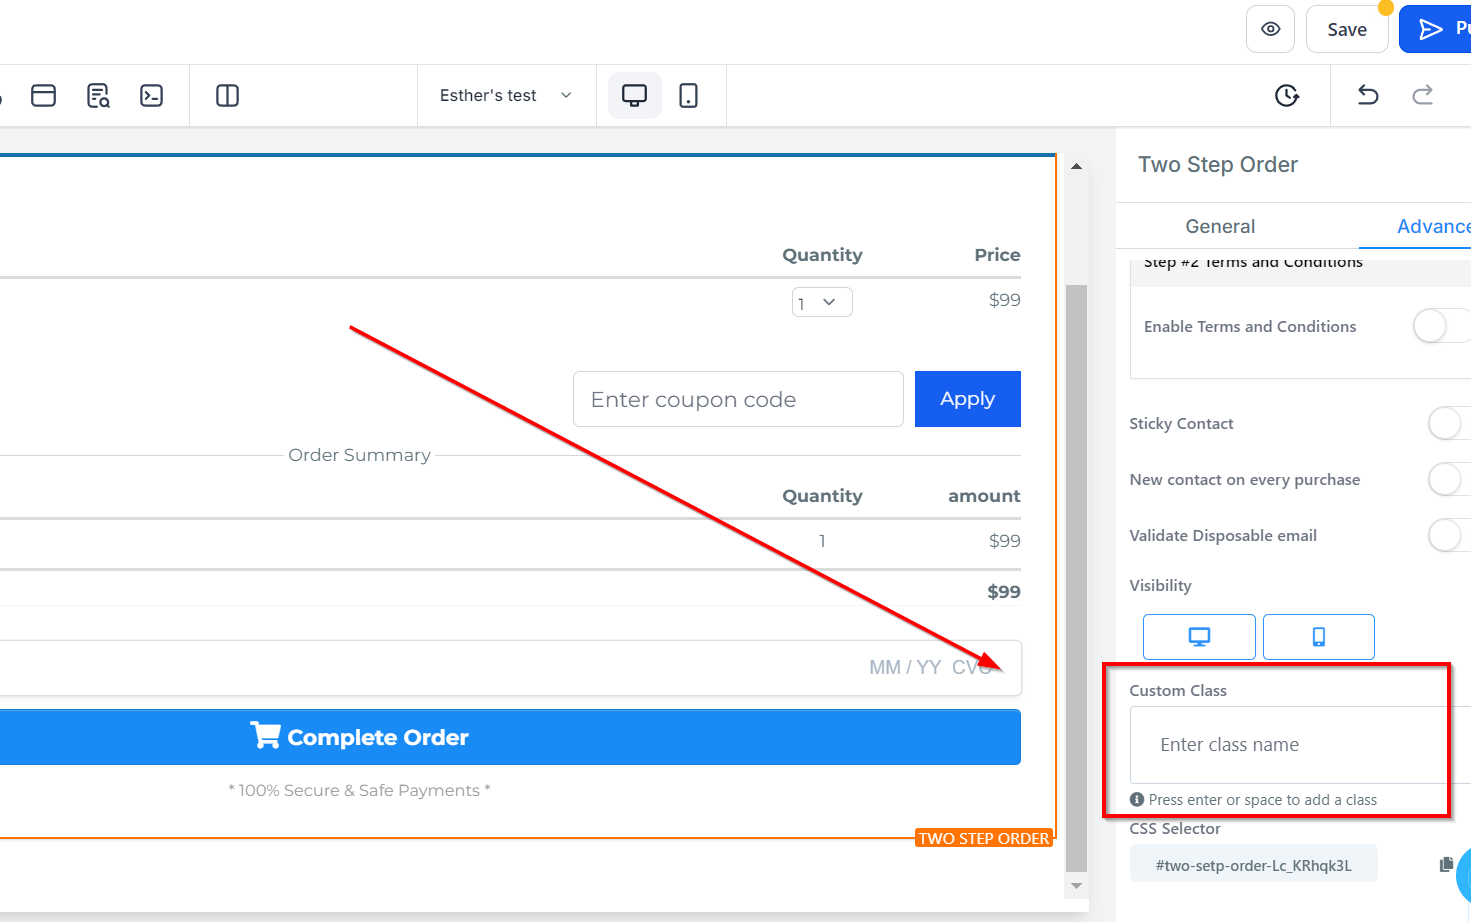
Custom Class
You can input a Custom Class in the given field, giving you even more customization options!

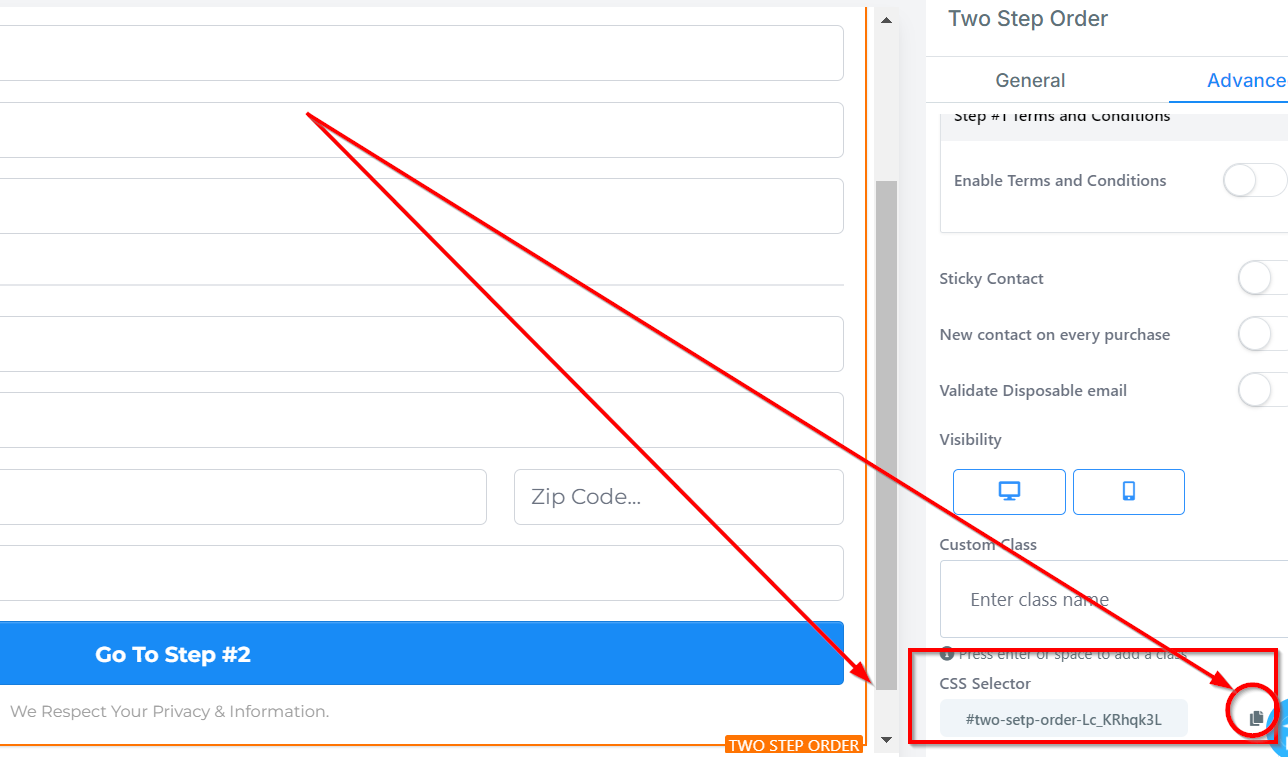
CSS Selector
If you need to copy the Custom CSS, just click on the "Copy" icon on the right side of the reference code.
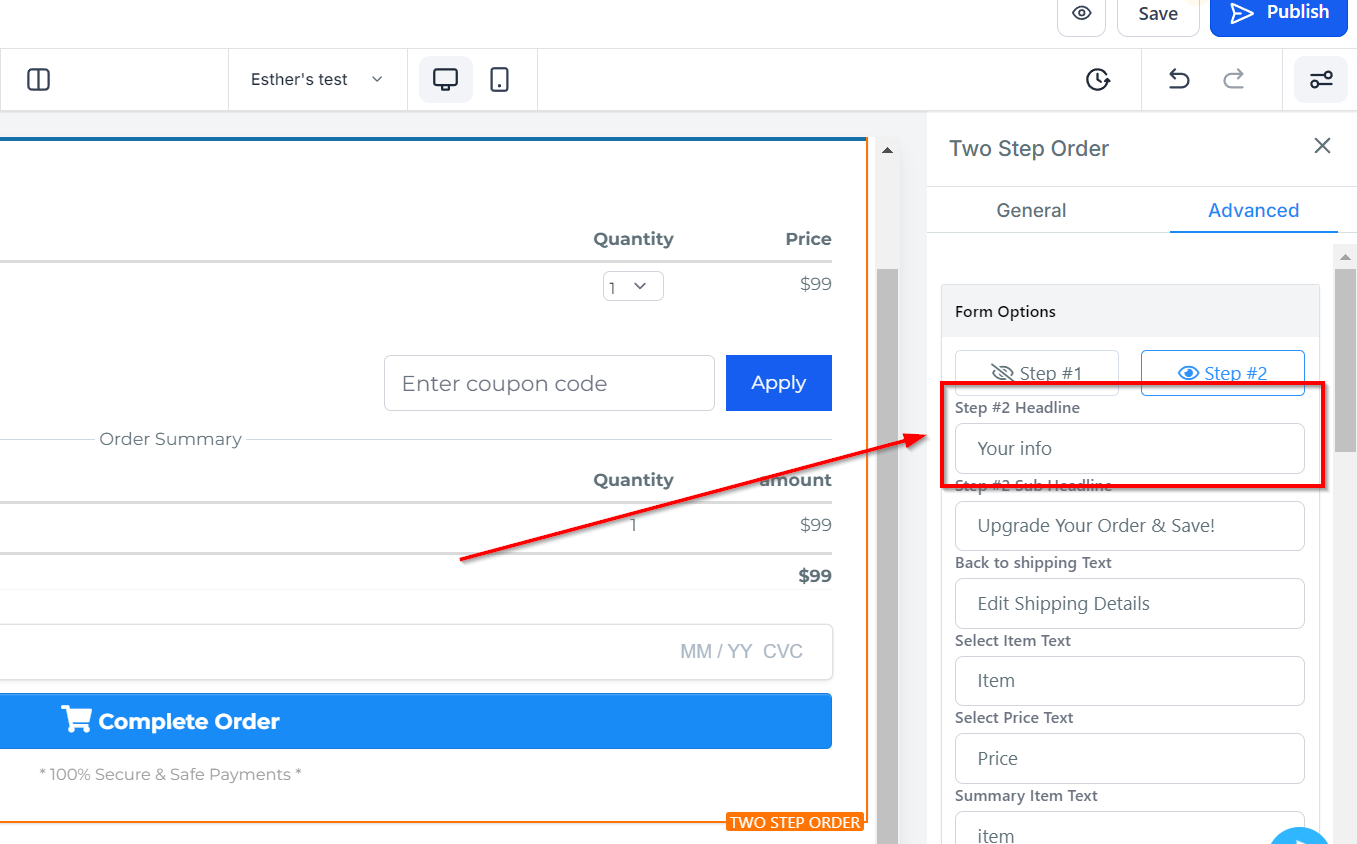
Step 2
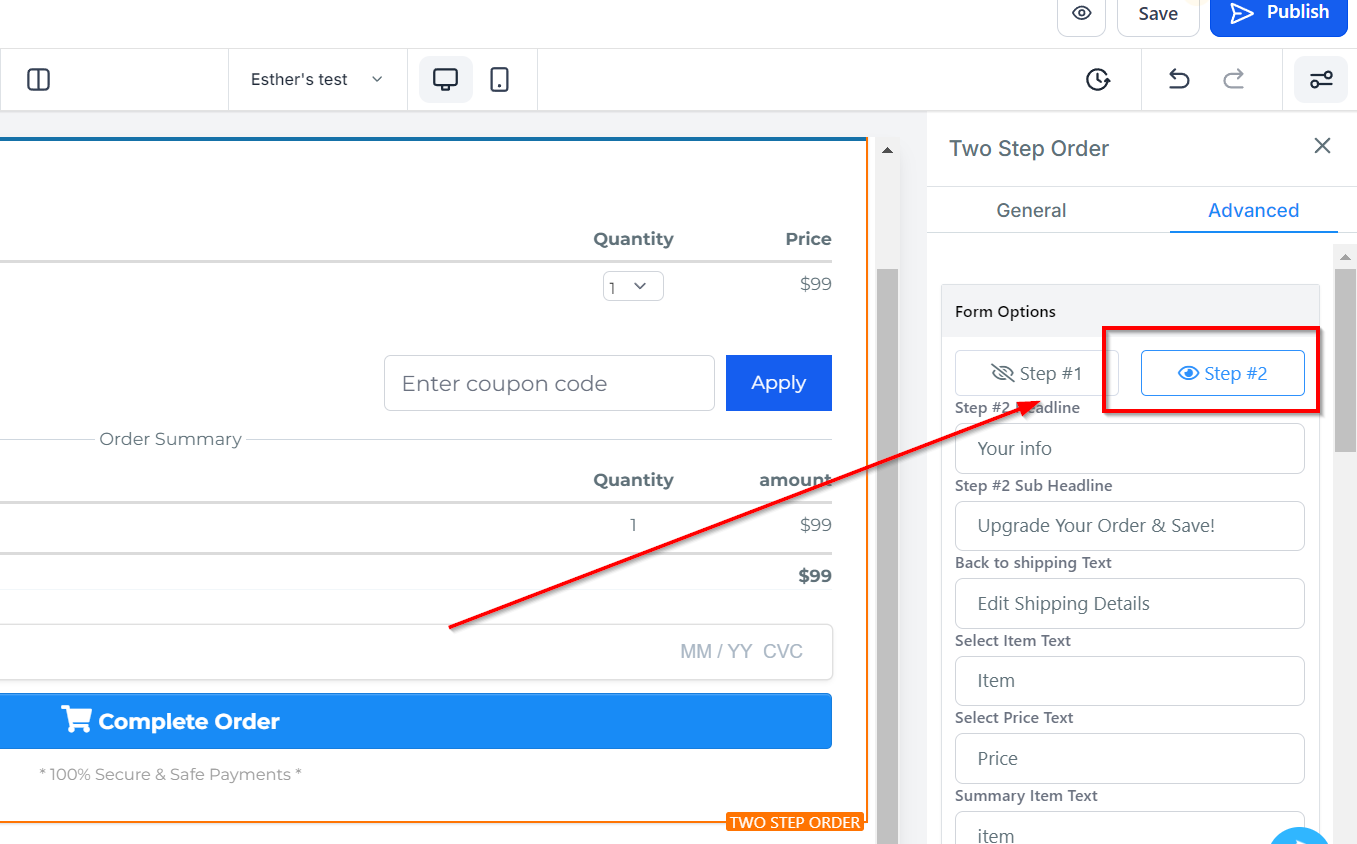
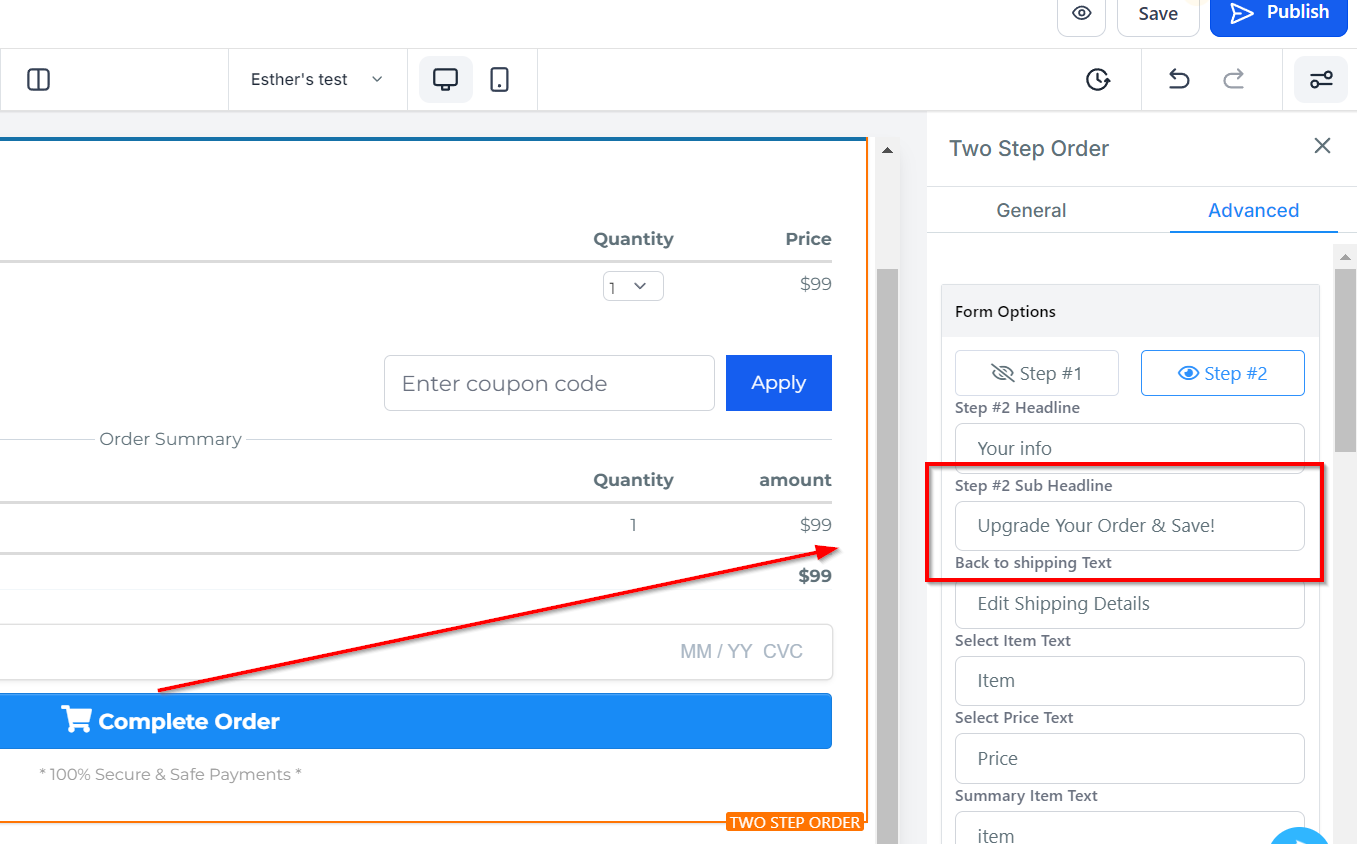
Headline
Here you will see the default headline name and you can decide to leave at that or rename it.
Sub-Headline
Same as the Sub-headline name, you can decide to change it or leave it as it is.
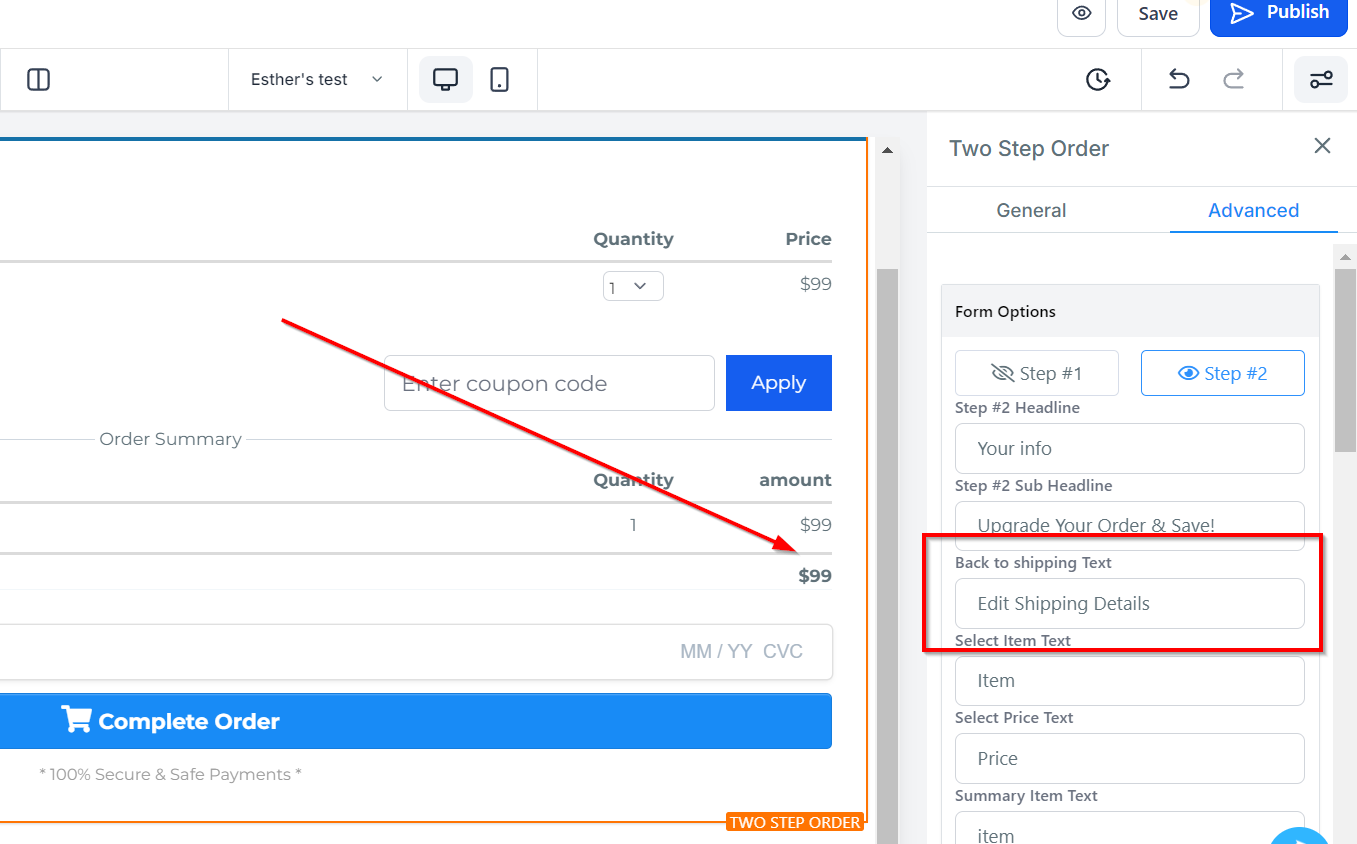
Back To Shipping Text
This is the back menu that allows you to go back to the Step 1#
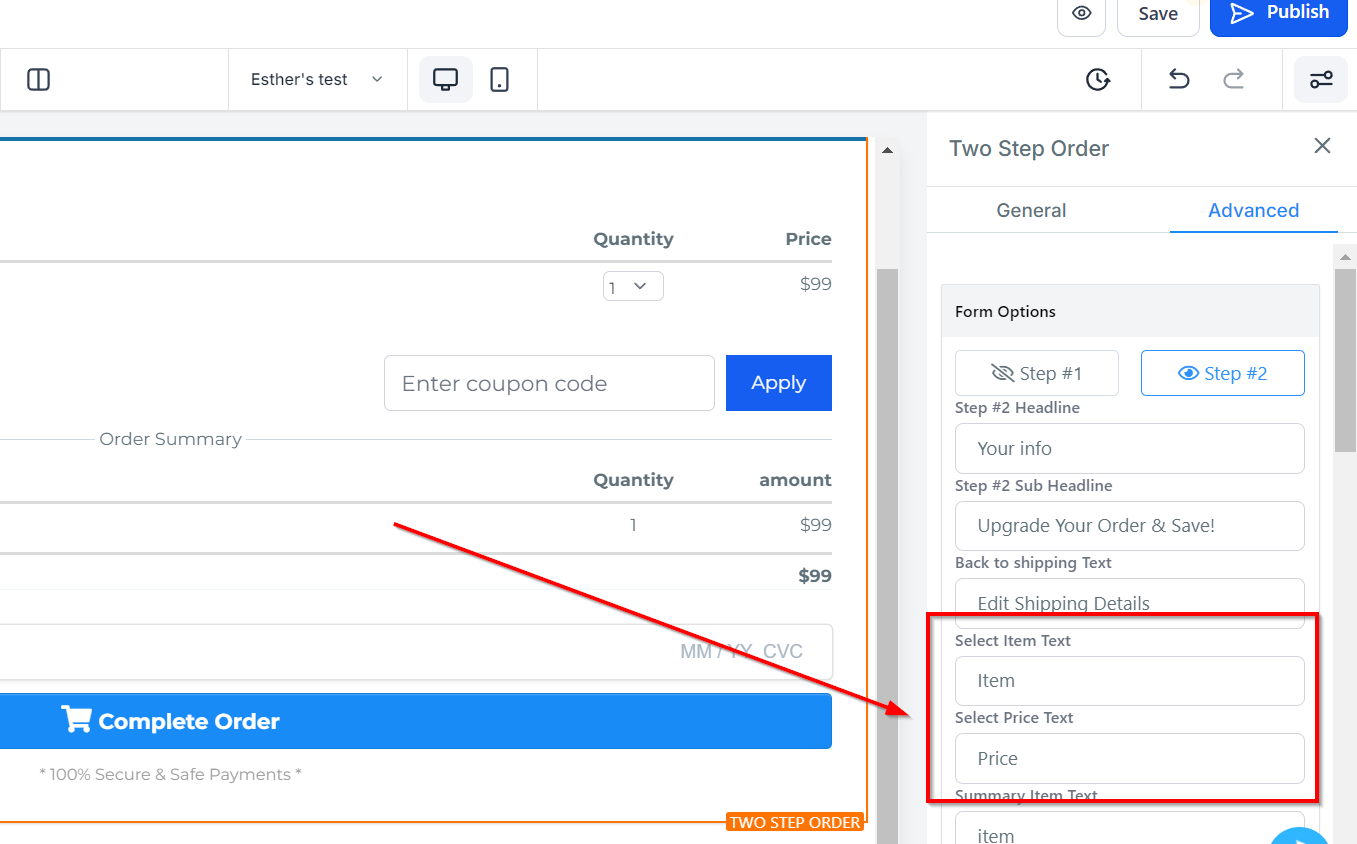
Select Item And Price Text
You can edit the description in the Item and price form field here.
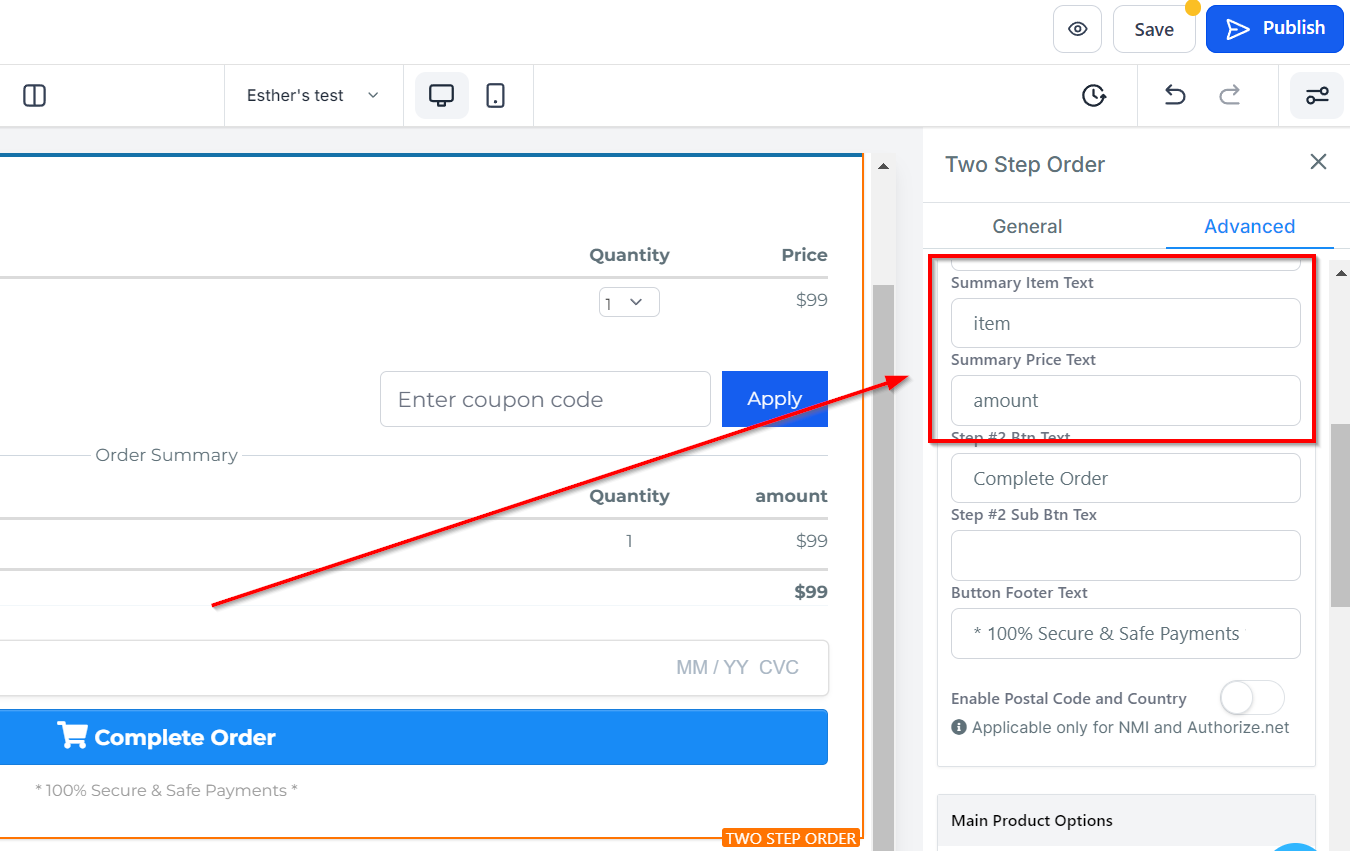
Summary Item and PriceText
You can edit the description in the Order Summary for the Item and price form field here.
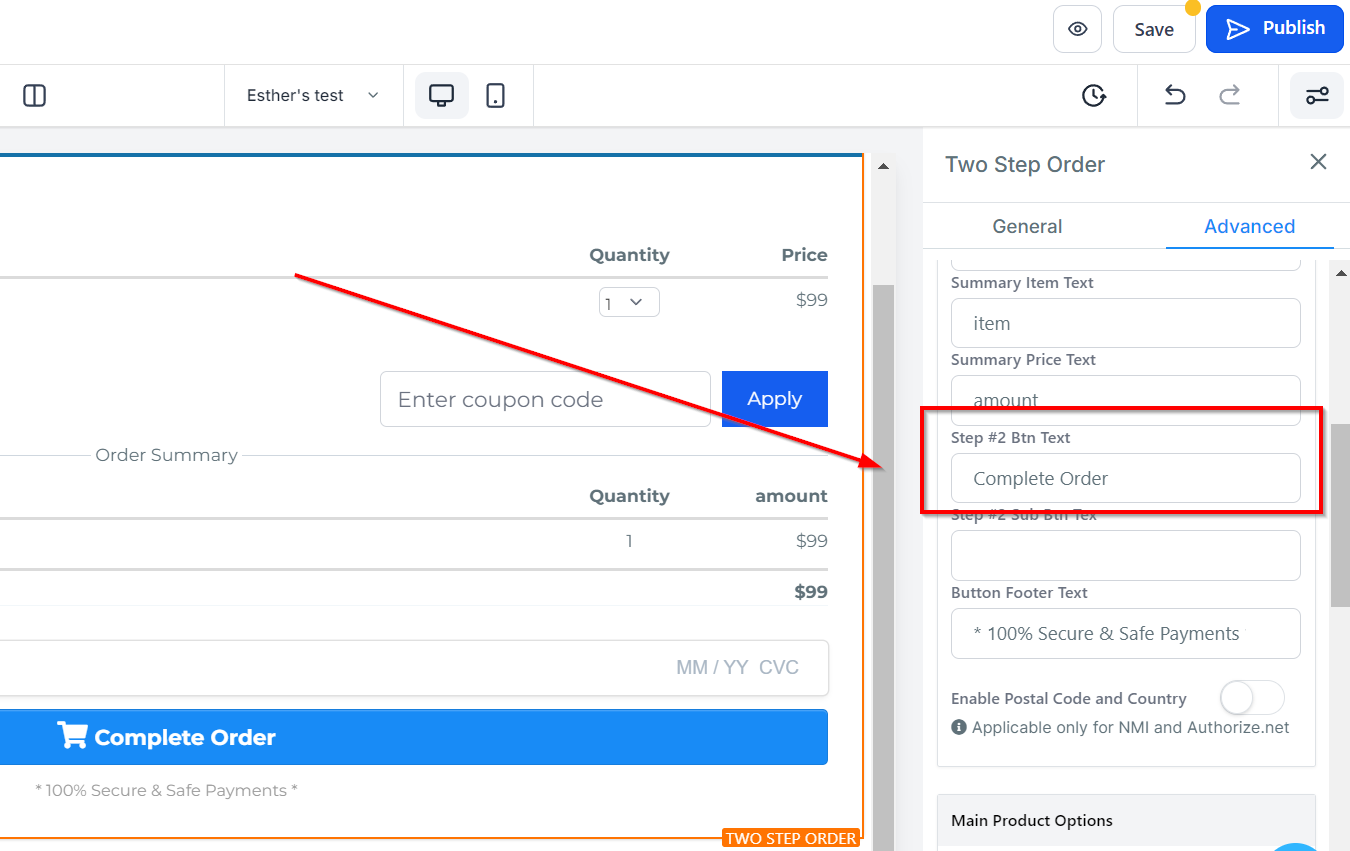
Button Text
This is the button you will click on to move to the next form. you can edit the text.
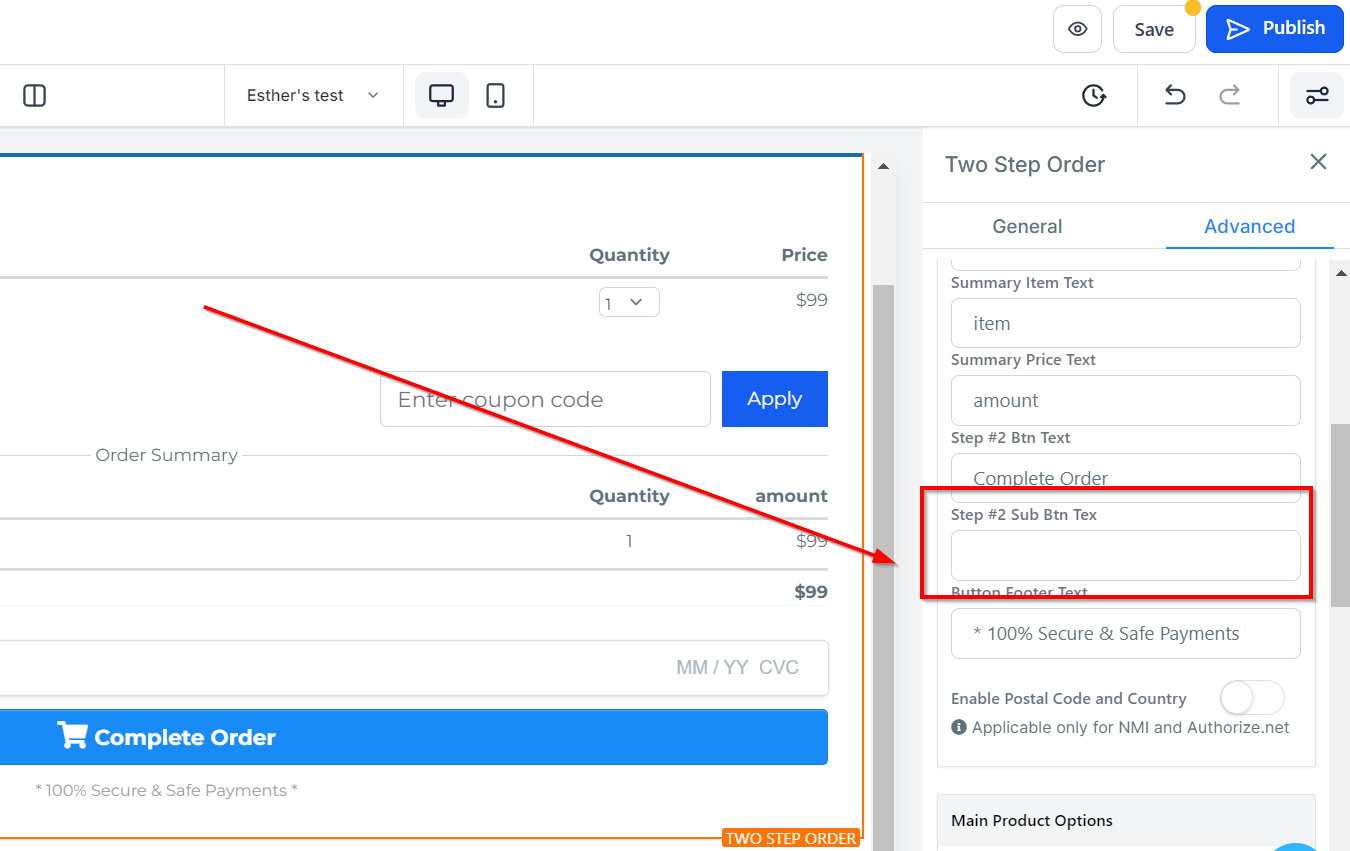
Sub Button Text
You can add a sub-text to the bin by inputting what you would like to name it.
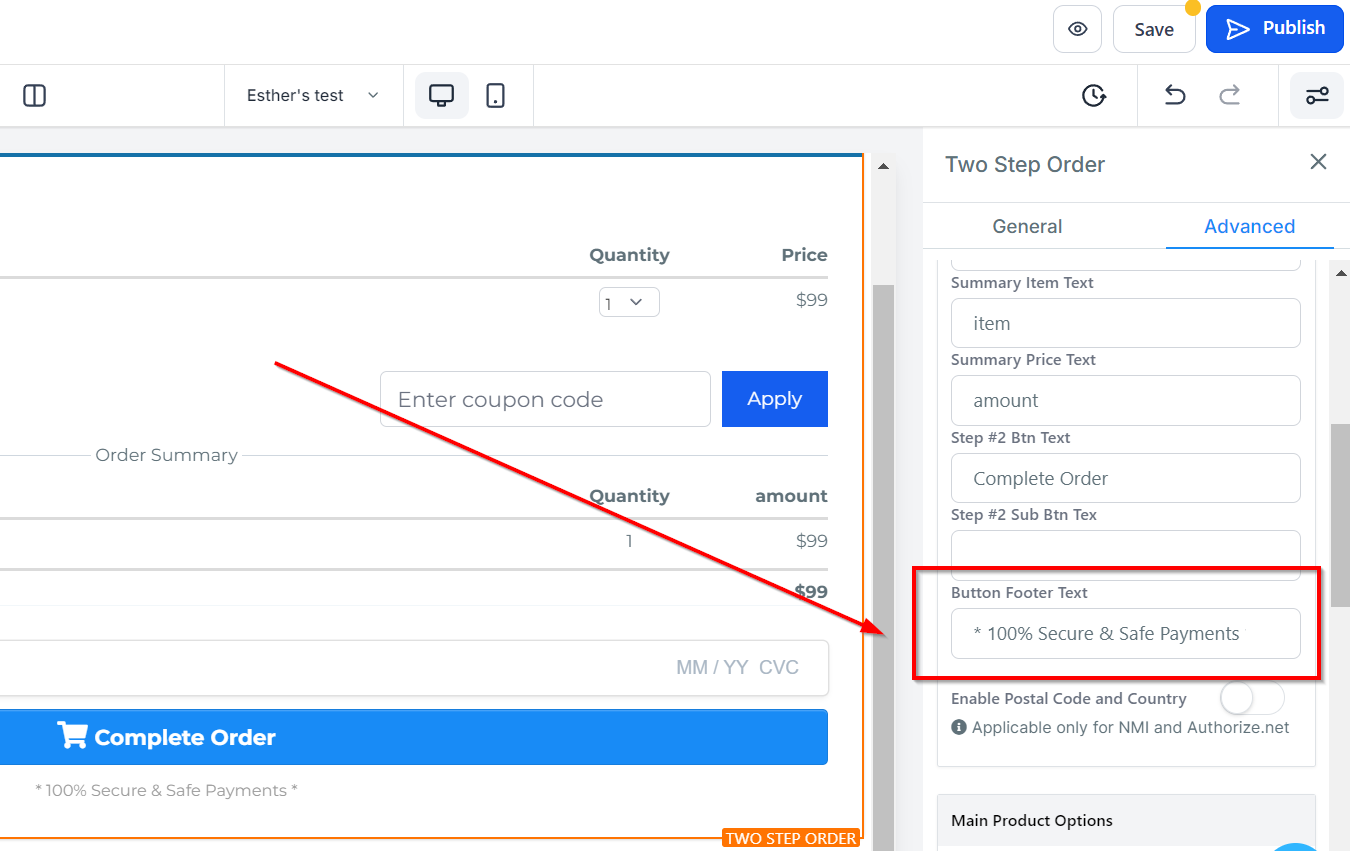
Button Footer Text
Additionally, you can add any other important information that you would like your visitors/clients to be aware of in the Button Footer Text section.
Enable Postal Code
You can enable or disable the postal code here.

Order Bump Options
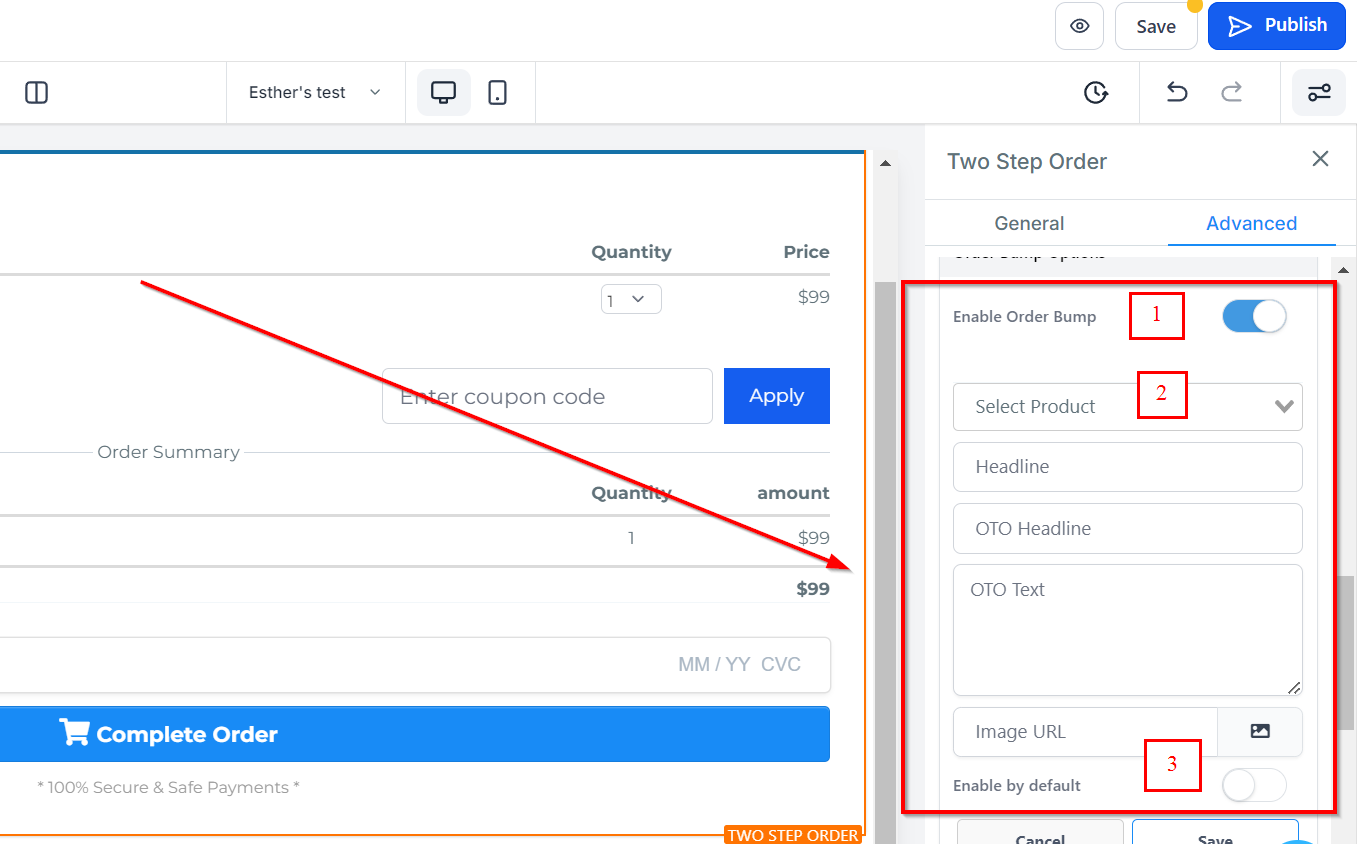
Enable Order bumps
When you toggle on the border bumps, it enables you to order bumps.
Select Product
You can select the product you will like to add here.
Enable by default
"Enable by default" allows you to set the order bumps to turn on by default.
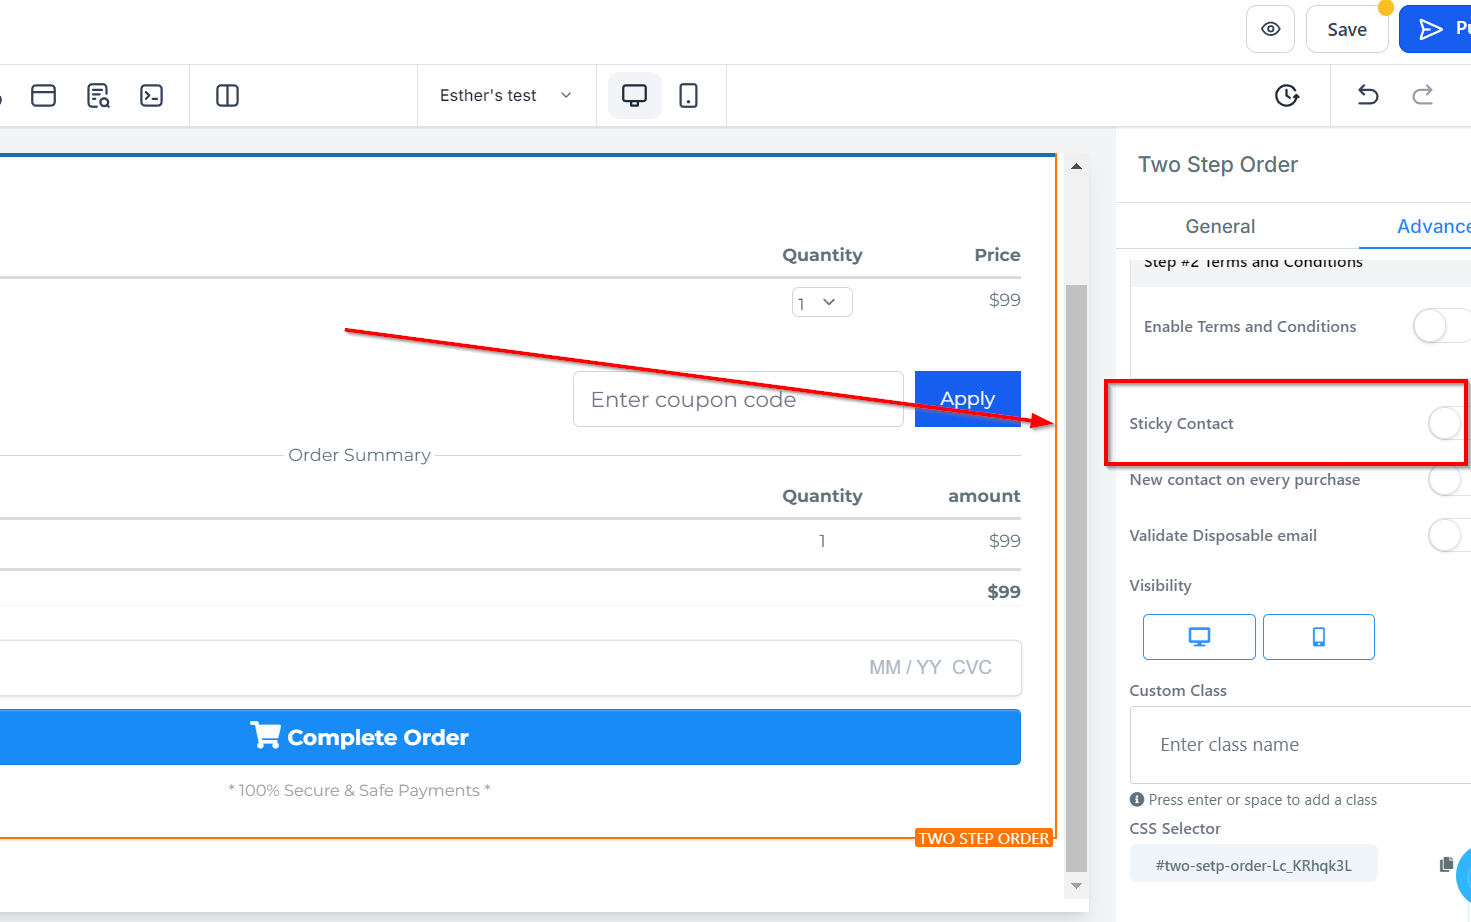
Sticky Contact
Under Sticky Contact, you can toggle on or off to add or remove the sticky contact.
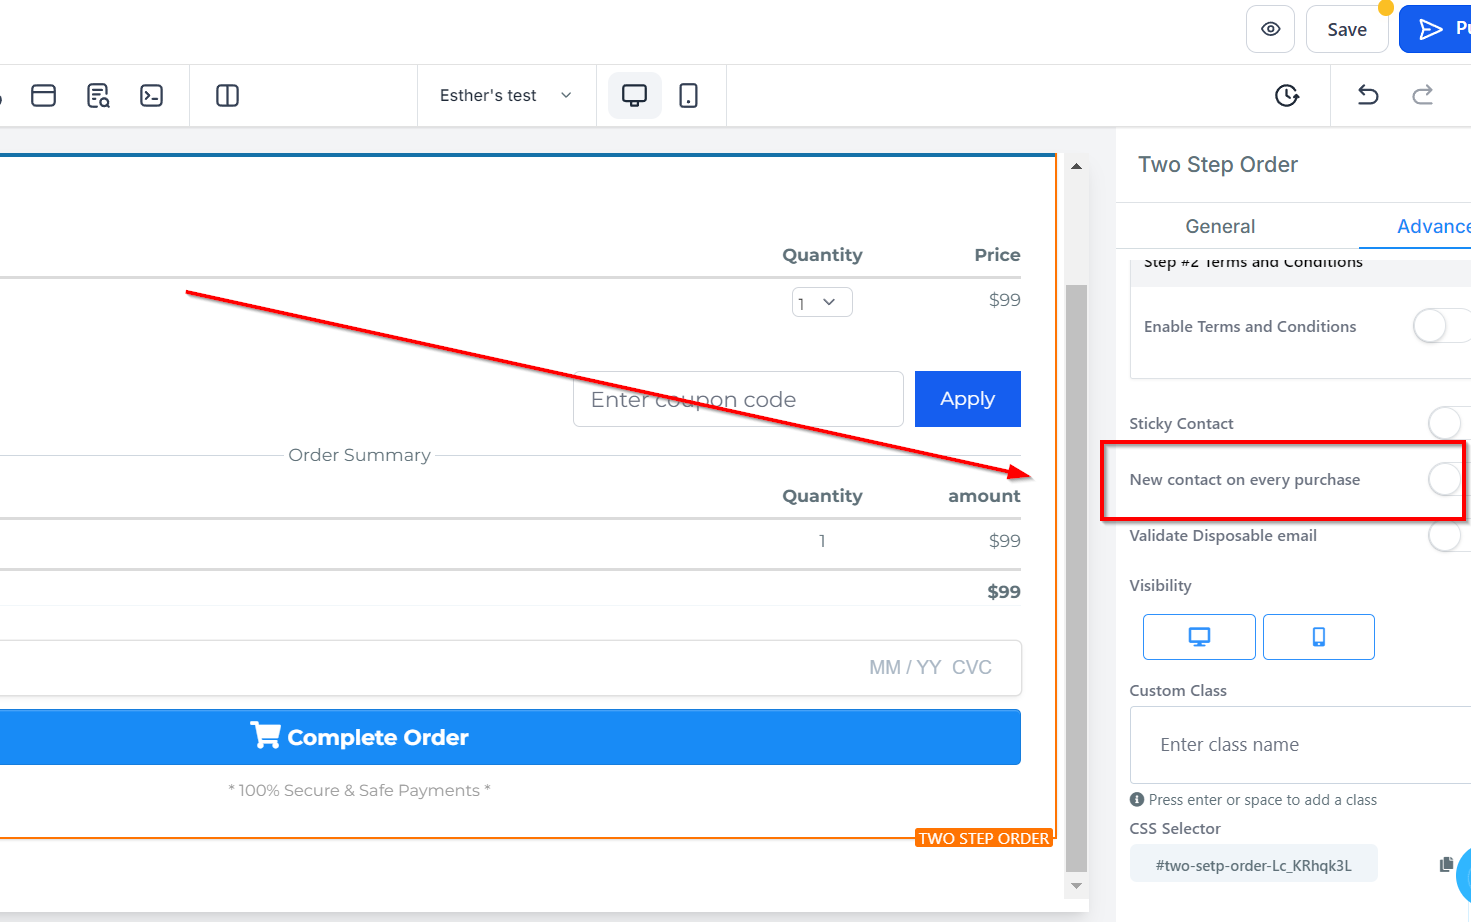
New Contact on Every Purchase
To create a new contact for every purchase, toggle on or off the New Contact on Every Purchase tab.
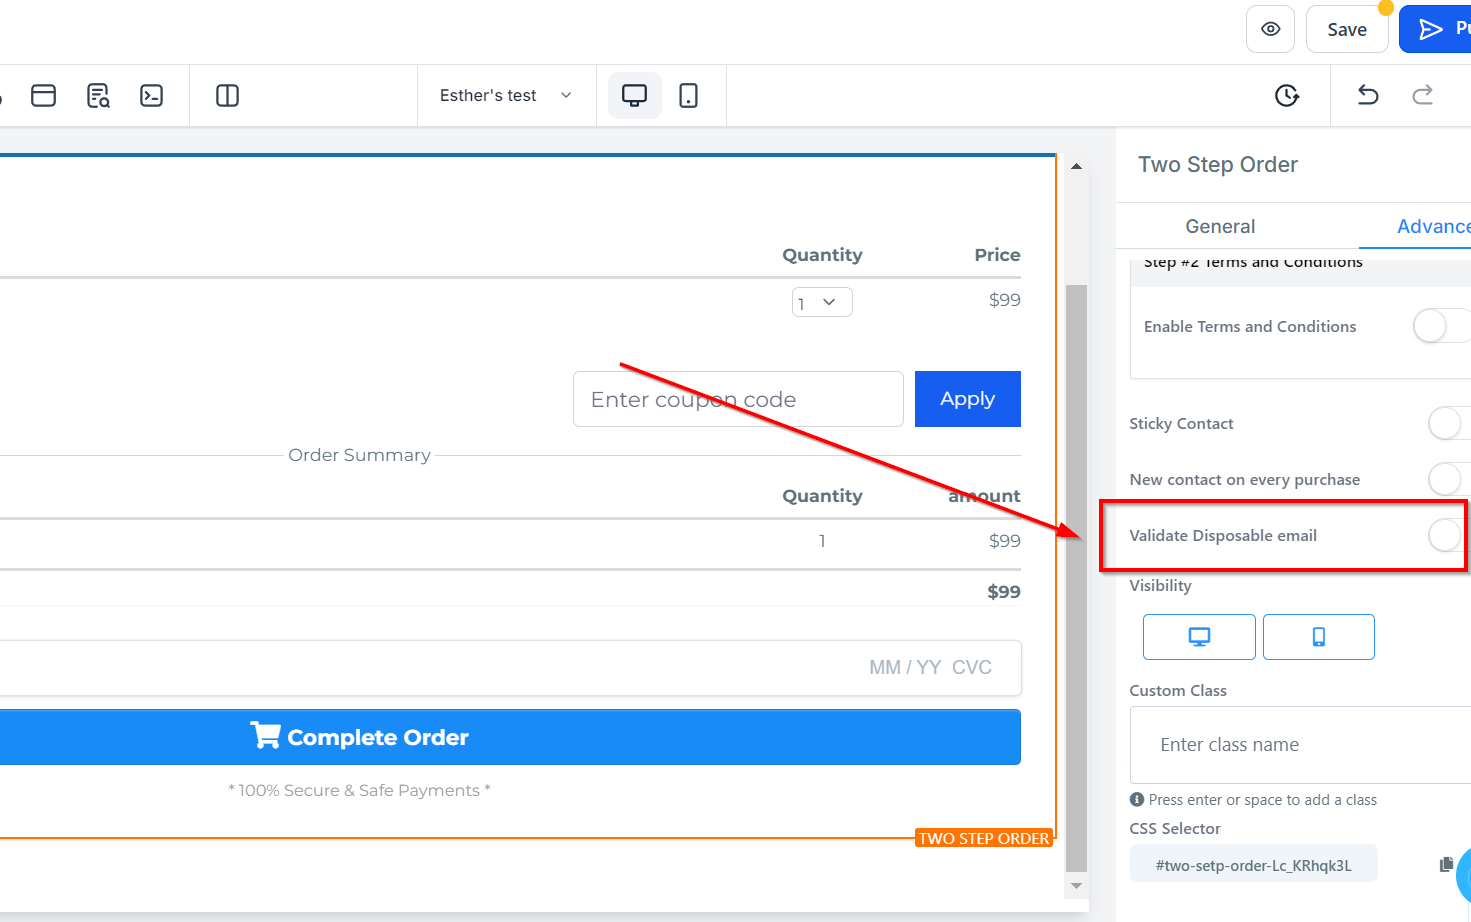
Validate Disposable Email
You can validate any disposable email by toggling this on.
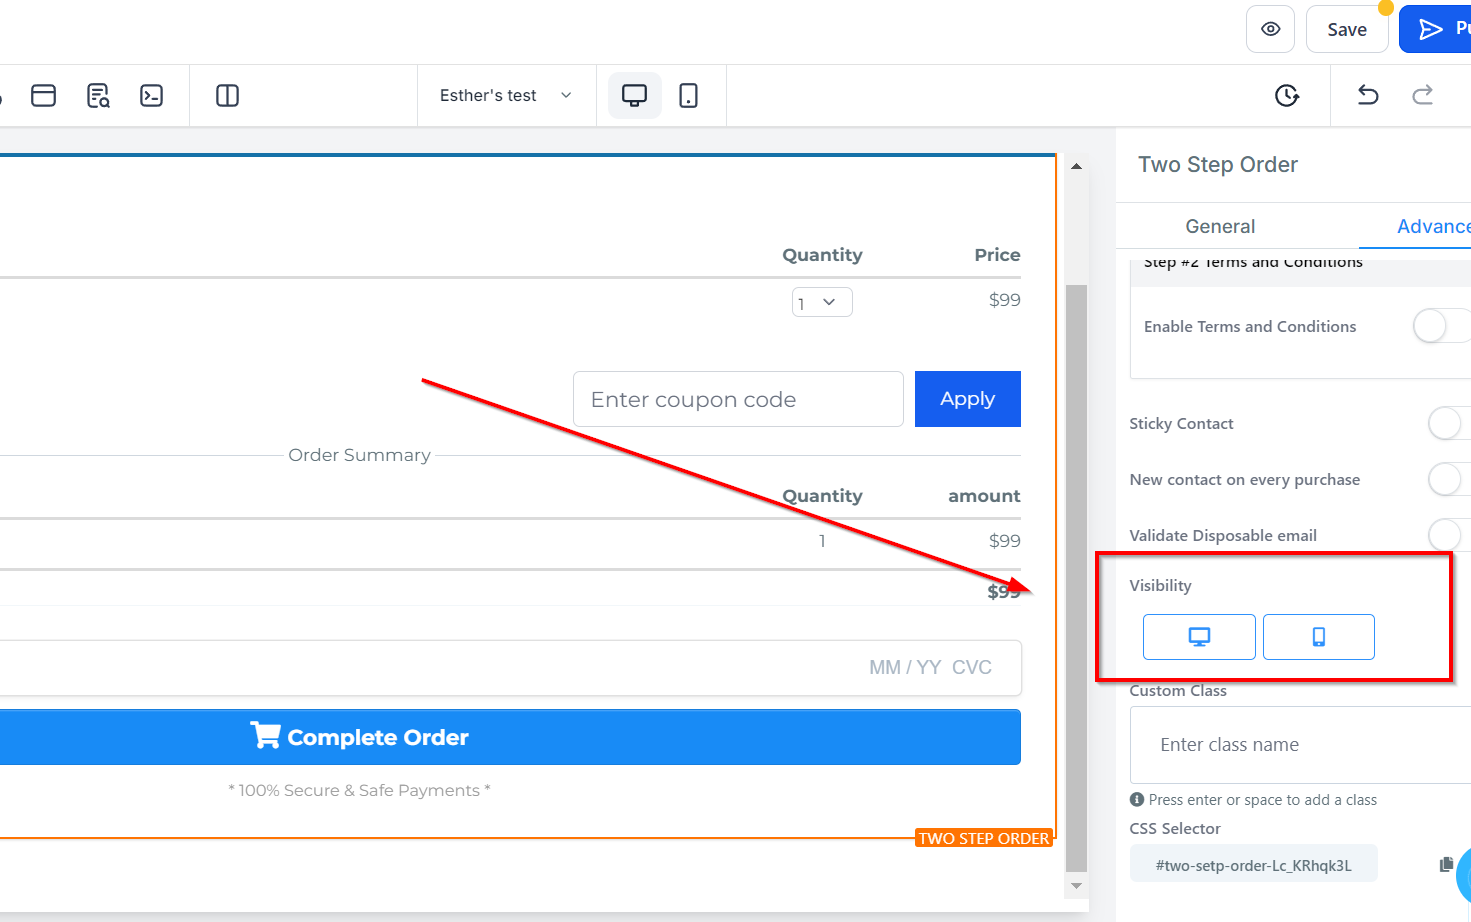
Visibility
You can decide if you want this particular Edit option to be visible on only mobile devices, desktops, or both by clicking on it to highlight the icon.
Custom Class
You can input your Custom Class in the given field, giving you even more customization options.
CSS Selector
If you need to copy the Custom CSS, just click on the "Copy" icon on the right side of the reference code.